

Most people give little thought to their car’s water pump—until something starts to go wrong. Yet, that small chunk of metal and seals stands between your engine and disaster. Lose it, and you risk rapid overheating, engine warping, or the sort of costly breakdowns that make your stomach turn.
Is figuring out whether your pump is on its last legs a tricky business? Not really, if you’re willing to pay attention to detail. This isn’t just some task for seasoned mechanics—any car owner keen on avoiding a tow bill might consider learning these checks. By paying close attention to small changes—a bit of dampness here, a subtle squeal there—you might just catch a problem early and save yourself a major headache.
What follows isn’t a cryptic process, but a series of practical moves you can make with a few tools and a sharp eye, right at home. In this guide on how to test water pump on car we will go through the steps you need to take in order to check your car’s water pump functionality.
Symptoms of a Bad Water Pump
Trouble brewing inside your water pump doesn’t always announce itself in dramatic style. That’s not to say all leaks make a grand entrance. Maybe you spot a suspiciously colored puddle—bright green, perhaps dull orange—under the front of your car. Could be coolant, it could be something else, but it isn’t a good sign either way. Then there’s the sound: an off-pitch whine coming from the engine bay, a noise that tends to grow more insistent as you drive. A slipping belt or failing bearing can both be culprits here, and either one means it’s time for inspection.
Sometimes, the dashboard offers a more direct warning. If your temperature gauge starts flirting with the red, or you glimpse steam streaming from beneath the hood, you have good reason to be concerned—your pump might be struggling to keep coolant moving. While none of this can confirm a failing pump with total certainty, ignoring these signals rarely ends well.
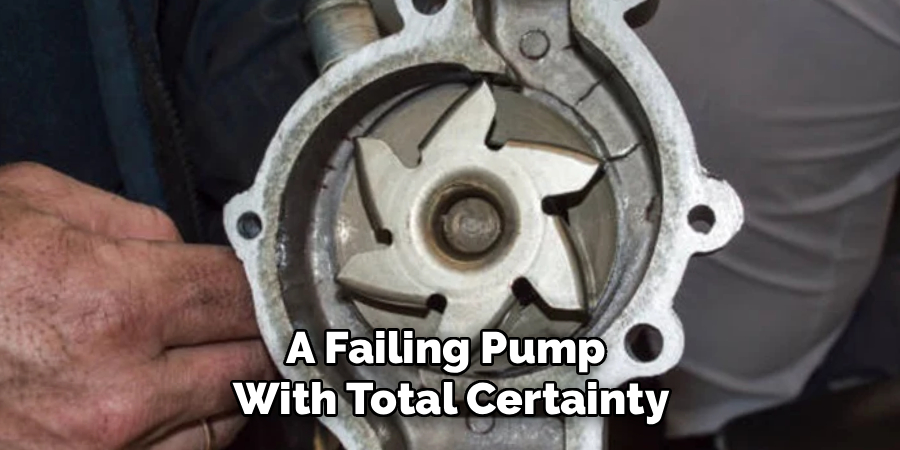
Where Is the Water Pump, Anyway?
It would be convenient if every water pump were front and center, easy to spot and reach. Life isn’t usually that simple in the automotive world. Your pump’s precise location will depend on your vehicle’s make and engine setup—some are fixed to the front of the block, spun by a serpentine or accessory belt, and easy to see.
Others hide behind timing covers, tucked away, harder to spot and much harder to reach. Timing belt-driven pumps are common in many engines, and unfortunately, they’re almost always obliged to lurk out of sight.
Tools and Materials You’ll Need
Before you start the process of changing your water pump, it’s important to gather all the necessary tools and materials. This will help ensure a smooth and efficient replacement process. Here are some items you’ll likely need:
- A wrench set
- Screwdrivers (flathead and Phillips)
- Pliers (long nose and channel lock)
- Socket/ratchet set
- New water pump gasket or sealant
- Coolant/antifreeze
- Jack stands or ramps for elevation if needed
6 Practical Steps on How to Test Water Pump on Car
Step 1: Visual Inspection for Leaks
Start simple: check for evidence of leaking, but only when the engine is cold. Shine your flashlight at the area around the pump. Pay close attention to the weep hole—usually found towards the pump housing’s bottom. It exists as a kind of early warning system, letting out coolant if internal seals wear down.
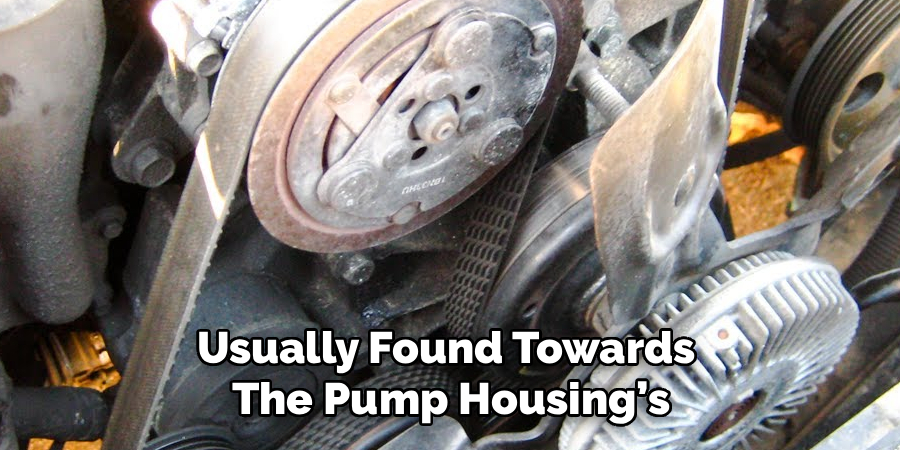
See any dampness, crusty white or rust-colored residue, or odd streaks trailing from the weep hole? Even faint traces may suggest that the seal inside has begun to give way. It’s tempting to overlook a drop or two, but such signs rarely improve on their own. Look over the gasket edges and hose joinings as well; sometimes what seems to be a bad pump turns out to be a leaky hose nearby.
Step 2: Check the Drive Belt and Pulley
With leaks ruled out or confirmed, turn your focus to the pump pulley. And before touching anything—make sure the engine’s off and the keys are stashed away. Place your hands on the pulley and carefully wiggle it. Does it feel solid, or can you feel play, hear clicks, or see it wobble even slightly? All of those can indicate the bearings aren’t what they used to be.
Now, inspect the belt. Maybe it looks fine under a quick glance, but run your finger along its surface: are there cracks, glazed areas, or spots that look overly stretched? It’s amazing how often a tired belt undermines a well-functioning pump, so don’t skip this rather humble check.
Step 3: Listen for Bearing Noise
Often, a failing pump speaks before it shows. Start the engine and let it settle at idle. Pop the hood and listen carefully near the front of the engine. Sometimes it’s a rough, gravelly grinding; other times, a whine that rises with engine speed. If you have a mechanic’s stethoscope on hand, gently press its tip to the metal body of the pump—just steer clear of any moving pulleys or fans.
If the odd noise is sharpest at the pump itself, the verdict is tough to ignore: the bearings are probably on their way out. Replacement isn’t a question of “if” at this stage—just “when.”
Step 4: Test Coolant Circulation in the Radiator
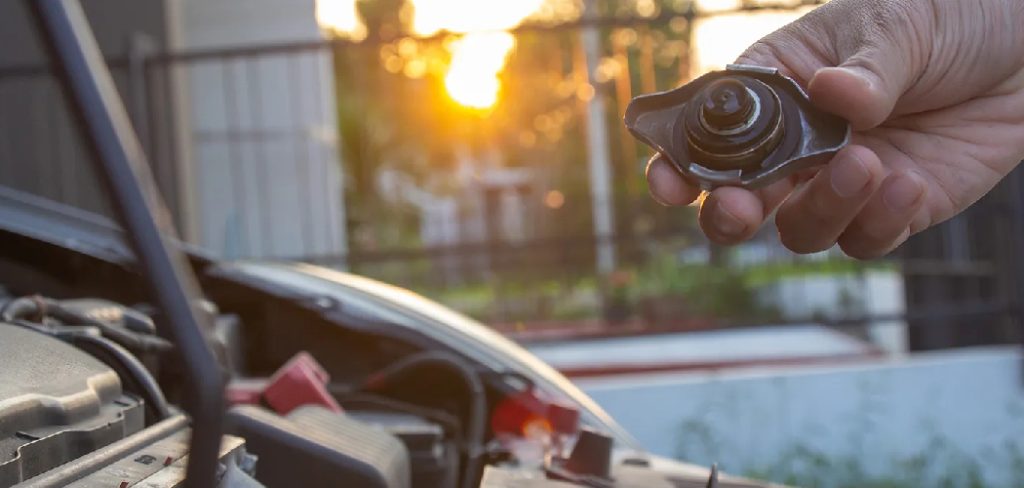
A pump that’s rotating might still fail the simple test of moving coolant. To check, wait until the engine is cold, then gently remove the radiator cap. Start the engine, let it idle until it warms up, and watch the coolant through the fill neck. Once the thermostat opens, you should see a distinct swirling within the radiator.
If, despite the car warming up, the liquid sits lifeless, something’s amiss; your pump may not be circulating coolant. Be careful, though—a stuck thermostat can also cause this “dead water” effect, so check that as well if you’re unsure.

Step 5: Squeeze the Radiator Hose
Some radiators stand in the way of a good look, or perhaps your car has a sealed system. No problem. Wait for the engine to warm up fully. Then, squeeze the upper radiator hose. There should be pressure—and you might feel fluid pulsing through as you compress and release. If the hose feels slack or empty, or you sense nothing moving inside, it casts serious doubt on whether the pump is doing its job.
Step 6: Pressure-Test the Cooling System
For those determined to pin down elusive leaks, a pressure tester is worth its weight. With a cold engine, fit the tester to the radiator neck or the reservoir, and slowly pump it up to match the pressure listed on your cap—commonly around 15 or 16 psi. Watch the gauge. If the pressure quickly drops, look for coolant finding its escape route. In many cases, the added pressure will force a reluctant leak to reveal itself at a gasket, hose, or the telltale weep hole. If so, you may have your culprit.
Following these steps on how to test water pump on car radiator, you can determine if your water pump is functioning properly or needs to be replaced. Regularly testing your water pump and keeping an eye out for any leaks can save you from potential breakdowns on the road and costly repairs.
Safety Reminders
Coolant systems run hot and under surprising pressure—a mix that can spell injury if you’re careless. Never, under any circumstances, remove the radiator or expansion tank cap while the engine is hot. Burns from sudden sprays of pressurized coolant are all too common. Keep clothing, hair, and most importantly, hands, clear of moving parts.
Gloves and goggles aren’t an affectation; they’re insurance. And please, if you drain coolant, collect it and recycle the waste—antifreeze is dangerous to wildlife and pets alike.
Common Mishaps and Missteps
It’s easy to confuse cooling problems. People sometimes replace a perfectly fine water pump, only to find the real issue was a jammed thermostat or a frayed belt slipping out of sight. Another pitfall: adding cold water to an engine that’s desperately overheated.
This can abruptly warp metal parts—a costly mistake. If, after working on the system, you fail to properly remove trapped air, your car might overheat immediately. Take your time, and don’t rush the process.
When Should You Replace the Water Pump?
Some warning signs—like a leaking weep hole, constant bearing noise, or total lack of coolant flow—make the choice for you. Waiting is rarely wise; a failing pump won’t recover, and the longer you postpone, the steeper the potential repair bill.
Many mechanics recommend swapping the pump whenever you replace the timing belt, if your engine uses one. It’s solid advice—the extra effort is often minimal when you’re already “in there.” Otherwise, 60,000 to 100,000 miles is a common interval, but always check your vehicle’s manual for the final word.
The Numbers: Testing Costs vs Replacement Costs
Testing a water pump yourself is (financially, at least) refreshingly low-cost, assuming you have the necessary tools on hand. If you need to buy a pressure tester kit, most land in the $50–$100 range. A professional diagnostic at a shop often comes to $100–$150—not outlandish, but sometimes avoidable.
Replacing the pump, however, swings dramatically depending on the engine layout. Parts and labor combined can range anywhere from $300 to as much as $800, especially if the pump’s tucked in a particularly unfriendly spot.
Preventive Maintenance Tips
- Replace your coolant at the intervals set by your car’s manufacturer—or sooner, if things seem off.
- Inspect belts routinely; early wear, slack, or frayed edges often spell later trouble.
- Keep your radiator’s exterior clear of debris; airflow is everything to efficient cooling.
- Always use the specified antifreeze and distilled water mix—minor shortcuts here lead to corrosion and deposits that slow everything down.
Frequently Asked Questions
Q1: How Long Does A Water Pump Last?
In a perfect world, most water pumps are built to endure 60,000 to 100,000 miles. Realistically, lifespan hinges on regular coolant changes, using the correct fluids, and keeping accessory belts in good condition. Skipping even minor maintenance may dramatically cut that lifespan short.
Q2: Can You Drive With A Bad Water Pump?
You can, technically, but driving just a short distance on a failing pump often leads to overheating faster than you’d like. Head gaskets, cylinder heads, or even the entire engine block can be at risk. If the pump gives out while you’re behind the wheel, the safest course is to pull over and call for a tow, rather than risk catastrophic engine damage.
Q3: What Does A Failing Water Pump Sound Like?
Bearings starting to go inside a pump often produce a noticeable sound—anything from a high-pitched whine to a gravelly rumble. The pitch and volume tend to rise with engine speed. If the noise is persistent and tracks to the pump, test it (and the related pulleys) without delay. Mechanical breakdown rarely offers much warning.
Conclusion
Learning to spot water pump issues before they escalate leaves you less at the mercy of chance—and of your local tow service. A little vigilance—a squeeze of a hose, a glance for telltale leaks, pausing to listen for suspicious noises—can save piles of money and inconvenience. Safety always comes first; mistakes around hot engines and rapidly spinning parts deliver more than lessons.
If you’re convinced the pump’s on its last legs, don’t wait. Take care of it, and your car, in return, will be much more likely to return the favor on the open road. Thanks for reading this guide on how to test water pump on car.

About
Ora Hayes is a distinguished figure in the world of DIY Thecarfixes, with over a decade of expertise in automotive diagnostics and high-performance maintenance. Her professional focus lies in merging mechanical precision with modern digital tools, fostering repair solutions that are both cost-effective and highly reliable. As the author of Thecarfixes, Ora Hayes delves into the art and science of automotive restoration, inspiring car owners and hobbyist mechanics alike.
Education
RMIT University (Melbourne, Australia) Associate Degree in Automotive Engineering — Focus on vehicle dynamics, industry-driven repair protocols, and advanced diagnostics. Gained hands-on experience with traditional mechanical tools and modern ECU remapping software.
Nottingham Trent University (United Kingdom) Bachelor’s in Mechanical Design and Automotive Engineering (Honors) — Specialized in automotive systems with a focus on blending technical engineering with everyday usability. Participated in industry projects, working with leading automotive manufacturers to gain real-world insights into vehicle longevity.
Publications and Impact
In Thecarfixes, Ora Hayes shares her insights on troubleshooting complex engine issues, material durability, and strategies for efficient garage setups. Her writing bridges the gap between professional mechanic knowledge and the home enthusiast’s needs, making it a must-read for both everyday drivers and seasoned gearheads.




