

A sharp, high-pitched squeal coming from your engine bay can make any drive unpleasant. That squeaking sound usually points directly to an issue with your vehicle’s serpentine belt or drive belt. The belt connects your engine’s crankshaft to vital accessories like the alternator, power steering pump, water pump, and air conditioning compressor.
When it slips, glazes over, or loses tension, it cries out for attention. Fixing a squeaking belt restores peace to your commute and protects your engine from sudden part failure.

Understanding how to stop a belt from squeaking gives you control over your vehicle’s maintenance.
What Will You Need?
Before you start working under the hood, gather the right tools. Having everything within reach makes the process smooth and safe. You will need:
- Safety gear
- Lighting
- Wrenches and sockets
- Cleaning supplies
- Replacement parts
- Spray bottle
10 Easy Steps on How to Stop a Belt from Squeaking
Step 1: Identify the Source of the Squeak
Before you unbolt anything, you must confirm which belt makes the noise and why it happens. Open the hood while the engine runs and listen carefully to the front of the engine block. Keep your hands, loose clothing, and hair far away from moving parts. Pay attention to when the squeak happens.
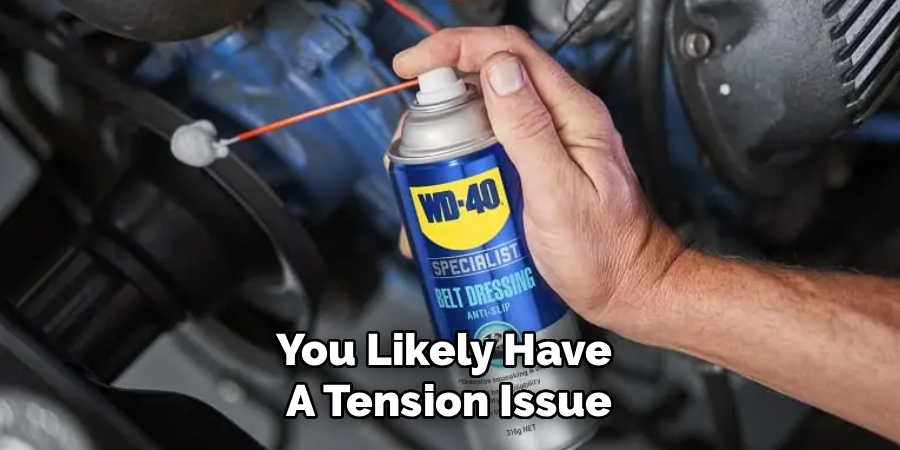
Does it squeal loudest when you first start the car? Does it happen when you turn the steering wheel sharply? Or does it squeal when you turn on the air conditioning? Identifying the trigger helps you figure out which accessory or section of the belt struggles the most. Use a simple water test to diagnose the issue. Carefully spray a mist of clean water on the ribbed side of the belt while it runs. If the noise stops for a few seconds and returns, you likely have a tension issue. If the noise gets louder, you probably have a severe pulley alignment problem.
Step 2: Inspect the Belt for Wear and Damage
Turn the engine off and remove the keys from the ignition. You can now safely inspect the physical condition of the belt. Look closely at the ribbed side of the belt, which makes contact with the grooved pulleys. You want to look for cracks, missing chunks of rubber, or frayed edges.
A few tiny cracks might be normal on older neoprene belts, but modern EPDM belts should not show cracks at all. Instead, EPDM belts wear out like tire tread. Run your fingers along the belt. If the ribs feel shallow or the belt looks shiny and glazed, it has lost its gripping power. A glazed belt slips over the pulleys instead of grabbing them, which creates that terrible squealing noise. If you spot significant wear, deep cracks, or a shiny surface, you must replace the belt entirely. No amount of adjustment will fix a worn-out belt.
Step 3: Check the Belt Tension
Improper tension ranks as the leading cause of a squeaking belt. A loose belt cannot grip the pulleys tightly enough to spin the heavy accessories. You can check the tension manually using the thumb test or the twist test. Press down firmly on the longest span of the belt between two pulleys. It should only yield about half an inch. Alternatively, grab the belt on its longest run and try to twist it. You should only be able to twist it about 90 degrees.

If you can twist it further, the belt is too loose. Most modern vehicles use an automatic spring-loaded tensioner to keep the belt tight. Over time, the internal spring loses its strength. If your belt feels loose on a car with an automatic tensioner, the tensioner assembly likely needs replacement. For older cars with manual tensioners, you will need to adjust the alternator or power steering pump bracket to pull the belt tight.
Step 4: Examine the Pulleys for Alignment
Even a brand-new, perfectly tensioned belt will squeak if the pulleys do not line up perfectly. Misalignment forces the belt to ride up against the raised edges of the pulleys. Look down the path of the belt from above. All the pulleys should sit perfectly parallel to one another. Look for any pulley that leans forward or backward. Sometimes, a failing bearing inside an accessory like the water pump or alternator will cause its pulley to wobble.
You can check for a wobbly pulley with the engine off. Grab each pulley firmly and try to wiggle it back and forth. It should feel solid. If you feel any play or hear a clicking noise, the bearing has failed. You will need to replace that specific accessory or its pulley before putting a new belt on, the squeak will return almost immediately.
Step 5: Clean the Belt and Pulleys
Dirt, oil, coolant, or power steering fluid can easily contaminate your belt. When fluids drip onto the rubber, they create a slippery surface that causes endless squeaking. If your belt looks relatively new but still slips, it might just need a good cleaning. Remove the belt from the engine to clean it properly. Wash the belt in a bucket of warm water and mild dish soap. Scrub it gently with a soft brush to remove built-up grime, then let it dry completely.
While the belt dries, turn your attention to the metal pulleys. Use a wire brush and a rag to clean out the grooves of every ribbed pulley. Old rubber dust and dirt often cake themselves into these grooves, pushing the belt outward and reducing grip. Clean pulleys ensure the belt makes full contact, transferring power efficiently without making any noise.
Step 6: Avoid Using Belt Dressing
Many auto parts stores sell aerosol cans of “belt dressing” or “belt conditioner,” claiming it stops squeaks instantly. You should treat this step as a caution rather than a solution. Applying belt dressing might silence a squeak for a day or two, but it causes more harm than good in the long run. Belt dressing acts like a sticky syrup. It masks the underlying mechanical problem—like bad tension or worn rubber—without actually fixing it.
Worse, that sticky residue attracts dirt, dust, and road grime. Over time, this debris builds up inside the grooves of your pulleys, causing the belt to slip even more. Modern serpentine belts made from EPDM rubber do not require any chemical conditioners. If your belt makes noise, you need to fix the tension, clean the pulleys, or replace the belt. Skip the chemical sprays entirely to protect your engine components.
Step 7: Locate and Release the Tensioner Pulley
If you have determined that the belt requires replacement or you need to swap out a weak tensioner, you must release the tension on the system. First, locate the belt routing diagram. You can usually find this sticker under the hood on the radiator support or in your vehicle’s owner’s manual.
You absolutely need this diagram to route the new belt correctly later. Next, find the automatic tensioner pulley. It usually sits near the center or bottom of the engine block and features a square hole for a 3/8-inch drive ratchet or a hex bolt in the center. Insert your breaker bar, serpentine belt tool, or socket wrench into the tensioner. Apply steady pressure in the direction that moves the tensioner away from the belt. You will feel the heavy spring resistance. Once you rotate the tensioner far enough, the belt will go completely slack.
Step 8: Remove the Old Belt
With the tensioner held securely in the open position, use your free hand to slip the loose belt off the easiest-to-reach smooth pulley. Usually, the idler pulley or the water pump pulley works best for this. Once you slide the belt off that first pulley, carefully release the pressure on your breaker bar and let the tensioner return to its resting position.
Do not let the tensioner snap back suddenly, as this can damage the internal spring or crack the aluminum housing. Now, untangle the old belt from the remaining accessories and pull it entirely out of the engine bay. Lay the old belt next to your new one to compare their lengths. The old belt might have stretched slightly, but they should look very similar in size and width. If the new belt looks drastically shorter or longer, stop immediately and get the correct part.
Step 9: Install the New Belt Correctly
Take your new belt and begin feeding it down the front of the engine. Follow your belt routing diagram exactly. Wrap the belt around the bottom crankshaft pulley first, then route it around the remaining accessories like the alternator, power steering pump, and air conditioning compressor. Leave the easiest smooth pulley for last.
Double-check that the ribbed side of the belt sits perfectly inside the grooves of the ribbed pulleys, and the smooth side of the belt touches the smooth pulleys. Once you have the belt routed correctly, grab your breaker bar and rotate the tensioner again. Slide the final loop of the belt over the last smooth pulley. Carefully release the tensioner so it applies pressure to the new belt. Inspect every pulley one last time. If the belt sits off-center on any groove, it will shred itself the moment you start the engine.
Step 10: Perform a Final Test Run
Clear all tools, rags, and equipment away from the engine bay. Start the engine and listen closely. The engine should idle quietly without any high-pitched squealing or chirping noises. Watch the belt as it moves across the pulleys. It should run smoothly without wobbling, jumping, or vibrating excessively.
Turn on your vehicle’s accessories to put a load on the belt system. Crank the air conditioning to maximum cold, turn on the headlights, and rotate the steering wheel from lock to lock. These actions force the alternator, AC compressor, and power steering pump to work hard, which tests the grip of your new belt. If you hear no squeaking under this heavy load, you have successfully fixed the problem. Close the hood, wash your hands, and enjoy driving your quiet, reliable vehicle once again.

Conclusion
A squeaking belt disrupts your drive and warns you of looming mechanical trouble. By taking the time to track down the source of the noise, you protect your engine from sudden part failure.
Checking the tension, inspecting the rubber for wear, and cleaning the pulleys often solves the problem without much hassle. When the time comes for a replacement, routing a new belt correctly ensures your alternator, water pump, and air conditioning compressor function perfectly. Keep up with your vehicle’s maintenance intervals, avoid chemical fixes, and rely on proper tension and clean parts.
Hopefully, you have found this guide on how to stop a belt from squeaking helpful in understanding the importance of serpentine belts and how to properly maintain them.

About
Ora Hayes is a distinguished figure in the world of DIY Thecarfixes, with over a decade of expertise in automotive diagnostics and high-performance maintenance. Her professional focus lies in merging mechanical precision with modern digital tools, fostering repair solutions that are both cost-effective and highly reliable. As the author of Thecarfixes, Ora Hayes delves into the art and science of automotive restoration, inspiring car owners and hobbyist mechanics alike.
Education
RMIT University (Melbourne, Australia) Associate Degree in Automotive Engineering — Focus on vehicle dynamics, industry-driven repair protocols, and advanced diagnostics. Gained hands-on experience with traditional mechanical tools and modern ECU remapping software.
Nottingham Trent University (United Kingdom) Bachelor’s in Mechanical Design and Automotive Engineering (Honors) — Specialized in automotive systems with a focus on blending technical engineering with everyday usability. Participated in industry projects, working with leading automotive manufacturers to gain real-world insights into vehicle longevity.
Publications and Impact
In Thecarfixes, Ora Hayes shares her insights on troubleshooting complex engine issues, material durability, and strategies for efficient garage setups. Her writing bridges the gap between professional mechanic knowledge and the home enthusiast’s needs, making it a must-read for both everyday drivers and seasoned gearheads.




