

Dim headlights, uneven beams, or lights that point too high can make night driving stressful and unsafe. Learning how to set car headlights helps you see the road better while avoiding glare that can bother other drivers. The process is easier than many beginners expect, and you can do a basic alignment at home with a flat parking spot, a wall or garage door, tape, and a measuring tape.
This guide explains why headlight aim matters, what tools you need, and how to adjust your lights step by step. You will learn how to check your setup, mark the correct beam height, adjust the vertical and horizontal aim, and confirm your work with a safe road test.
Why Proper Headlight Alignment Matters
Proper headlight alignment affects both safety and comfort. If your headlights point too low, you may not see far enough ahead to react to potholes, animals, curves, or stopped traffic. If they point too high, they can shine into the eyes of oncoming drivers and create dangerous glare.
Headlights can move out of alignment after replacing bulbs, repairing the front end, changing suspension parts, hauling heavy loads, or hitting bumps. Even normal wear can affect the aim over time. A correct beam pattern helps your low beams light the road evenly without blinding others. For beginner drivers and DIY car owners, checking alignment is a simple maintenance habit that can improve night visibility and road confidence.
Tools And Setup You Need Before Adjusting Headlights
Before you begin, gather a few basic items. You need a measuring tape, masking tape or painter’s tape, a screwdriver or socket that fits your adjustment screws, and your vehicle owner manual. The manual can help you find the headlight adjustment points and confirm whether your car has separate vertical and horizontal aim controls.
Choose level ground facing a flat wall or garage door. A driveway may work if it is truly flat, but a level parking area is often better. The car should be in normal driving condition, with proper tire pressure, a typical fuel level, and no unusual cargo in the trunk. If your vehicle often carries heavy tools or equipment, leave that weight in place during the alignment.
Clean the headlight lenses before testing the beam pattern. Cloudy or dirty lenses can make your lights appear weak even when the aim is correct. If the lenses are badly oxidized, restore or replace them before making fine adjustments.
Step-By-Step Guide: How To Set Car Headlights
Step 1: Park On Level Ground Facing A Flat Wall
Start by parking your vehicle on level ground about 10 to 25 feet from a flat wall or garage door. The exact distance can vary by vehicle, so check your owner manual if it gives a specific measurement. Make sure the car is straight, not angled toward the wall. The front bumper should face the surface evenly so both headlights project a clear beam pattern. Turn off bright outdoor lights if possible, because a darker area makes the low beams easier to see. A stable, flat setup is the foundation for an accurate adjustment.

Step 2: Prepare The Vehicle Before Measuring
Before you measure anything, prepare the car as it would be used during normal driving. Check tire pressure, because low or uneven tires can tilt the vehicle and change the headlight aim. Remove unnecessary cargo unless you regularly carry it. If the suspension was recently repaired or modified, let the vehicle settle by driving briefly before starting. When learning how to set car headlights, this preparation matters because even a small change in ride height can shift the beam. Sit in the driver’s seat or add similar weight if your manual recommends it.
Step 3: Find The Headlight Centerlines
Use your measuring tape to find the center of each headlight housing. Measure from the ground to the center of the low beam lens, then place a horizontal tape mark on the wall at that height. Next, mark the vertical centerline of each headlight by measuring from a fixed point on the car, such as the center of the grille, to each lamp. Transfer those measurements to the wall with vertical tape marks. These reference points help you compare the actual beam pattern with the correct aim. Take your time so both sides match accurately.
Step 4: Back The Vehicle To The Correct Distance
After making your tape marks, back the vehicle straight away from the wall to the distance recommended in your owner manual. If you do not have a specific number, many basic wall test methods use about 25 feet, but some modern vehicles require a different setup. Keep the steering wheel straight and make sure the car remains centered with the marks. Avoid parking on a slope, curb, or uneven patch of pavement. A small angle can make the horizontal aim look wrong. Once parked, turn on the low beams, not the high beams or fog lights.
Step 5: Check The Beam Pattern Against The Tape Marks
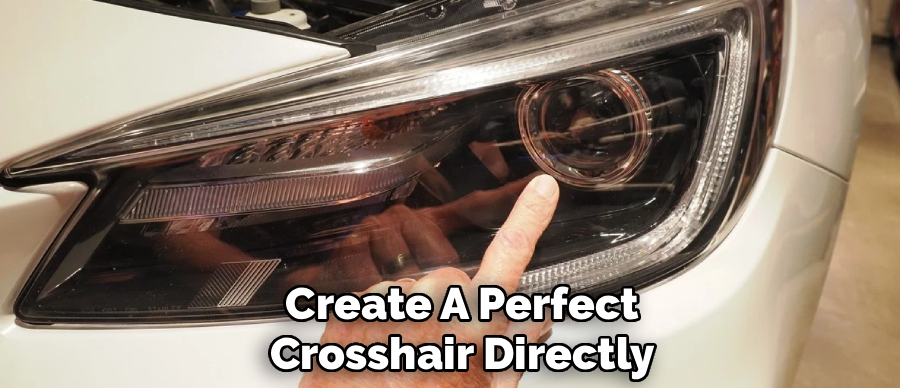
Look closely at where the brightest part of each low beam lands on the wall. Most low beams should sit slightly below the horizontal tape mark, not directly above it. The beam pattern may have a cutoff line, a brighter hotspot, or a step that rises to one side depending on the headlight design. Compare both sides and look for obvious problems, such as one beam pointing much higher, lower, inward, or outward than the other. Do not aim the lights only by brightness. Focus on the shape and position of the beam.
Step 6: Adjust The Vertical Aim Slowly
Find the vertical adjustment screw or adjuster near the headlight housing. Your owner manual can help you locate it, and some vehicles label the adjustment points under the hood. Turn the screw slowly and watch the beam move on the wall. Small turns can create a noticeable change, so avoid rushing. As you practice how to set car headlights, aim for a controlled adjustment that places the low beam cutoff slightly below the headlight centerline mark. This helps light the road without creating glare. Adjust one headlight at a time for better control.
Step 7: Correct The Horizontal Aim If Needed
Some vehicles allow horizontal aim adjustment, while others are designed to control mostly vertical aim. If your car has a horizontal adjustment screw, use it carefully to move the beam left or right. The goal is to keep each beam centered in front of the vehicle without crossing too far into oncoming traffic. Use the vertical tape marks as your guide. If one beam points strongly inward or outward, make small corrections and recheck from a few steps back. Avoid extreme changes, because poor horizontal aim can leave dark spots on the road shoulder or center lane.

Step 8: Confirm The Alignment With A Road Test
Once the wall test looks correct, take the car for a careful road test at night. Choose a quiet road with low traffic and good visibility. Watch how the low beams light the lane, road signs, shoulder, and distance ahead. They should give you a clear view without shining into rear windows or oncoming drivers’ faces. If other drivers flash their lights at you, the aim may still be too high. Return to the wall and make small adjustments if needed. A road test helps confirm that the garage door setup works in real driving conditions.
Common Mistakes To Avoid When Adjusting Headlights
One common mistake is adjusting headlights on uneven ground. Even a slight slope can make a beam look too high or too low. Always use the flattest surface you can find, and keep the vehicle straight in front of the wall.
Another mistake is using high beams for alignment. High beams are designed for distance, not normal traffic conditions. Low beams are the lights you use most often, so they should be the focus of your alignment check.
Some beginners also forget to inspect the headlight lenses. If the plastic lens is cloudy, yellowed, or scratched, the beam may look scattered even when the aim is correct. Cleaning or restoring the lens can improve visibility before you touch the adjustment screws.
Avoid turning adjusters too quickly. A quarter turn can sometimes move the beam more than expected. Make small changes, step back, compare the beam to your tape marks, and continue only when you understand how the light is moving.
Finally, do not ignore vehicle condition. Tire pressure, suspension height, cargo weight, and recent front-end repairs can all affect headlight aim. Set the car up as close to normal driving condition as possible before judging the beam.
Frequently Asked Question
How Far Should My Car Be From The Wall?
Many home headlight alignment methods use a distance of about 25 feet from the wall, but you should check your owner manual first. Some vehicles require a shorter or more specific distance because of their headlight design. The most important thing is that the ground is level, the car is straight, and your tape marks are measured carefully before you adjust anything.
Should Headlights Be Aimed Straight Ahead?
Headlights should point forward, but they are not always aimed exactly straight like a spotlight. Low beams usually sit slightly below the headlight center height to reduce glare. Depending on the vehicle and driving side, the beam pattern may also have a shaped cutoff that lights the road edge better. The goal is clear road visibility without shining into other drivers’ eyes.

Can I Adjust Headlights After Replacing Bulbs?
Yes, it is smart to check alignment after replacing headlight bulbs. A bulb that is not seated correctly can change the beam pattern and make the light look scattered or misdirected. Make sure the bulb is locked into the housing properly before adjusting the aim. If the beam still looks wrong, then use the wall test and adjustment screws to fine-tune it.
Why Is One Headlight Higher Than The Other?
One headlight may sit higher because of a previous adjustment, a loose headlight housing, uneven tire pressure, suspension wear, or damage from a minor impact. A bulb installed incorrectly can also cause an odd beam. Start by checking the bulb, housing, tire pressure, and vehicle stance. If everything looks normal, adjust the lower or higher beam using the wall marks as your guide.
When Should I Have A Professional Check My Headlights?
A professional check is a good idea if your headlight housing is damaged, the adjustment screws do not work, the beam pattern looks broken, or your car has advanced lighting systems. Some vehicles with LED, HID, adaptive, or self-leveling headlights may need special procedures. If you feel unsure or keep getting flashed by other drivers after adjustment, a shop can confirm the aim accurately.
Conclusion
Correct headlight alignment helps you see farther, drive more comfortably, and reduce glare for everyone else on the road. With level ground, a flat wall, accurate tape marks, and small adjustments, beginners can handle a basic alignment check at home.
Take your time, use your owner manual, and confirm the results with a safe road test. Once you understand how to set car headlights, you can make night driving clearer, safer, and less stressful.

About
Ora Hayes is a distinguished figure in the world of DIY Thecarfixes, with over a decade of expertise in automotive diagnostics and high-performance maintenance. Her professional focus lies in merging mechanical precision with modern digital tools, fostering repair solutions that are both cost-effective and highly reliable. As the author of Thecarfixes, Ora Hayes delves into the art and science of automotive restoration, inspiring car owners and hobbyist mechanics alike.
Education
RMIT University (Melbourne, Australia) Associate Degree in Automotive Engineering — Focus on vehicle dynamics, industry-driven repair protocols, and advanced diagnostics. Gained hands-on experience with traditional mechanical tools and modern ECU remapping software.
Nottingham Trent University (United Kingdom) Bachelor’s in Mechanical Design and Automotive Engineering (Honors) — Specialized in automotive systems with a focus on blending technical engineering with everyday usability. Participated in industry projects, working with leading automotive manufacturers to gain real-world insights into vehicle longevity.
Publications and Impact
In Thecarfixes, Ora Hayes shares her insights on troubleshooting complex engine issues, material durability, and strategies for efficient garage setups. Her writing bridges the gap between professional mechanic knowledge and the home enthusiast’s needs, making it a must-read for both everyday drivers and seasoned gearheads.





1 thought on “How To Set Car Headlights”