A camshaft position sensor is a small part with a big job. It tells the engine computer where the camshaft is during engine rotation, helping control fuel injection, ignition timing, variable valve timing, and smooth starting. When this sensor fails, your vehicle may crank longer than normal, stall, misfire, lose power, or trigger a check engine light.

Learning how to install cam sensor can help you replace a faulty sensor safely and avoid paying for a simple repair when the part is easy to reach. The process is usually straightforward, but it still requires care. You need to identify the correct sensor, disconnect power, avoid damaging the wiring, and install the replacement part in the right position.
This guide explains the process in a professional but beginner-friendly way. Because sensor locations vary by engine, always compare these steps with your vehicle’s service manual before starting.
Why Cam Sensor Replacement Matters
A failing camshaft position sensor can affect engine performance in several ways. Since the engine control module relies on this sensor for timing information, bad readings can cause rough running, poor fuel economy, hesitation, hard starting, or sudden stalling. In some vehicles, the engine may not start at all if the sensor signal is missing.
Replacing the sensor on time can prevent more serious drivability problems. It can also protect related systems, such as the ignition system, fuel system, and variable valve timing components. If the computer receives incorrect camshaft data, it may make poor timing adjustments, which can lead to uneven combustion and extra strain on the engine.
A correct installation is just as important as the replacement itself. A loose connector, damaged O-ring, dirty mounting surface, or wrong sensor gap can cause the same symptoms to return. Some vehicles also use more than one camshaft position sensor, especially engines with dual overhead cams or separate intake and exhaust cam sensors. That means diagnosis matters before replacing parts.
Step-By-Step Guide To How to Install Cam Sensor
Step 1: Confirm The Fault And Identify The Correct Sensor
Start by confirming that the camshaft position sensor is the likely problem. Use an OBD-II scanner to read trouble codes. Common codes include P0340, P0341, P0342, and P0343, though exact codes can vary by vehicle. A code does not always prove the sensor is bad, but it gives you a strong starting point.
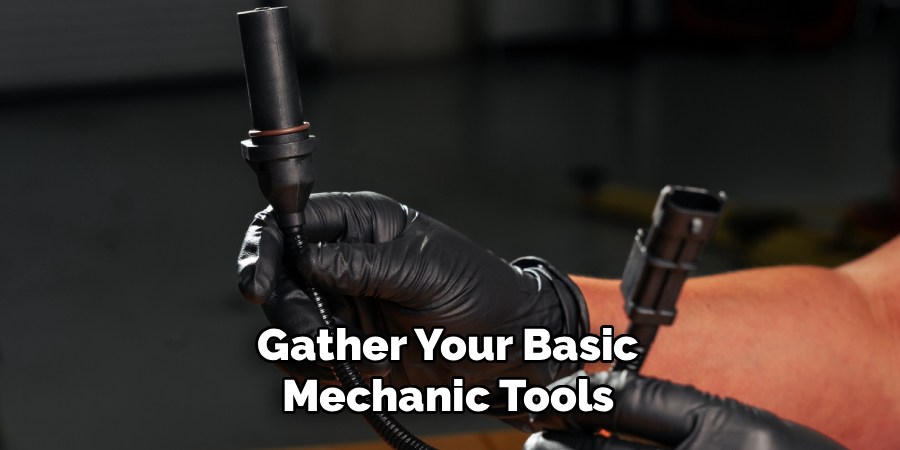
Check your service manual or parts diagram to identify the correct sensor location. Some engines have more than one cam sensor, often labeled intake, exhaust, bank 1, or bank 2. Replacing the wrong one can waste time and leave the problem unchanged.
Step 2: Prepare The Vehicle And Disconnect The Battery
Park the vehicle on a flat surface, set the parking brake, and let the engine cool fully. Working near a hot engine can cause burns, and plastic connectors are easier to break when handled roughly. Open the hood and make sure you have good lighting around the work area.
Disconnect the negative battery cable before touching the sensor wiring. This helps prevent accidental shorts and protects sensitive electronics. Keep the cable away from the battery post while you work. If your vehicle has radio codes, memory settings, or special battery procedures, review them before disconnecting power.
Step 3: Locate The Sensor And Clear Access
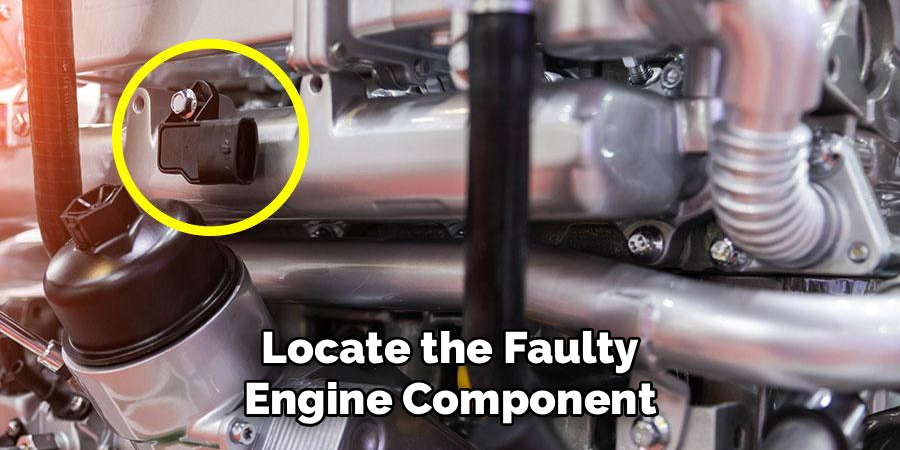
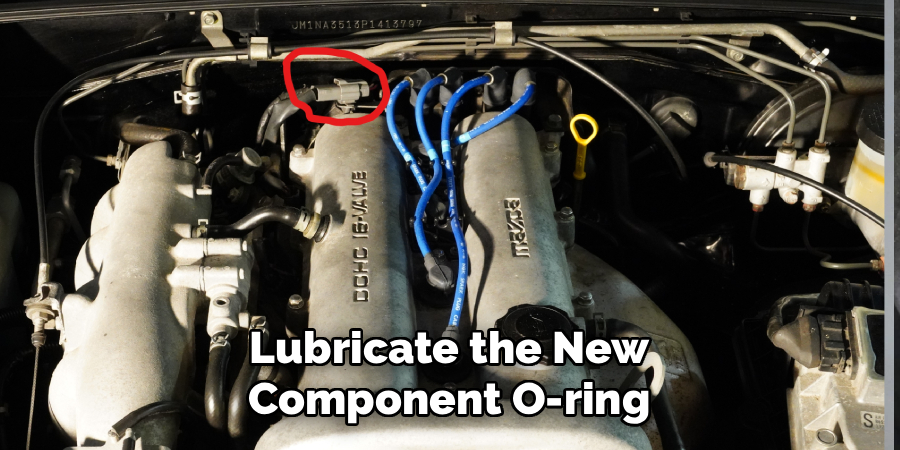
The camshaft position sensor is often mounted near the cylinder head, valve cover, timing cover, or end of the camshaft. On some engines, it is easy to see from above. On others, you may need to remove an engine cover, air intake tube, wiring bracket, or small hose to reach it.
Use care when moving parts out of the way. Do not pull hard on vacuum lines, plastic clips, or wiring looms. If fasteners are removed, place them in a small tray so they do not get lost. Good access makes the replacement safer and reduces the chance of damaging nearby components.
Step 4: Clean the Surrounding Engine Block
Garden tractors naturally accumulate thick layers of dry grass clippings, sticky dirt, and dark engine grease during their long working hours. You must aggressively clean the metal area immediately surrounding the broken electronic device before removing it. Use your clean microfiber rag and a gentle degreasing spray to wipe away the heavy dirt buildup.
Removing this stubborn grime prevents loose soil from accidentally falling directly into the sensitive internal engine compartments once you pull the old part out. Keeping the engine internals perfectly clean guarantees your mower will run reliably for many more gardening seasons.
Step 5: Remove The Old Sensor And Inspect The Area
Most camshaft position sensors are held in place by one small bolt. Use the correct socket or wrench and apply steady pressure so you do not round the fastener. Once the bolt is removed, twist the sensor gently and pull it straight out. Some resistance is normal if the O-ring is tight.
Inspect the old sensor for cracks, metal debris, oil contamination, or damage. Also check the mounting hole and surrounding surface. Wipe away dirt and oil with a clean shop towel. Do not allow debris to fall into the opening. A clean mounting area helps the new sensor seat properly.
Step 6: Install The New Sensor Correctly
Compare the new sensor with the old one before installation. The connector shape, mounting tab, length, and O-ring position should match. Lightly coat the new O-ring with clean engine oil if the design uses one. This helps the sensor slide in smoothly and prevents the seal from tearing.
Insert the sensor straight into the mounting hole and make sure it sits flush. Reinstall the retaining bolt by hand first to avoid cross-threading. Tighten it snugly to the manufacturer’s torque specification if available. Do not overtighten, as small sensor bolts can strip or break easily.
Step 7: Reconnect Power And Test The Repair
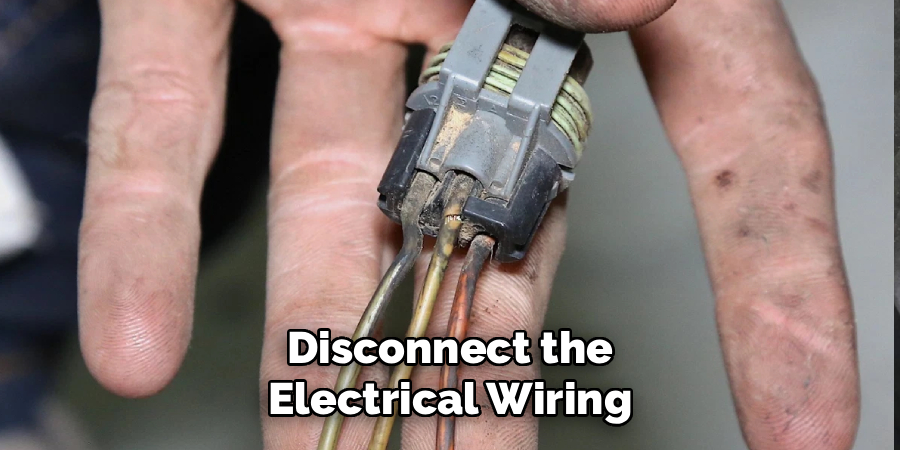
Reconnect the electrical connector until it clicks or locks into place. Reinstall any engine covers, intake parts, brackets, or hoses removed during access. Then reconnect the negative battery cable and make sure it is tight.
Start the engine and listen for smooth operation. It may take a moment for the computer to relearn normal readings. Use your scanner to clear stored codes, then take a short test drive. Watch for hesitation, stalling, or the check engine light returning. This final check is a key part of how to install cam sensor because it confirms that the repair solved the issue.
Frequently Asked Questions
What Are The Common Signs Of A Bad Camshaft Position Sensor?
Common signs include hard starting, rough idle, engine misfires, stalling, poor acceleration, reduced fuel economy, and a check engine light. Some vehicles may enter limp mode to protect the engine. In more severe cases, the engine may crank but not start. Since these symptoms can also come from wiring, timing, or ignition problems, scanning for codes and inspecting the circuit is important before replacing the sensor.
Can I Drive With A Faulty Camshaft Position Sensor?
You may be able to drive for a short time, but it is not recommended. A faulty sensor can cause sudden stalling, poor power, or unpredictable engine behavior. That can become unsafe in traffic. It may also cause the engine computer to use backup timing data, which can reduce performance and fuel efficiency. If the vehicle starts running badly or stalls often, repair it as soon as possible.
Do I Need To Reset The Computer After Replacement?
In many cases, the vehicle will recognize the new sensor after startup, but clearing the trouble code with an OBD-II scanner is still recommended. This lets you confirm whether the same code returns after the repair. Some vehicles may also require a relearn procedure, especially if timing-related parts were replaced. Check your service manual if the engine still runs poorly after installation.
How Long Does Camshaft Position Sensor Replacement Take?
For many vehicles, the job takes 20 minutes to one hour if the sensor is easy to reach. It can take longer if the sensor is hidden under covers, intake parts, or other components. The hardest part is often access, not the sensor itself. Taking time to locate the correct sensor and handle the connector carefully can prevent broken clips and repeat repairs.
Should I Use An Original Equipment Or Aftermarket Sensor?
An original equipment sensor is often the safest choice because it matches the factory design and signal quality. High-quality aftermarket sensors can also work well if they come from a trusted brand. Avoid very cheap parts from unknown sources, as poor signal accuracy can cause the same trouble codes to return. For critical engine sensors, reliability matters more than saving a small amount upfront.
Conclusion
Replacing a camshaft position sensor is a manageable repair when you work carefully and follow the right process. Start by confirming the fault, locating the correct sensor, disconnecting the battery, and creating safe access. Then remove the connector, take out the old sensor, clean the mounting area, install the new part, and test the vehicle with a scanner.
The key is patience and accuracy. Do not force connectors, overtighten bolts, or skip inspection of the wiring. A proper repair can restore smoother starting, better performance, and more reliable engine operation.
With the right tools and a clear method, how to install cam sensor becomes a practical job that many careful beginners can complete with confidence.

About
Ora Hayes is a distinguished figure in the world of DIY Thecarfixes, with over a decade of expertise in automotive diagnostics and high-performance maintenance. Her professional focus lies in merging mechanical precision with modern digital tools, fostering repair solutions that are both cost-effective and highly reliable. As the author of Thecarfixes, Ora Hayes delves into the art and science of automotive restoration, inspiring car owners and hobbyist mechanics alike.
Education
RMIT University (Melbourne, Australia) Associate Degree in Automotive Engineering — Focus on vehicle dynamics, industry-driven repair protocols, and advanced diagnostics. Gained hands-on experience with traditional mechanical tools and modern ECU remapping software.
Nottingham Trent University (United Kingdom) Bachelor’s in Mechanical Design and Automotive Engineering (Honors) — Specialized in automotive systems with a focus on blending technical engineering with everyday usability. Participated in industry projects, working with leading automotive manufacturers to gain real-world insights into vehicle longevity.
Publications and Impact
In Thecarfixes, Ora Hayes shares her insights on troubleshooting complex engine issues, material durability, and strategies for efficient garage setups. Her writing bridges the gap between professional mechanic knowledge and the home enthusiast’s needs, making it a must-read for both everyday drivers and seasoned gearheads.