Welcome, fellow home gardeners! We fully understand the frustrating struggle of driving delicate spring blooms and heat-sensitive produce back from the local wholesale nursery inside a sweltering, uncomfortably hot truck cabin. A highly functional automotive air conditioner remains absolutely vital for protecting your expensive tender plants and ensuring your personal physical comfort during long summer drives.
If your trusted vehicle suddenly starts blowing warm, stale air through the dashboard vents, you might simply need a basic chemical recharge. Understanding exactly how to fill refrigerant in car transforms a sweaty, miserable drive into a delightfully refreshing, icy breeze. You do not need to be a master mechanic to perform this incredibly easy preventative maintenance task on your own driveway. We will carefully walk you through gathering the right mechanical supplies, locating the proper under-hood connection ports, and adding the cooling gas safely. Let us grab our clear safety glasses, pop the heavy metal hood, and restore that beautiful cold airflow for your next massive botanical haul!
Step-by-Step Guide on How to Fill Refrigerant in Car
Step 1: Gather Your Protective Safety Gear
Before you begin actively working under the heavy metal hood of your vehicle, you must gather a few basic pieces of personal protective equipment. The chemical cooling gas resting inside your air conditioning system sits under immense physical pressure and can cause severe frostbite if it accidentally touches your bare skin. Put on a pair of thick leather working gloves, exactly like the heavy-duty ones you use when pruning aggressive, thorny rose bushes in your backyard. You must also wear clear plastic safety goggles to protect your sensitive eyes from unexpected pressurized chemical spray. Taking these simple safety precautions guarantees your weekend maintenance project remains entirely safe and highly successful.
Step 2: Purchase the Correct Cooling Gas
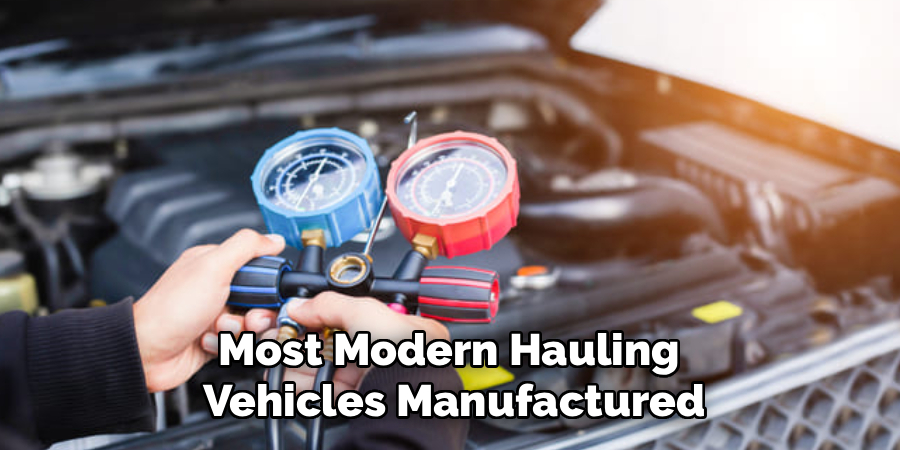
Automotive air conditioning systems require a very specific type of chemical cooling gas to operate efficiently and safely. Most modern hauling vehicles manufactured after the middle of the nineteen-nineties utilize a standardized chemical compound known commercially as R-134a. You can easily purchase large pressurized metal cans of this exact chemical at any local neighborhood auto parts store or major hardware retailer. Look specifically for a premium retail kit that includes a reusable braided rubber dispenser hose and a highly visible circular pressure gauge attached directly to the top. Buying an all-in-one dispenser kit saves you the frustrating hassle of acquiring separate mechanical measuring tools.
Step 3: Locate the Low Pressure Port
Your automotive cooling system features two highly distinct metal connection valves, but you must only ever interact with the low-pressure side. Open your heavy vehicle hood and look for thick aluminum pipes running near the passenger side firewall. You will eventually spot a small metal valve covered by a protective plastic cap featuring a prominent letter L printed directly on the top. This distinct L stands for low pressure, marking the exact location where you will safely introduce the fresh chemical gas. Treat this vital diagnostic step exactly like locating the primary main watering valve for your complex backyard drip irrigation system before making plumbing modifications.
Step 4: Understand the Chemical Transfer Process
Introducing new pressurized gas into your sealed automotive system requires patience and a gentle, systematic approach. You must never rush this delicate mechanical process, as overfilling the metal pipes can instantly destroy the expensive internal compressor pump completely. Mastering this process simply means closely watching the attached mechanical gauge while adding the liquid chemical in short, controlled bursts. Think of this delicate balancing act just like applying highly concentrated liquid fertilizer to your prized heirloom tomatoes. You want to give the complex system exactly what it needs to thrive without accidentally causing severe, irreversible structural damage through careless over-application.

Step 5: Attach the Dispenser Hose Securely
Once you have firmly identified the correct low-pressure metal valve, carefully unscrew the protective plastic cap and set it safely aside in your pocket. Take the specialized quick-connect fitting attached to the end of your braided rubber dispenser hose and pull the outer metal ring backward. Push the fitting firmly down onto the exposed vehicle valve until you hear a distinct, satisfying mechanical click. Pull up gently on the rubber hose to verify the metal connection remains completely secure and firmly locked in place. A perfectly tight physical connection ensures the highly pressurized chemical gas flows smoothly into your vehicle without dangerously leaking into the surrounding atmosphere.
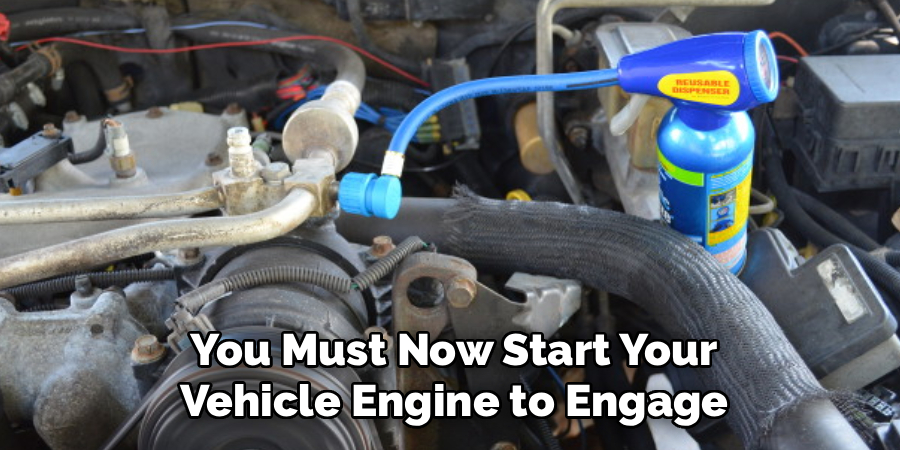
Step 6: Start the Engine and Activate the AC
With the dispenser hose securely attached to the proper metal valve, you must now start your vehicle engine to engage the internal mechanical compressor. Climb inside the passenger cabin, turn the ignition key, and switch your dashboard air conditioning dial to the absolute coldest temperature setting available. Turn the internal cabin fan speed all the way up to its maximum blowing output. You will likely hear a loud mechanical clicking noise coming from under the hood as the heavy metal compressor clutch physically engages and begins pumping the existing chemicals through the thick aluminum pipes.
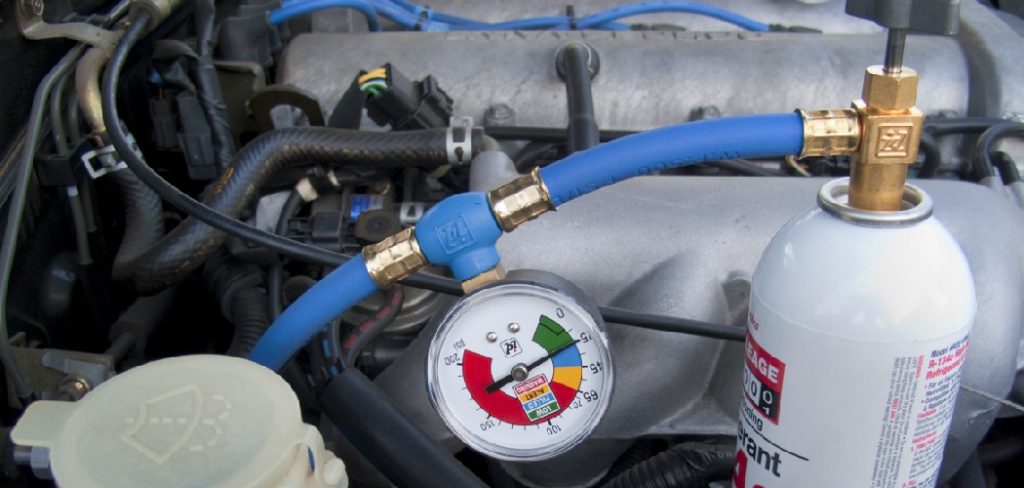
Step 7: Read the Attached Pressure Gauge
Walk back to the front of your running vehicle and look closely at the circular pressure gauge attached directly to your chemical canister. The mechanical needle will actively bounce around before settling on a specific numerical reading indicating the current internal pipe pressure. Most premium retail gauges feature color-coded visual zones designed to make reading the ambient pressure incredibly simple for beginners. If the sweeping needle rests firmly inside the green optimal zone, your system is already perfectly full and likely suffers from a different mechanical problem. If the needle sits very low in the white or yellow depleted zone, you are fully cleared to add more gas.
Step 8: Squeeze the Trigger to Add Gas
Hold the heavy pressurized metal canister perfectly upright and slowly squeeze the plastic dispensing trigger to release the chilled chemical liquid. Shake the cold metal can gently back and forth while squeezing to help the dense chemical flow smoothly through the braided rubber hose. Release the plastic trigger every ten seconds to check the updated pressure reading on your circular gauge. You must carefully repeat this brief squeezing and checking process until the mechanical needle finally rests directly in the center of the green optimal zone. Stop adding the chemical immediately once you reach the proper designated pressure to avoid overloading the delicate internal compressor seals.
Step 9: Monitor the Internal Cabin Airflow
After achieving the perfect internal system pressure, walk back to the driver door and place your bare hand directly in front of the dashboard vents. You should instantly feel a massive, dramatic improvement in the overall temperature of the blowing air. The stale, uncomfortably warm breeze should now feel incredibly icy, crisp, and wonderfully refreshing against your skin. If the air feels perfectly cold, you have successfully restored your vital vehicle cooling system. You can now confidently transport your heat-sensitive nursery plants and delicate spring flowers without worrying about them wilting miserably under the intense afternoon sun.
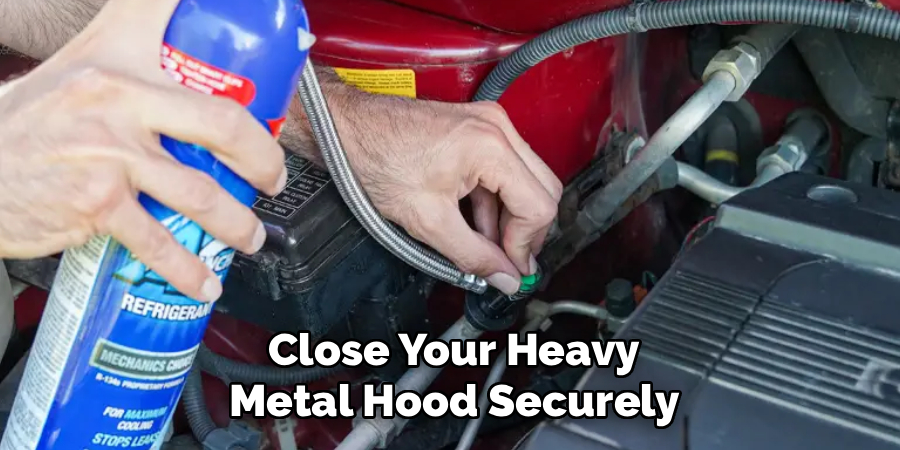
Step 10: Disconnect the Hose and Replace the Cap
The final step of this rewarding driveway maintenance project involves safely detaching your mechanical equipment and securing the vehicle. Pull the outer metal ring on the quick-connect fitting backward to pop the rubber hose completely off the low-pressure vehicle valve. You might hear a very brief hiss of escaping gas, which is completely normal and entirely safe. Retrieve the small plastic protective cap from your pocket and screw it firmly back onto the threaded metal valve to keep microscopic dust and heavy road debris out. Close your heavy metal hood securely, pack your leather gloves away, and celebrate your newly restored icy automotive comfort.
Frequently Asked Question
What Happens If I Overcharge The AC System?
- Adding entirely too much pressurized chemical gas to your vehicle creates a massive mechanical hazard for the internal compressor pump.
- The excess fluid physically prevents the heavy metal compressor from cycling properly, which completely halts the cooling process.
- Severe overcharging can literally blow out the delicate rubber seals connecting the thick aluminum pipes, causing catastrophic system leaks.
- If you accidentally overfill the system, you must immediately take your truck to a licensed professional mechanic.
- They utilize specialized heavy machinery to safely extract the excess chemical pressure without harming the surrounding environment.
Why Does My Air Conditioner Smell Like Mildew?
- A foul, musty odor blowing from your dashboard vents usually indicates severe mold growth inside the dark plastic ventilation housing.
- This organic growth happens when natural condensation fails to drain completely out of the bottom of your parked vehicle.
- The damp, dark environment acts exactly like a poorly ventilated garden greenhouse, promoting rapid fungal expansion.
- You can easily solve this annoying problem by replacing your dirty cabin air filter located directly behind the glovebox.
- Spraying a specialized automotive ventilation cleaner into the exterior windshield cowl also quickly eliminates the lingering organic mildew smell.
How Often Does My System Need Recharging?
- A perfectly healthy, factory-sealed automotive cooling system theoretically never needs a chemical recharge during its entire lifespan.
- The pressurized cooling gas does not naturally burn away or evaporate like the gasoline inside your primary fuel tank.
- If your dashboard air slowly becomes warm, it indicates a tiny microscopic leak somewhere along the complex aluminum piping.
- Most older hauling vehicles require a minor chemical top-off exactly once every three to four years as the rubber O-rings slowly age.
- Recharging your system at the very beginning of the spring planting season ensures maximum comfort all summer long.
Can I Mix Different Types Of Cooling Gas?
- You must absolutely never mix different chemical compounds inside your sealed automotive air conditioning system under any circumstances.
- Combining older R-12 chemicals with modern R-134a gas creates a highly corrosive, incredibly toxic internal sludge.
- This destructive chemical mixture will quickly dissolve the delicate rubber seals and completely destroy your expensive compressor pump.
- Always check the bright printed sticker located under your metal hood to verify the exact chemical required for your specific vehicle.
- Sticking exclusively to the factory-recommended cooling gas guarantees safe, highly reliable operation during your busy landscaping weekends.
Is It Normal For Water To Drip Under My Car?
- Finding a small, clear puddle of plain water directly underneath your parked vehicle on a hot summer day is entirely normal.
- As your air conditioning system actively removes heavy humidity from the passenger cabin, the resulting moisture condenses on the cold mechanical coils.
- This clean water drips harmlessly down a designated rubber drain tube directly onto your concrete driveway.
- You should only worry if the leaking fluid features a bright neon green, deep pink, or bright orange chemical dye.
- Colored puddles indicate a severe engine coolant leak, while clear, odorless water simply proves your air conditioner functions perfectly.
Conclusion
Maintaining the reliable utility vehicle you use to transport heavy gardening supplies requires patience, respect, and a willingness to learn simple maintenance tasks. By taking the time to gather safety gear, locate the proper low-pressure valve, and carefully monitor the mechanical gauge, you guarantee a remarkably comfortable driving experience. You no longer have to tolerate a sweltering truck cabin while nervously watching your expensive nursery plants wilt rapidly in the passenger seat.
Understanding exactly how to fill refrigerant in car transforms a potentially expensive, highly frustrating mechanic visit into an incredibly satisfying thirty-minute driveway project. The noticeable, icy improvement in your dashboard airflow serves as a fantastic, deeply comforting reward for your careful physical efforts. Wash the rich organic soil off your hands, pack your sturdy gardening tools into the truck bed, and drive confidently toward your next beautiful botanical adventure knowing you will arrive feeling completely refreshed and perfectly cool!
About
Ora Hayes is a distinguished figure in the world of DIY Thecarfixes, with over a decade of expertise in automotive diagnostics and high-performance maintenance. Her professional focus lies in merging mechanical precision with modern digital tools, fostering repair solutions that are both cost-effective and highly reliable. As the author of Thecarfixes, Ora Hayes delves into the art and science of automotive restoration, inspiring car owners and hobbyist mechanics alike.
Education
RMIT University (Melbourne, Australia) Associate Degree in Automotive Engineering — Focus on vehicle dynamics, industry-driven repair protocols, and advanced diagnostics. Gained hands-on experience with traditional mechanical tools and modern ECU remapping software.
Nottingham Trent University (United Kingdom) Bachelor’s in Mechanical Design and Automotive Engineering (Honors) — Specialized in automotive systems with a focus on blending technical engineering with everyday usability. Participated in industry projects, working with leading automotive manufacturers to gain real-world insights into vehicle longevity.
Publications and Impact
In Thecarfixes, Ora Hayes shares her insights on troubleshooting complex engine issues, material durability, and strategies for efficient garage setups. Her writing bridges the gap between professional mechanic knowledge and the home enthusiast’s needs, making it a must-read for both everyday drivers and seasoned gearheads.