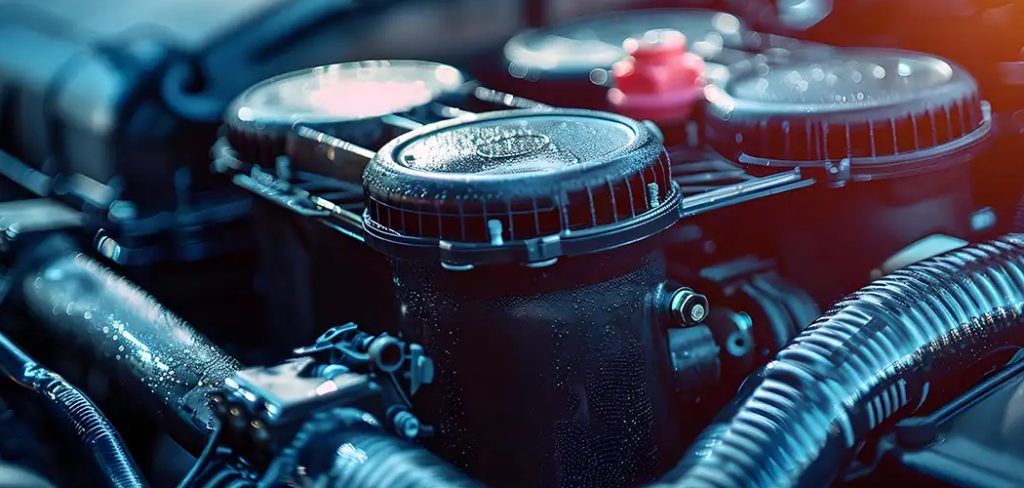
A vacuum leak happens when excess air enters your engine past the mass airflow sensor, throwing off the delicate air-to-fuel ratio required for your vehicle to run smoothly.
When your engine runs lean, you might experience rough idling, stalling, poor acceleration, or a check engine light glaring from your dashboard. While a vacuum leak sounds intimidating, diagnosing the issue is a manageable task for most car owners. You do not need a professional mechanic to find the source of the extra air. With patience and a few simple techniques, you can track down the compromised hose or gasket in your garage.
This guide on how to find vacuum leak on car walks you through the entire process, giving you the knowledge to confidently identify and locate vacuum leaks on your own vehicle.
What Will You Need?
Before you start hunting for leaks, gather the right tools. Having everything within reach makes the process much easier. You will need:
- A bright flashlight or headlamp to see into tight spaces.
- A spray bottle filled with water.
- A can of carburetor cleaner or brake parts cleaner (use with caution).
- A pair of mechanic’s gloves and safety glasses.
- A basic set of pliers for removing hose clamps.
- A specialized automotive smoke machine (optional, but highly recommended).
- An automotive vacuum gauge (optional, for advanced testing).
- A quiet working environment to help you hear subtle sounds.
10 Easy Steps on How to Find Vacuum Leak on Car
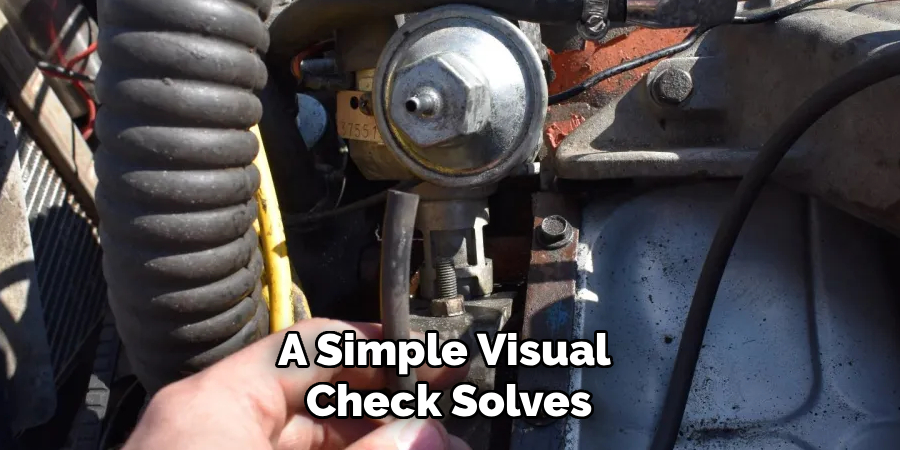
Step 1: Perform a Thorough Visual Inspection
The simplest and most effective way to find a vacuum leak is by looking closely at the engine bay. Open your hood and inspect every rubber hose connected to the intake manifold. Rubber deteriorates over time due to intense engine heat, leading to cracks, splits, and total collapses. Look for hoses that appear brittle, swollen, or disconnected entirely. Pay special attention to the ends of the hoses where they slip over metal or plastic fittings, as these connection points frequently split. Use a bright flashlight to illuminate dark corners behind the engine block. Tracing each line with your fingers can help you feel rough spots or cracks that you might not be able to see from above. Do not rush this step, as a simple visual check solves the majority of vacuum leak mysteries.
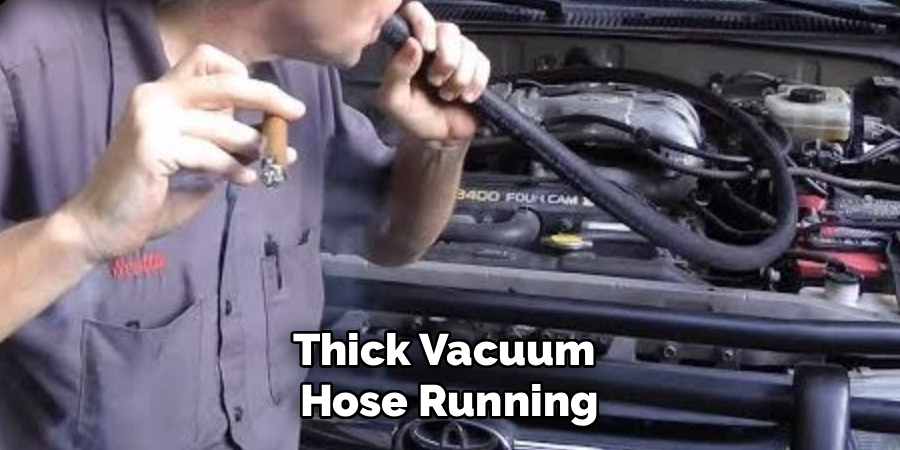
Step 2: Listen for Hissing Sounds
Engines generate a significant amount of vacuum pressure, and when that pressure escapes through a small hole, it often creates a distinct hissing noise. Start your engine and let it idle in park or neutral with the emergency brake applied. Open the hood and listen carefully. Try to tune out the normal mechanical clatter of the engine and focus on any high-pitched hissing or whistling sounds. To pinpoint the exact location, you can use a piece of rubber tubing as a makeshift stethoscope. Hold one end to your ear and move the other end around the intake manifold, throttle body, and vacuum hoses. When the open end of the tube passes over the leak, the hissing sound will amplify dramatically in your ear.
Step 3: Check the PCV System
The Positive Crankcase Ventilation (PCV) system is a common culprit for vacuum leaks. This system relies on engine vacuum to pull harmful blow-by gases out of the crankcase and route them back into the intake to be burned. The PCV valve itself, as well as the rubber hoses connecting it, can fail. Locate your PCV valve, which usually sits on the valve cover. Inspect the hose running from the valve to the intake manifold for cracks or mushy spots. Pull the PCV valve out and shake it; it should rattle freely. If it does not rattle, it is clogged and needs replacing. Furthermore, check the rubber grommet holding the valve in place, as a torn grommet allows unmetered air to enter the engine.
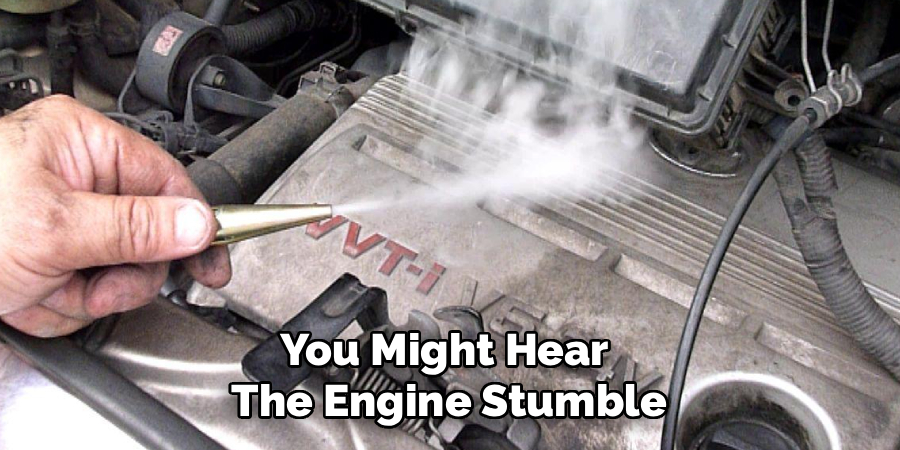
Step 4: The Water Spray Method
If visual inspection and listening fail to locate the leak, the water spray method offers a safe and simple alternative. Fill a clean spray bottle with plain water. With the engine idling, mist a fine spray of water over the vacuum hoses, intake manifold gasket areas, and throttle body connections. When the water hits a vacuum leak, the engine will suck the water into the intake. This sudden gulp of water temporarily seals the leak and changes the engine’s idle speed or sound. You might hear the engine stumble briefly or notice a change in the exhaust note. Because water is completely safe for the engine in small misted amounts, this method poses zero fire risk, making it an excellent technique for beginners.
Step 5: The Carburetor Cleaner Method
For stubborn leaks that water cannot reveal, mechanics frequently use carburetor cleaner or brake cleaner. These fluids are highly combustible. With the engine idling, spray short, precise bursts of cleaner around suspected leak areas. If there is a leak, the engine will suck the combustible fluid into the intake manifold alongside the air. This adds extra fuel to the combustion process, causing a sudden and noticeable increase in the engine’s RPM. You must exercise extreme caution when using this method. Keep a fire extinguisher nearby, wear safety glasses, and never spray these flammable liquids near the hot exhaust manifold or open sparks. Use the included straw on the spray can to direct the fluid exactly where you want it.
Step 6: Pinch Off the Hoses
Sometimes, isolating the specific leaking circuit is the best approach. Your engine has multiple vacuum lines running to various accessories like the brake booster, the EGR valve, and the climate control system. With the engine running rough at idle, use a pair of smooth-jawed pliers or specialized hose-pinching pliers to squeeze one vacuum line shut at a time. Do this close to where the hose connects to the intake manifold. If pinching a specific hose causes the engine idle to suddenly smooth out and return to normal, you have found the leaking circuit. You can then follow that specific hose down its path to find the exact tear or the faulty accessory component causing the problem.
Step 7: Inspect the Brake Booster
The power brake booster is one of the largest vacuum-operated components on your vehicle. A massive leak here will cause terrible engine idling and a very hard brake pedal. Locate the large, thick vacuum hose running from the intake manifold to the round black metal canister behind your brake fluid reservoir. Inspect this heavy hose for splits. Next, check the one-way check valve where the hose plugs into the booster. If the grommet is torn, replace it. To test the internal diaphragm of the booster, turn off the engine and pump the brakes until the pedal feels stiff. Hold your foot on the pedal and start the engine. The pedal should sink slightly. If it doesn’t, or if you hear a loud hiss inside the cabin when braking, the booster itself is leaking.
Step 8: Check the Intake Manifold Gaskets
Vacuum leaks do not only happen in rubber hoses; they frequently occur where metal and plastic engine parts bolt together. The intake manifold gasket seals the gap between the intake manifold and the cylinder head. Over time, heat cycles cause these gaskets to shrink, crack, or warp, allowing air to slip past. To test these gaskets, you can use the water or carburetor cleaner methods detailed in steps 4 and 5. Spray along the seam where the manifold meets the engine block. Pay special attention to the corners and areas near the coolant passages. If the engine RPM fluctuates when you spray these seams, your intake manifold gaskets have failed and require replacement.
Step 9: Use an Automotive Smoke Machine
When all other methods fail, an automotive smoke machine is the ultimate diagnostic tool. Professional mechanics rely on these machines to find microscopic leaks that fluids cannot reveal. The machine generates a thick, low-pressure, non-toxic mineral oil smoke. To use it, turn the engine off. Disconnect the air intake hose from the throttle body and seal the opening with a rubber cone. Inject the smoke into the intake manifold. Wait a few minutes for the smoke to fill the entire engine cavity. Use your flashlight to inspect the engine bay. Smoke will billow out of any crack, split hose, or failed gasket, showing you the exact location of the leak with zero guesswork and absolute precision.
Step 10: Utilize a Vacuum Gauge
While a vacuum gauge will not point out the exact location of a leak, it provides crucial confirmation that a leak exists and helps you evaluate overall engine health. Disconnect a small vacuum line from the intake manifold and attach the vacuum gauge. Start the engine and let it warm up to normal operating temperature. A healthy engine at idle should produce a steady reading between 17 and 22 inches of mercury (inHg). If the needle is significantly lower than this range and holding steady, it strongly indicates a large vacuum leak somewhere in the system. You can leave the gauge attached while you perform the pinching method from Step 6; when you pinch the leaking line, you will see the needle jump back up to the normal range.

Conclusion
How to find vacuum leak on car might seem like finding a needle in a haystack, but a systematic approach makes it highly achievable.
By visually inspecting the rubber hoses, listening for hissing sounds, and utilizing simple diagnostic techniques like the water spray method, you can pinpoint the problem area quickly. Remember to prioritize safety by keeping away from hot exhaust parts when using any diagnostic fluids.
Fixing a vacuum leak is often one of the cheapest and most rewarding DIY maintenance tasks you can perform. Once repaired, you will instantly regain your vehicle’s smooth idle, fuel efficiency, and reliable performance.
About
Ora Hayes is a distinguished figure in the world of DIY Thecarfixes, with over a decade of expertise in automotive diagnostics and high-performance maintenance. Her professional focus lies in merging mechanical precision with modern digital tools, fostering repair solutions that are both cost-effective and highly reliable. As the author of Thecarfixes, Ora Hayes delves into the art and science of automotive restoration, inspiring car owners and hobbyist mechanics alike.
Education
RMIT University (Melbourne, Australia) Associate Degree in Automotive Engineering — Focus on vehicle dynamics, industry-driven repair protocols, and advanced diagnostics. Gained hands-on experience with traditional mechanical tools and modern ECU remapping software.
Nottingham Trent University (United Kingdom) Bachelor’s in Mechanical Design and Automotive Engineering (Honors) — Specialized in automotive systems with a focus on blending technical engineering with everyday usability. Participated in industry projects, working with leading automotive manufacturers to gain real-world insights into vehicle longevity.
Publications and Impact
In Thecarfixes, Ora Hayes shares her insights on troubleshooting complex engine issues, material durability, and strategies for efficient garage setups. Her writing bridges the gap between professional mechanic knowledge and the home enthusiast’s needs, making it a must-read for both everyday drivers and seasoned gearheads.