

Keeping your car’s air conditioning in reliable working order isn’t just a matter of comfort on the hottest days—it sometimes borders on necessity, especially if you’ve ever slogged through a July afternoon in a black sedan with no relief in sight. Over time, it’s not uncommon for unwanted air and a dash of humidity to sneak their way into the AC lines. This may not sound catastrophic at first glance, but it can absolutely deflate your system’s cooling ability, sometimes surprisingly quickly.

If you’re wondering whether pulling a vacuum on the AC makes any sort of real difference, the short answer is: it can. The process, which involves drawing out all those stragglers—moisture, stray air, and even certain dissolved gases—sets the stage for topping up with fresh refrigerant. Don’t expect a simple button-push operation, though. You’ll want to prepare for several steps on how to evacuate car ac and a few important precautions.
How a Car AC System Works: The Compressed Version
It’s easy to forget that your car’s air conditioner isn’t just a black box that turns hot air cold by some kind of magic. Really, it’s a closed circuit governed by the physics of pressure, temperature, and flow. There’s a compressor (yes, it compresses), which raises the temperature and pressure of the refrigerant. That now-hot gas heads for the condenser up front—it releases heat and returns to a liquid.
Next up is the expansion valve, which lets the pressure drop suddenly; just as quickly, the liquid’s temperature plummets. Inside, the evaporator absorbs heat from the cabin air, which vanishes up the refrigerant line as the blessedly cool air blows out at your feet. Around and around the cycle goes—a little orchestra of physics, if you will.
Why Bother with an Evacuation, Anyway?
So, when does pulling a vacuum become genuinely necessary? Usually, you’ll face this when diagnosing lackluster AC performance or after opening the system for repair. The problem is, every time outside air enters the circuit, it drags along moisture. It’s easy to shrug off a trace amount of humidity—until, that is, it reacts inside the system.
Here’s what happens: moisture and refrigerant interact, and the result is a corrosive soup that will gnaw away at metals and rubber alike. That acid doesn’t wait politely. It pounces and, if left unchecked, can destroy compressors in short order and leave you with a repair bill you will absolutely not want to see. Drawing a deep vacuum long enough to boil out the water vapor reduces your chances of future breakdowns—though, as always, nothing in the world of car repair is an absolute guarantee.
You’ll Need:
- A vacuum pump
- Manifold gauge set
- Refrigerant (R134a)
- Oil and a refrigerant identifier
- Protective gloves and safety glasses
- Leak detection dye
A Few Words on Safety
Maybe it goes without saying—though honestly, it shouldn’t—that working on AC systems carries its own set of risks. Blues and purples are nice enough in an ice cream, but not so great on your skin or eyes. Always wear solid safety goggles; refrigerant can freeze you in a flash. Gloves, sure—opt for thicker nitrile or even sturdy leather if you’re cautious.
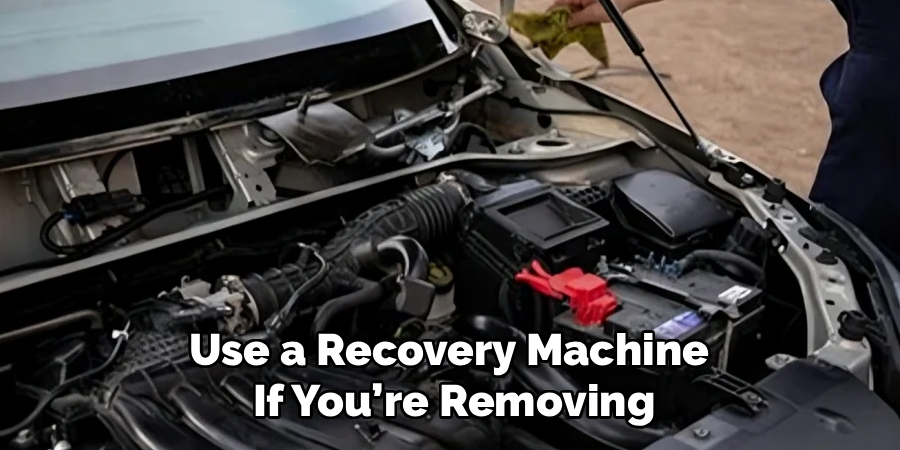
Give yourself plenty of room, whether in the garage with the doors wide open or outside altogether. One last bit: strictly avoid venting old refrigerant to the air, not just for the sake of the planet, but also because it’s illegal and traceable. Use a recovery machine if you’re removing the old stuff.
6 Step-by-step Guides on How to Evacuate Car AC
Step 1: Set Up Before the Chaos
Before you touch a single fitting, make sure your car is on level ground, turned off, and hood up. Find those service ports—the larger one, low-pressure side, usually makes itself easy to spot on the thicker AC line, while the narrower tube marks the high side. Clean off dirt, leaves, or mess near these ports. There’s nothing more frustrating than having a flawless seal ruined by stray particles—no need to add another variable.
Check over your gauges and pump, too. Is the pump oil clean? Sight glass shows level? If not, swap the oil. Lay the hoses out so they won’t get caught in the fan or rest on anything hot (ask me how I know). It’s probably best to resist the urge to rush—you’ll thank yourself ten minutes later.
Step 2: Hook Up the Gauges
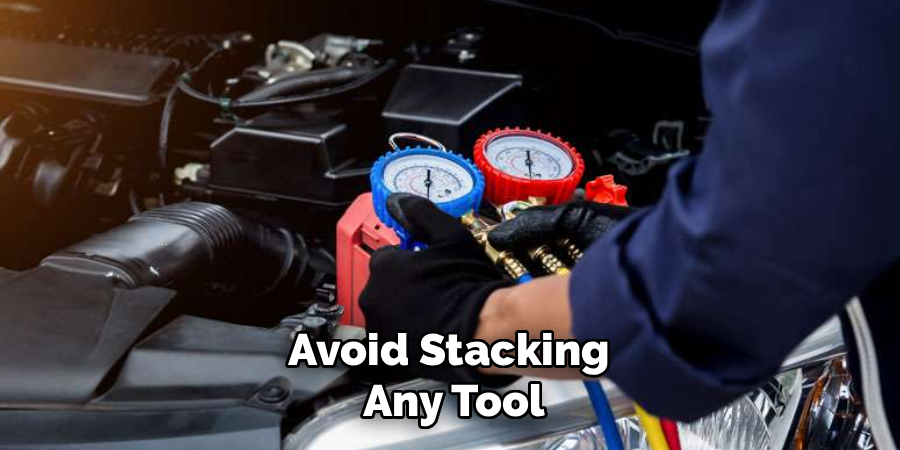
Time to connect the blue (low) hose to the low-pressure port. The red (high) hose attaches to the high side—listen for a definitive click as you snap the couplers in place. You may need to twist the collars a bit to open up the valves within the ports. But—importantly—keep the gauge block valves closed for now. That’ll prevent an unexpected release of whatever pressure remains. You’ll leave the yellow utility hose disconnected for just a moment. Check seals, tighten connections, and make sure you’re working with a truly airtight setup.
Step 3: Vacuum Pump Joins the Party
Pick up that yellow (center) hose and thread it onto your vacuum pump’s inlet. Not too tight; stripping brass threads is a headache nobody needs. This connection needs to be firm, but you can leave your muscle for the next step. Double-check power cords and make sure there’s no pooling water anywhere in the area. Avoid stacking any tool or hose near spinning fans or belts.
Step 4: Time to Pull a Vacuum
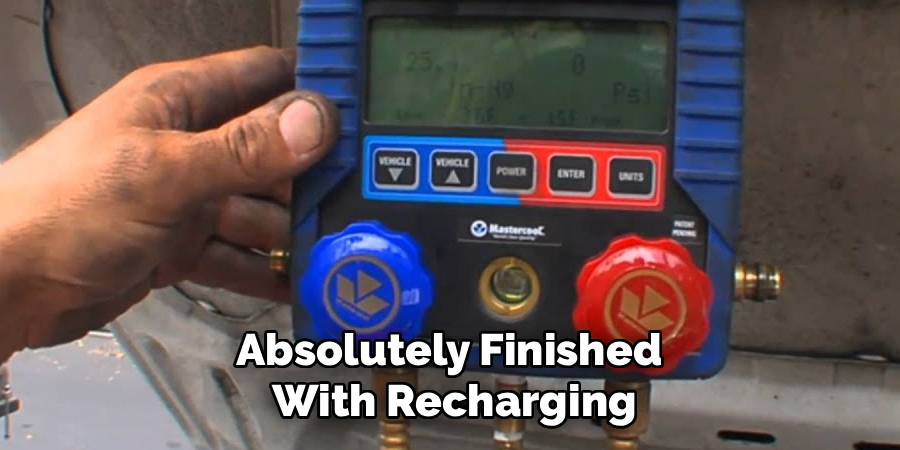
Only after confirming everything is properly joined, power up the vacuum pump. You’ll hear the motor’s hum—maybe see vapor at the outlet; that’s fine. Now, open both blue and red valves on your gauge block. As the pump pulls, watch the low side needle. It should drop below zero and settle somewhere close to -30 inHg (inches of mercury, if you’re curious about that old-school metric). Leave the pump running a good half hour—forty-five minutes isn’t overkill. Trying to cut corners here is usually false economy, as deeply-seated moisture needs time and negative pressure to boil off.
Step 5: The Waiting Game (and Leak Check)
After you’ve run the vacuum for a while, close both valves on the manifold block. Then and only then, shut off the pump. What you’re doing now is checking the system’s integrity. Leave everything as-is for maybe 15 or 20 minutes. Watch the low-side gauge—does the needle hold steady, or is it sneaking upward? Any upward drift says air is slipping in somewhere, likely thanks to a leaky O-ring, cracked hose, or loose thread. Sometimes fixes are simple; sometimes they’re not. Either way, don’t ignore this.
Step 6: Disconnect and Button Up
If, after your waiting period, the system holds steady at deep vacuum, you can be reasonably confident the system is sealed. Carefully detach the yellow hose from the pump, but keep both gauge block valves closed for now (this preserves the vacuum). Only pull off the high and low side hoses when you’re completely, absolutely finished with recharging. At this point, the circuit is primed for refrigerant and oil—match the volume and spec exactly as your manual suggests. Take your time; it’s all too easy to skip a step in a rush and regret it later.
Following these steps on how to evacuate car ac system will ensure a smooth and effective process of recharging your car’s air conditioning system. It is important to follow these steps carefully, as skipping any step can lead to damage in the system or ineffective cooling.
Common Pitfalls—A Bumpy Ride
Some errors come up again and again—sometimes out of impatience, sometimes inexperience. Skipping the leak check? That almost guarantees refrigerant loss and poor cooling. A weak vacuum pump may leave moisture behind, often resulting in future corrosion. If you leave the gauge block valves open when turning off the pump, don’t be surprised to find pump oil drawing up the hoses into your AC lines.
Using the wrong refrigerant can be catastrophic; it doesn’t take much to ruin compressor seals. Lastly, don’t toss those little plastic service caps—they matter more than most people realize. Lost caps lead to dirty, malfunctioning Schrader valves.
What Happens If Evacuation Goes Sideways?
Let’s say the process didn’t go quite right. What might you notice? Well, air from the vents may feel disappointingly lukewarm, or the AC might cycle on and off almost erratically—never quite finding its stride.
Sometimes, trapped moisture will freeze up right at the expansion valve, forming a blockage so complete that refrigerant just gives up the ghost. Left unresolved, moisture causes internal rust, which eventually chews up your compressor so badly you’ll hear it grinding before total failure.
When to Leave It to a Pro?
There’s only so much you should attempt in your driveway. If you uncover a major leak and can’t trace or fix it, you’re probably better off admitting defeat and visiting a shop. Pros have UV dye, sniff testers, and other niche tools to get to the bottom of stubborn leaks. Still have old refrigerant inside?
Don’t risk venting; let a certified mechanic recover it (again, legality is a real concern). Is your compressor already toast? That’s a much, much bigger project involving a system flush to get rid of shrapnel, which is best handled by someone with specialized experience.
Routine Habits for a Healthy AC
A bit of prevention can go a long way—seriously. Fire up the air conditioning for ten minutes or so each month, regardless of the season. This keeps the internal O-rings soft and functional.
Make a habit of checking the front condenser, plucking off leaves, bugs, or anything that clogs airflow. Oh, and swap out the cabin air filter on schedule. Every little step helps, and together, they stretch the system’s lifespan.
Frequently Asked Questions
Q1: Should I Run the Vacuum Pump Longer If My System Sat Open?
If the AC’s been open to the air for days or weeks, consider running your pump for a solid hour. If it’s just a straightforward repair, 30–45 minutes should suffice. Shorter run times almost never pull all the moisture, so patience pays off here.
Q2: Can You Get Away Without a Vacuum Pump?
No. You really can’t. Letting pressure bleed out by hand leaves a mess of air and moisture behind, which—sooner rather than later—will corrode internal parts and trash your compressor. Only a true vacuum removes the water vapor that matters.
Q3: What if I Accidentally Overcharge the System?
Adding too much refrigerant can strain the compressor, leading to engine stumbling, feeble cooling, or rapid cycling from the AC clutch as it fights to avoid bursting something. In the worst cases, seals will blow, hoses might rupture, and internal destruction is certain. Precision matters here.
Conclusion
It’s tempting to skip steps or let a mechanic handle all of it, but doing the job right yourself can be surprisingly satisfying. Evacuating your AC isn’t magic, but it does give your car a fighting chance at a long, cool life—assuming you treat the process (and your tools) with respect.
Always check for a held vacuum before recharging, and don’t rush. You might just thank yourself the next time midsummer heat rolls in. Thanks for reading this guide on how to evacuate car ac.

About
Ora Hayes is a distinguished figure in the world of DIY Thecarfixes, with over a decade of expertise in automotive diagnostics and high-performance maintenance. Her professional focus lies in merging mechanical precision with modern digital tools, fostering repair solutions that are both cost-effective and highly reliable. As the author of Thecarfixes, Ora Hayes delves into the art and science of automotive restoration, inspiring car owners and hobbyist mechanics alike.
Education
RMIT University (Melbourne, Australia) Associate Degree in Automotive Engineering — Focus on vehicle dynamics, industry-driven repair protocols, and advanced diagnostics. Gained hands-on experience with traditional mechanical tools and modern ECU remapping software.
Nottingham Trent University (United Kingdom) Bachelor’s in Mechanical Design and Automotive Engineering (Honors) — Specialized in automotive systems with a focus on blending technical engineering with everyday usability. Participated in industry projects, working with leading automotive manufacturers to gain real-world insights into vehicle longevity.
Publications and Impact
In Thecarfixes, Ora Hayes shares her insights on troubleshooting complex engine issues, material durability, and strategies for efficient garage setups. Her writing bridges the gap between professional mechanic knowledge and the home enthusiast’s needs, making it a must-read for both everyday drivers and seasoned gearheads.




