Welcome, fellow home gardeners! We demand a massive amount of utility from our reliable vehicles during the busy spring planting season. Loading the back seat with heavy bags of premium compost, loose wood mulch, and blooming nursery pots inevitably leaves a massive trail of organic debris. That fine potting soil naturally floats through the dry cabin air, eventually settling deep inside your delicate door panels and acoustic grilles. Ignoring this trapped dirt severely muffles your favorite gardening podcasts and can permanently damage the highly sensitive internal cones.
Understanding why and how to clean car speakers protects your expensive automotive sound system from abrasive organic materials. This beginner-friendly guide walks you safely through the entire process of removing stubborn yard debris without causing any devastating electrical damage. We will cover safely extracting loose construction sand, scrubbing sticky pine sap, and protecting the interior plastic trim from sun fading. Let us grab some gentle detailing tools, step away from the vegetable patch for an afternoon, and restore your vehicle audio to its original crisp clarity!
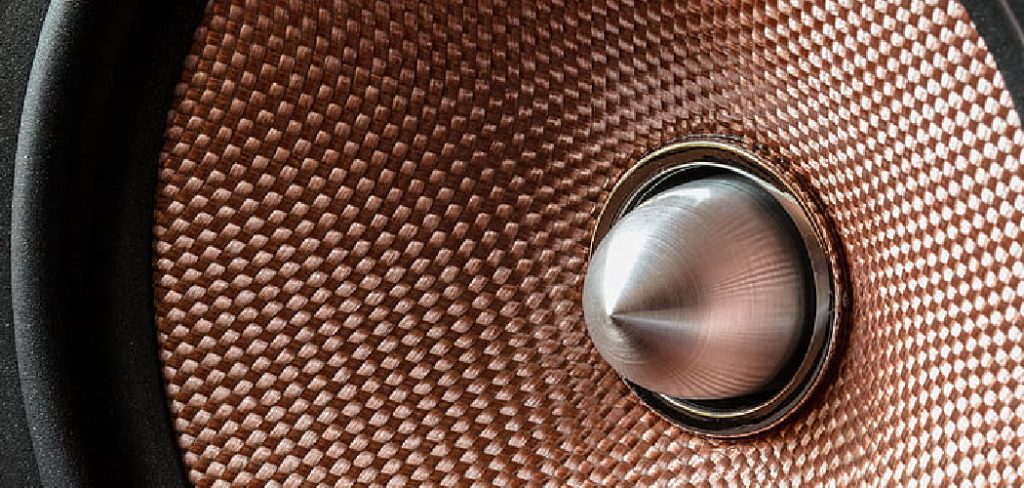
Step-by-Step Guide: How to Clean Car Speakers
Step 1: Learning how to clean car speakers Safely
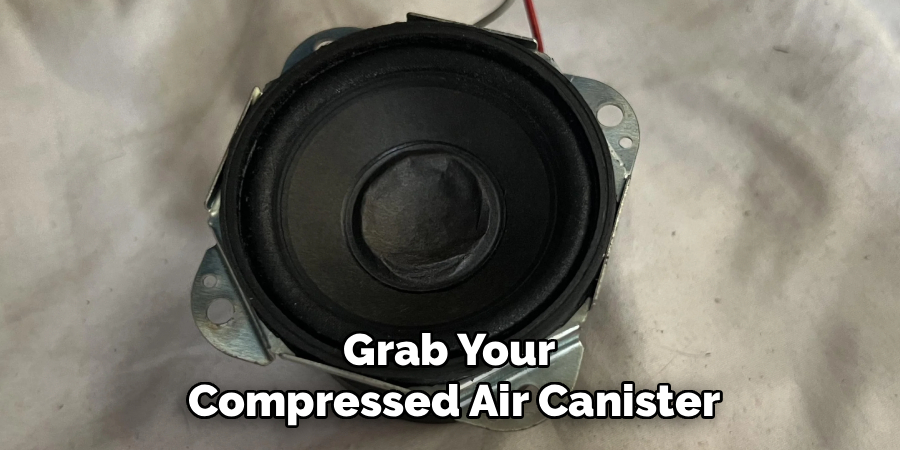
Before tackling the dusty interior of your hauling vehicle, you must gather a few specialized detailing tools to make this electrical maintenance task incredibly simple. You will need a soft-bristled makeup brush, a can of compressed air, a highly reliable vacuum equipped with a soft brush attachment, and several clean microfiber towels. Grab a small plastic bucket and fill it with warm water mixed with a single drop of mild dish soap. Staging all your detailing materials on the driveway prevents you from frantically searching for tools while dirt settles back onto the plastic. Treat this careful preparation phase exactly like organizing your heirloom seeds and hand trowels before the busy spring planting season begins.
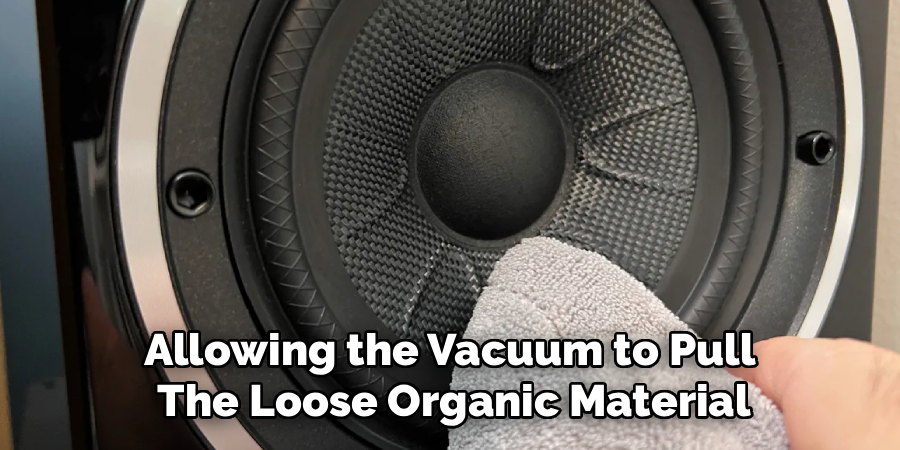
Step 2: Vacuum the Loose Potting Soil
The very first physical action requires removing the heavy layers of dry potting soil resting on the surface of your audio grilles. Attach the softest brush head to your household vacuum cleaner hose and turn the machine to its lowest suction setting. Gently glide the soft bristles over the perforated plastic or metal mesh, allowing the vacuum to pull the loose organic material out of the tiny holes safely. You must apply very little physical pressure to avoid pushing the abrasive sand particles deeper into the delicate internal acoustic cones. Taking your time during this crucial dry extraction phase acts just like carefully pulling shallow weeds before they establish deep roots in your vegetable garden.
Step 3: Brush the Delicate Audio Grilles
Even the most powerful household vacuum will leave stubborn pieces of dried mud clinging stubbornly to the tiny perforations. Take your completely dry, soft-bristled makeup brush and begin swirling it across the face of the speaker cover. The fine bristles easily penetrate the tiny plastic holes, dislodging the stuck organic matter without scratching the surrounding decorative trim. Move the brush in gentle, overlapping circular motions to agitate the trapped dirt completely free from the tight spaces. Keep your vacuum nozzle running right next to the brush to instantly catch the floating dust particles before they resettle onto your freshly detailed door panels. This meticulous technique ensures a remarkably thorough dirt extraction process.
Step 4: Blow Away Hidden Garden Dust
Sometimes tiny granules of coarse construction sand wedge themselves incredibly deep behind the protective exterior mesh layer. Grab your compressed air canister and attach the thin plastic targeting straw to the nozzle for maximum precision. Hold the canister perfectly upright and keep the straw at least three inches away from the plastic housing to avoid blasting the internal electronics with freezing liquid propellant. Administer short, controlled bursts of air to forcefully eject the deeply hidden soil particles out into the open cabin. You must keep the nearby vacuum running simultaneously to capture this newly freed debris instantly. This careful physical maneuver safely clears out the absolute deepest layers of stubborn agricultural dust.
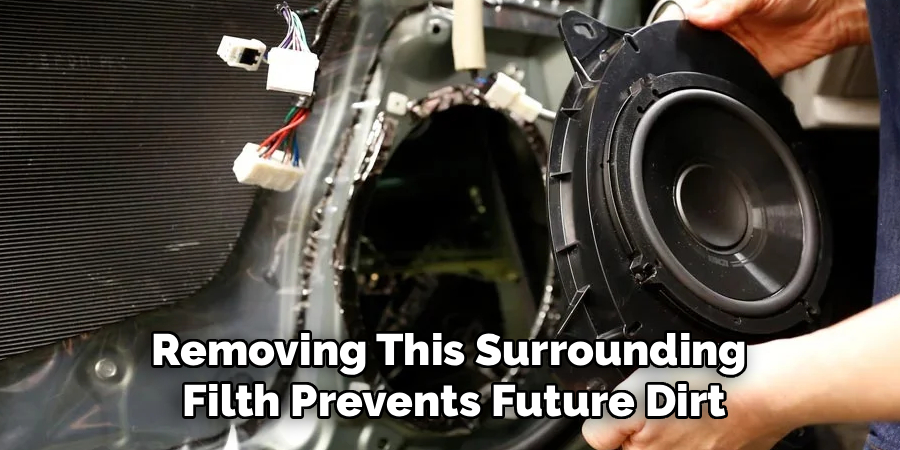
Step 5: Wipe the Surrounding Door Panels
Once the heavy organic debris is completely removed from the perforated mesh, you must address the surrounding interior plastic panels. Dip a fresh microfiber towel into your bucket of warm, lightly soapy water and wring it out until the fabric feels barely damp. You never want dripping water running down the interior door panels, as liquid can easily short out the sensitive electrical window switches. Gently wipe away any lingering muddy fingerprints or sticky tree sap from the smooth plastic trim bordering the acoustic covers. Removing this surrounding filth prevents future dirt from migrating right back into the freshly detailed audio components during your next trip to the local plant nursery.
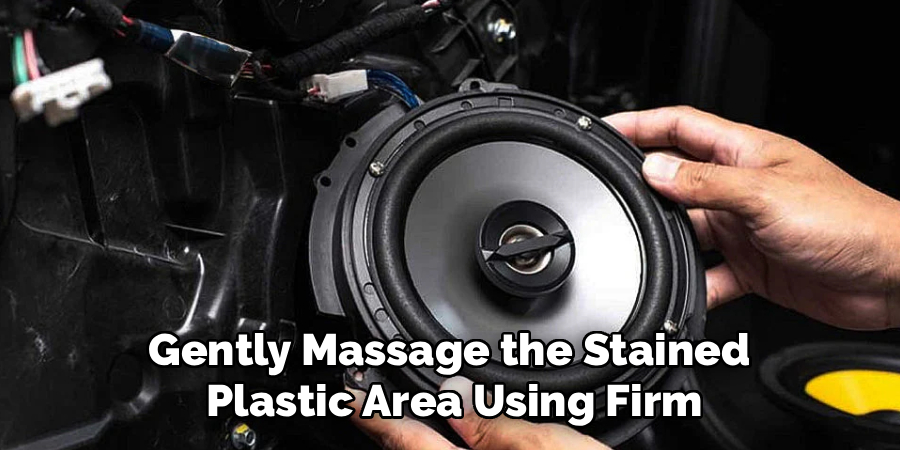
Step 6: Address Sticky Sap and Mud Stains
Hauling fresh pine mulch or sap-covered evergreen saplings often leaves highly stubborn, sticky residue near the bottom edges of your interior door frames. If the lightly damp towel fails to remove these tough organic stains, you must utilize a specialized automotive interior cleaner. Spray a tiny amount of the cleaning chemical directly onto your folded microfiber cloth rather than spraying it blindly toward the perforated audio mesh. Gently massage the stained plastic area using firm, controlled finger pressure until the sticky tree sap completely dissolves into the soft towel. Taking this highly targeted approach protects the delicate internal electronic voice coils from sustaining catastrophic damage caused by aggressive liquid chemical overspray.
Step 7: Dry and Protect the Components
The final critical phase of this driveway maintenance project involves eliminating any residual moisture and protecting the freshly exposed plastic surfaces. Take a completely dry, highly absorbent microfiber cloth and wipe down the entire door panel to ensure zero water droplets remain near the electrical wiring. You must leave the vehicle doors wide open for at least twenty minutes, allowing fresh outdoor air to circulate through the cabin and dry any hidden dampness. Once the area feels bone dry, lightly apply a premium automotive UV protectant to the solid plastic trim pieces to prevent severe sun fading. Your beautifully restored audio system now looks absolutely perfect and sounds incredibly crisp!
Frequently Asked Question
What Cleaning Liquid Is Best For Audio Grilles?
When detailing delicate interior vehicle components, less chemical intervention is always better.
- You should primarily use plain warm water mixed with a single drop of mild dish soap.
- Harsh household degreasers or bleach-based chemicals will permanently discolor your interior plastic trim.
- Never use thick, greasy conditioning sprays directly on the perforated mesh, as they attract and trap future garden dust.
- Always apply your chosen cleaning liquid to the microfiber towel first, never directly onto the electronic equipment.
Can I Use A Wet Vacuum On Audio Components?
You must never utilize a heavy-duty wet extraction machine on your delicate interior door panels.
- Wet vacuums introduce excessive amounts of moisture directly into the highly sensitive electrical voice coils.
- Trapped liquid quickly causes massive structural rust and completely ruins the internal paper acoustic cones.
- Only use completely dry, soft-bristled brush attachments connected to a standard dry household vacuum cleaner.
- Keeping the environment perfectly dry ensures your expensive automotive sound system continues functioning flawlessly for years.
How Do I Remove Trapped Sand From The Mesh?
Getting stubborn grains of sharp construction sand out of the tiny plastic perforations requires incredible patience and a gentle touch.
- A clean, dry makeup brush works wonderfully for agitating the trapped silica particles free.
- Holding a running vacuum nozzle right next to the brush instantly catches the heavy sand as it falls out.
- For severely wedged debris, gently use a wooden toothpick to dislodge the organic matter without scratching the surrounding decorative plastic trim.
Will Water Damage The Internal Sound Cones?
Yes, introducing liquid moisture to the internal acoustic components will cause catastrophic, irreversible electrical damage.
- Most factory automotive sound cones are constructed from pressed, heavily treated paper materials.
- When this delicate paper gets wet, it instantly warps, tears, and completely loses its vital structural integrity.
- This severe warping creates a terrible, permanent rattling noise whenever you play music with heavy bass frequencies.
- Always wring your microfiber towels out completely to prevent accidental liquid drips from ruining the internal hardware.
How Often Should I Detail My Vehicle Doors?
Passionate home gardeners should actively maintain their vehicle interiors throughout the busy spring and summer planting seasons.
- Giving the door panels a quick, dry brush and vacuum every two weeks prevents heavy organic soil accumulation.
- Wipe the solid plastic trim down immediately after hauling fresh, sticky pine mulch or messy liquid fertilizers.
- Consistent, light maintenance takes far less physical effort than attempting to reverse months of deeply ground-in agricultural dirt and thick mud stains.
Conclusion
Maintaining a remarkably clean vehicle interior requires the exact same patience and consistent dedication you apply to cultivating your thriving backyard vegetable patches. By taking the time to gather a soft makeup brush, operating your household vacuum carefully, and wiping away sticky tree sap, you guarantee a wonderfully pristine driving environment. You no longer have to tolerate muffled, distorted music while commuting home from the local wholesale plant nursery.
Understanding exactly how to clean car speakers transforms a potentially intimidating electrical maintenance chore into a highly manageable, incredibly simple weekend project. The noticeable improvement in your automotive sound quality serves as a fantastic, deeply comforting reward for your careful physical efforts. Empty your plastic bucket, pack your sturdy gardening gloves away, and drive confidently toward your next botanical adventure knowing your favorite gardening podcasts will sound absolutely crystal clear!
About
Ora Hayes is a distinguished figure in the world of DIY Thecarfixes, with over a decade of expertise in automotive diagnostics and high-performance maintenance. Her professional focus lies in merging mechanical precision with modern digital tools, fostering repair solutions that are both cost-effective and highly reliable. As the author of Thecarfixes, Ora Hayes delves into the art and science of automotive restoration, inspiring car owners and hobbyist mechanics alike.
Education
RMIT University (Melbourne, Australia) Associate Degree in Automotive Engineering — Focus on vehicle dynamics, industry-driven repair protocols, and advanced diagnostics. Gained hands-on experience with traditional mechanical tools and modern ECU remapping software.
Nottingham Trent University (United Kingdom) Bachelor’s in Mechanical Design and Automotive Engineering (Honors) — Specialized in automotive systems with a focus on blending technical engineering with everyday usability. Participated in industry projects, working with leading automotive manufacturers to gain real-world insights into vehicle longevity.
Publications and Impact
In Thecarfixes, Ora Hayes shares her insights on troubleshooting complex engine issues, material durability, and strategies for efficient garage setups. Her writing bridges the gap between professional mechanic knowledge and the home enthusiast’s needs, making it a must-read for both everyday drivers and seasoned gearheads.