Many drivers overlook the basic maintenance required to keep their vehicles safely connected to the pavement. A visual glance at the wheels rarely provides accurate diagnostic information. Under-inflated rubber might appear perfectly normal to the untrained eye, yet it drastically alters the physical dynamics of the chassis.
This fundamental automotive skill demands very little time but offers substantial long-term benefits. We will explore the mechanics of air expansion, the necessary tools for the job, and the precise steps required to establish an accurate baseline.
Proper maintenance often prevents premature wear and unexpected blowouts on the highway. This guide aims to equip you with the specific knowledge needed to maintain an optimal contact patch. Understanding how to check tyre pressure indicates a higher level of driver responsibility.
Why Maintaining Proper Tire Pressure Matters
Air pressure directly dictates how the rubber carcass interacts with the asphalt. When a tire is inflated correctly, its tread lies perfectly flat against the ground. This geometry maximizes the available friction needed for sudden maneuvers.
Deviating from the manufacturer’s suggested inflation rate introduces instability into the suspension system. Too much air causes the center of the tread to bulge outward. Too little air forces the outer sidewalls to collapse under the vehicle’s immense weight.
Ensuring Road Safety and Handling
A properly inflated tire responds predictably to steering inputs. If the internal pressure drops too low, the sidewalls flex excessively during sharp cornering. This dangerous flexing often creates a sluggish, wandering sensation felt directly through the steering wheel.
During a panic stop, you rely entirely on the friction generated by those four small patches of rubber. Compromised inflation limits the tire’s ability to bite into the road surface. This lack of grip could significantly extend your braking distance when you need it most.
Maximizing Fuel Economy
Rolling resistance serves as a primary antagonist to fuel efficiency. An under-inflated tire sags heavily against the pavement, forcing the engine to work much harder to maintain a cruising speed. The mechanics of this are quite straightforward.
Think of riding a bicycle with flat tires. The physical exertion required increases exponentially. Automotive engines experience this same mechanical penalty, which translates directly into wasted gasoline and frequent trips to the fuel pump.
Extending the Lifespan of Your Tires
Rubber compounds degrade rapidly when subjected to improper physical stress. Under-inflation generates excessive internal heat, which slowly breaks down the chemical bonds within the tire. This heat might eventually lead to tread separation or a catastrophic blowout.
Furthermore, improper inflation causes highly irregular wear patterns. An over-inflated tire focuses all the friction onto the narrow center strip of the tread. You might find yourself replacing tires thousands of miles ahead of schedule simply because the outer edges remain untouched while the center goes completely bald.
Understanding Your Vehicle’s Recommended PSI
Locating the correct air pressure specification occasionally confuses new vehicle owners. Many people mistakenly assume the numbers printed on the tire itself represent the target goal. This misconception often leads to dangerously over-inflated wheels.
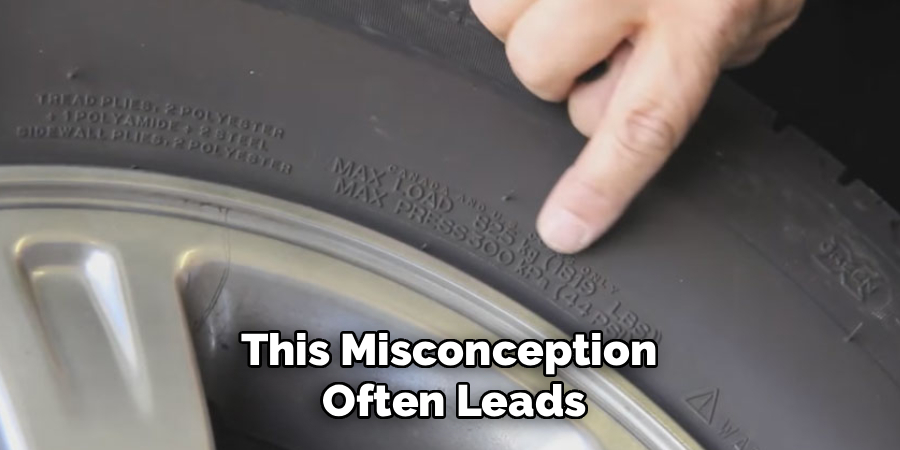
Automotive engineers spend countless hours calculating the exact pressure needed to support a specific chassis. You must defer to the vehicle manufacturer’s data rather than the tire manufacturer’s generic ratings. Finding this specialized information requires looking in a few specific locations.
Locating the Driver’s Side Door Placard
The most reliable source of truth resides right inside your vehicle. Open the driver’s side door and inspect the metal jamb for a permanent sticker. This yellow and white placard clearly lists the factory-recommended PSI for both the front and rear axles.
This sticker provides the baseline pressure for the vehicle as it left the assembly line. It assumes you are running the factory-specified wheel dimensions. If you have heavily modified your suspension or wheel size, these numbers might no longer apply perfectly.
Decoding the Owner’s Manual
Your glovebox likely contains a dense manual filled with crucial technical data. Turning to the maintenance section usually reveals comprehensive inflation charts. These charts often provide nuanced recommendations based on expected cargo weight.
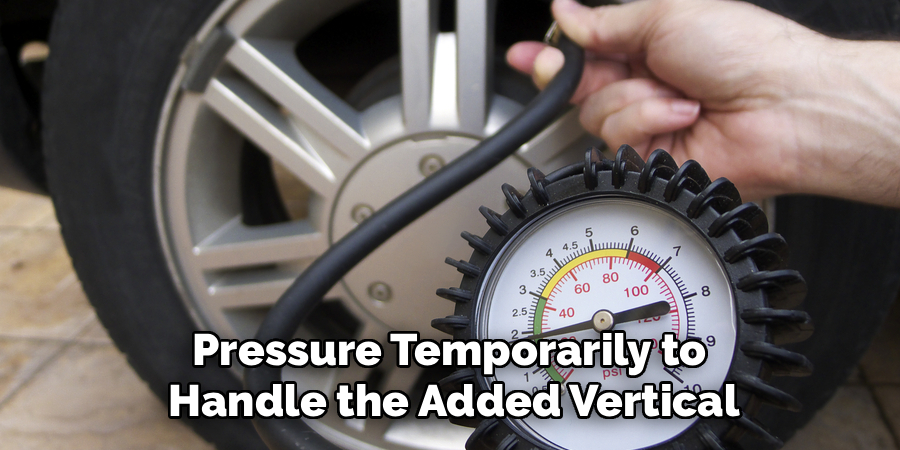
For instance, driving alone with an empty trunk requires less pressure than hauling a heavy trailer across the country. The manual might suggest increasing the rear tire pressure temporarily to handle the added vertical load.
The Danger of the Maximum PSI Rating
Inspect the sidewall of any modern tire, and you will see a prominent PSI number stamped into the rubber. This digit represents the absolute maximum pressure the tire can physically contain before risking a structural rupture. It does not suggest the ideal pressure for daily commuting.
Inflating your tires to this maximum limit creates a harsh, punishing ride. The suspension cannot absorb impacts properly because the tire acts like a solid piece of concrete. You must avoid this common error to preserve your vehicle’s ride quality.
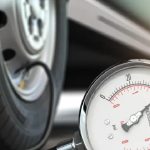
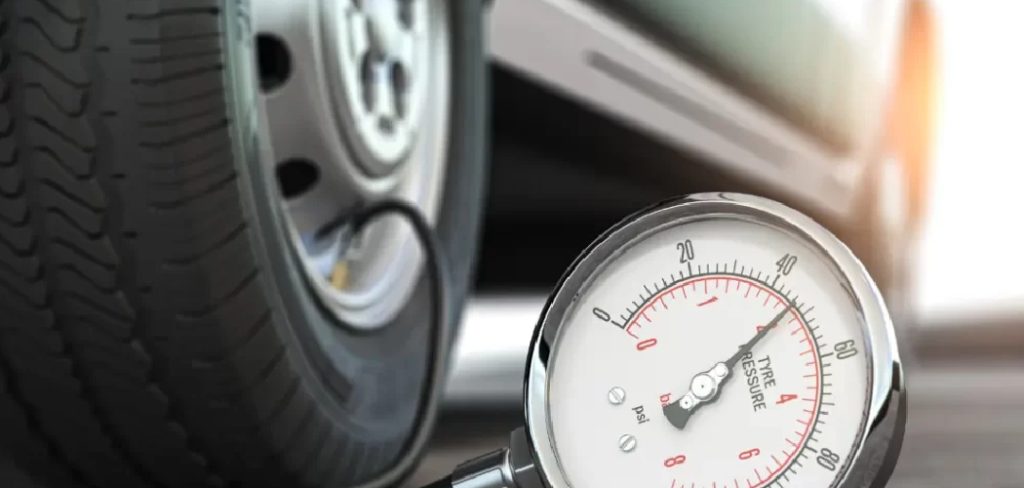
Essential Tools: Choosing the Right Pressure Gauge
You cannot measure air volume accurately by kicking the sidewall with your boot. A dedicated mechanical or digital instrument is absolutely required for this task. The automotive market offers several distinct types of gauges to suit different budgets.
Selecting a reliable tool ensures your diagnostic readings are actually useful. A cheap, malfunctioning gauge might cause you to release air when the tire is already dangerously low. Let us examine the three primary options available to consumers.
Digital Pressure Gauges
Digital instruments typically provide the most precise readings available to home mechanics. They feature an internal electronic sensor that translates air volume into a clear numerical display. The LCD screen eliminates the guesswork associated with reading tiny mechanical hash marks.
Many of these modern units include illuminated nozzles and backlit screens. This makes checking your pressure in a dark driveway or during a rainstorm significantly easier. They do require small batteries, which you must replace occasionally to maintain accuracy.
Analog Dial Gauges
Mechanical dial gauges remain a staple in professional repair shops. These instruments utilize a complex internal Bourdon tube to physically move a needle across a clock-like face. They require zero electricity, making them incredibly reliable for long-term storage in a cold trunk.
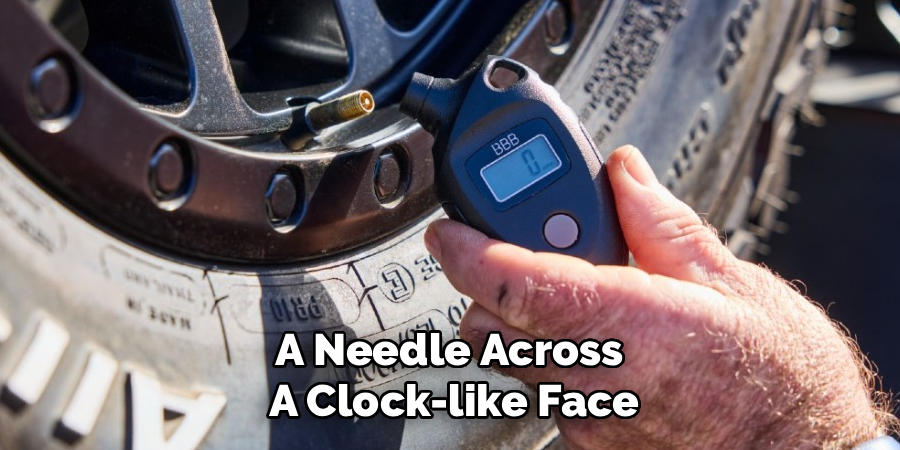
A high-quality dial gauge often features a bleeder valve button on the side of the housing. This allows you to deliberately over-inflate the tire slightly at the air pump and then bleed the pressure down to the perfect exact number.
Standard Stick (Pencil) Gauges
The traditional pencil gauge is a simple, spring-loaded metallic tube. When you press the nozzle against the valve, the escaping air pushes a numbered plastic stick out of the bottom. They are incredibly compact and completely impervious to dead batteries.
While they are highly affordable, their accuracy is sometimes questionable. The internal spring might lose tension over the years of repeated use, causing the stick to read lower than the actual pressure. They remain a decent backup option, though a digital or dial gauge is generally preferred.
Cold vs. Hot Readings: Timing is Everything
Air behaves predictably when subjected to thermal changes. Heat causes gas molecules to expand rapidly, which artificially inflates the internal pressure of a closed cylinder. This basic physics principle heavily influences when you should perform your maintenance checks.
Measuring a tire immediately after a long highway commute will yield highly inaccurate data. The friction from the road surface heats the rubber, forcing the internal PSI to spike by several points. You must control for this variable to achieve a reliable baseline.
What Constitutes a Cold Tire
Automakers strictly base their recommended PSI charts on “cold” tire readings. A tire is considered mechanically cold if the vehicle has been parked in the shade for at least three consecutive hours. The internal air temperature must match the ambient outside temperature.
If you must drive to a gas station to use their air compressor, try to keep the trip under a single mile. Driving at low, residential speeds generates minimal friction. This short distance will not heat the rubber enough to significantly distort the final gauge reading.
Adjusting for Warm Tires
Sometimes, checking a hot tire becomes unavoidable during a long road trip. If you suspect a leak halfway through your journey, you cannot realistically wait three hours on the shoulder of the highway. You must adjust your mathematical expectations accordingly.
A hot tire typically registers about three or four PSI higher than its actual cold resting state. If your door placard recommends 32 PSI, a hot reading of 36 PSI suggests the tire is likely perfectly fine. Never bleed air out of a hot tire to reach the cold target number, as this will leave you severely under-inflated the next morning.
Step-by-Step Guide on How to Check Tyre Pressure
Approaching this maintenance task requires a methodical, unhurried mindset. Rushing the process often results in poor valve seals and inaccurate measurements. Follow this exact sequence to ensure your data reflects reality.
Step 1: Gather Your Tools and Find the Target PSI
Retrieve your preferred pressure gauge from the glovebox. Take a moment to open the driver’s door and mentally note the factory-recommended PSI printed on the placard. You need this target number firmly in your mind before proceeding to the wheels.
If you know the tires are low and require filling, position your vehicle near an air compressor. Unravel the air hose completely to ensure it reaches all four corners of the car without straining.
Step 2: Remove the Valve Stem Caps
Crouch down beside the first wheel and locate the rubber valve stem protruding from the metal rim. Unscrew the small plastic or metallic dust cap covering the core. These caps prevent dirt and moisture from fouling the delicate internal spring mechanism.
Place the cap safely in your pocket immediately. Setting it on the ground almost guarantees it will roll away and disappear under the chassis. A missing cap allows road grime to enter the valve, which could eventually cause a slow, frustrating leak.
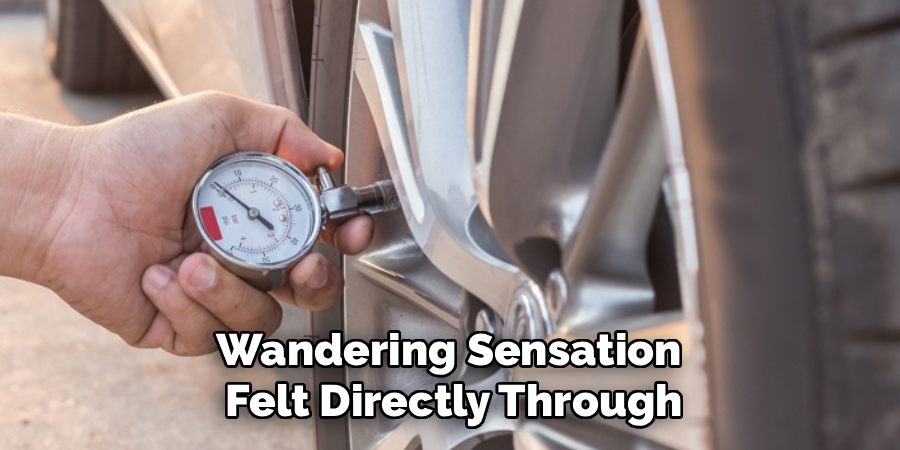
Step 3: Press the Gauge Onto the Valve Stem
Take your gauge and align the nozzle perfectly straight with the exposed metal valve. Press the instrument down firmly and decisively. A brief hissing sound is normal for a fraction of a second as the seal engages.
If the hissing continues loudly, your angle is slightly crooked. The escaping air means the gauge is not capturing the full pressure of the tire. Simply pull the tool back, realign your wrist, and press down again until the connection is completely silent.
Step 4: Read and Record the Pressure
Hold the gauge firmly against the valve for a full second. Remove the tool and look at the numerical output on the screen or the dial. Compare this specific number to the target PSI you memorized from the door placard earlier.
It is highly recommended to perform this measurement twice on each wheel. Taking a second reading confirms that your initial connection was solid and the data is reliable. Moving systematically from one wheel to the next prevents you from accidentally skipping a tire.
Step 5: Add or Release Air as Needed
If the reading falls below the factory specification, attach the air compressor hose directly to the valve. Add air in short, five-second bursts. Check the pressure frequently with your gauge to avoid overshooting the target number drastically.
Should you find the tire is over-inflated, use the small nub located on the back of most gauges. Press this nub gently against the tiny metal pin inside the valve stem to release excess air. Bleed the pressure down slowly until the gauge registers the perfect mathematical specification.
Don’t Forget the Spare Tire
Drivers routinely check their four primary wheels while completely ignoring the emergency backup hidden in the trunk. Discovering a flat tire on the highway is frustrating. Discovering that your spare tire is also completely flat constitutes a genuine emergency.
Rubber is slightly porous, meaning tires naturally lose about one PSI of pressure every month through simple osmosis. A spare tire sitting untouched in a dark trunk for three years is likely empty. You must include this hidden wheel in your maintenance routine.
Checking Space-Saver (Donut) Spares
Modern vehicles rarely include full-size spare wheels to save on weight and manufacturing costs. Instead, they rely on compact, space-saver units affectionately known as “donuts.” These highly specialized tires operate under vastly different physical constraints than standard rubber.
Because they are so narrow, they require an incredible amount of internal pressure to support the weight of a car. A standard donut spare typically demands a massive 60 PSI to function safely. Attempting to drive on a donut inflated to only 30 PSI will instantly destroy the sidewall.
Maintenance Frequency for Spares
You do not necessarily need to dig the spare out of the trunk every single month. Adding it to your checklist twice a year usually suffices. Checking it before the winter season begins and again before the intense heat of summer is a logical schedule.
If your vehicle mounts the spare underneath the rear bumper, it is fully exposed to road salt and debris. You should inspect the valve stem for severe rust or corrosion while checking the pressure. A seized valve stem renders the spare tire completely useless in a roadside emergency.
Understanding TPMS (Tire Pressure Monitoring Systems)
Modern automotive legislation requires manufacturers to install automated monitoring systems on all new passenger vehicles. These electronic sentinels constantly evaluate the rotational speed or internal pressure of the wheels. They provide a layer of technological safety that did not exist a few decades ago.
While these systems are incredibly helpful, they occasionally breed a false sense of security. Drivers often assume that a dark dashboard implies perfect mechanical health. Understanding how these sensors communicate might prevent you from relying on them too heavily.
How Dashboard Alerts Work
Direct TPMS utilizes a physical electronic sensor bolted to the back of the valve stem inside the wheel. This sensor transmits real-time pressure data to the engine control unit via radio frequency. If the pressure drops below a pre-programmed threshold, a yellow horseshoe-shaped light illuminates on the dashboard.
Indirect TPMS takes a completely different mathematical approach. It uses the anti-lock braking sensors to monitor the rotational speed of each tire. An under-inflated tire has a slightly smaller diameter, causing it to spin faster than the others, which triggers the warning light.
The Limitations of TPMS
You should view the dashboard light as a catastrophic warning rather than a maintenance tool. By the time the TPMS light actually triggers, the tire has usually lost at least twenty-five percent of its optimal air volume. Driving a vehicle with a quarter of its tire pressure missing is inherently dangerous.
The sensors themselves are also prone to electronic failure or battery depletion after several years. A broken sensor might leave you driving on a flat tire with zero warning from the dashboard. Consequently, manual checks with a physical gauge remain necessary.
Seasonal Changes and Altitude Effects
Environmental factors dictate how air behaves inside a sealed rubber container. As the weather shifts, the baseline pressure of your tires will organically fluctuate without any physical leaks present. Anticipating these atmospheric changes prevents unexpected dashboard warnings on cold mornings.
Ignoring the weather could leave you driving on severely compromised rubber. You must adjust your maintenance schedule to compensate for extreme temperature swings. Let us examine how the environment manipulates physical gas expansion.
Winter Drops and Summer Expansion
A widely accepted rule of thumb governs automotive thermodynamics. For every ten-degree drop in ambient Fahrenheit temperature, a tire will lose approximately one PSI of pressure. A sudden winter cold front could easily siphon four or five PSI from your wheels overnight.
Conversely, intense summer heat waves force the trapped air to expand rapidly. A tire filled correctly in January will likely be significantly over-inflated by July. You must manually bleed off this excess pressure to prevent accelerated center tread wear during the hotter months.
Navigating Altitude Shifts
Taking a long road trip from a coastal city up into a high mountain range introduces another variable. As your physical elevation increases, atmospheric pressure decreases. The air trapped inside your tires pushes outward with more relative force against the thinning outside air.
This phenomenon effectively increases the internal PSI of your tires as you climb the mountain pass. While this minor fluctuation rarely causes a blowout, it might slightly alter the handling dynamics of a heavily loaded SUV. It is wise to perform a quick manual check when you reach your high-altitude destination.
Conclusion
Understanding how to check tyre pressure represents a fundamental pillar of automotive ownership. This simple diagnostic task takes only a few moments but protects the integrity of your suspension and fuel economy. We have explored the dangers of thermal expansion, the necessity of cold readings, and the limitations of modern dashboard sensors.
By utilizing a high-quality gauge and referencing your driver’s side placard, you eliminate the dangerous guesswork of visual inspections. Ignoring this vital maintenance ultimately compromises your ability to stop safely in an emergency. Purchase a reliable tool, keep it accessible in your glovebox, and prioritize your connection to the road.
About
Ora Hayes is a distinguished figure in the world of DIY Thecarfixes, with over a decade of expertise in automotive diagnostics and high-performance maintenance. Her professional focus lies in merging mechanical precision with modern digital tools, fostering repair solutions that are both cost-effective and highly reliable. As the author of Thecarfixes, Ora Hayes delves into the art and science of automotive restoration, inspiring car owners and hobbyist mechanics alike.
Education
RMIT University (Melbourne, Australia) Associate Degree in Automotive Engineering — Focus on vehicle dynamics, industry-driven repair protocols, and advanced diagnostics. Gained hands-on experience with traditional mechanical tools and modern ECU remapping software.
Nottingham Trent University (United Kingdom) Bachelor’s in Mechanical Design and Automotive Engineering (Honors) — Specialized in automotive systems with a focus on blending technical engineering with everyday usability. Participated in industry projects, working with leading automotive manufacturers to gain real-world insights into vehicle longevity.
Publications and Impact
In Thecarfixes, Ora Hayes shares her insights on troubleshooting complex engine issues, material durability, and strategies for efficient garage setups. Her writing bridges the gap between professional mechanic knowledge and the home enthusiast’s needs, making it a must-read for both everyday drivers and seasoned gearheads.