

A weak car air conditioner can make warm-weather driving uncomfortable fast. Many drivers search for how to replace freon in car air conditioning systems because the vents blow warm air, the compressor cycles often, or the cooling feels weaker than it used to. In most modern vehicles, “Freon” usually means automotive refrigerant, though the exact type depends on the vehicle.
This guide explains the safe, beginner-friendly way to understand the process. You will learn how to identify the correct refrigerant, check for signs of leaks, use basic recharge tools, read pressure, and know when the job should be handled by a qualified technician.
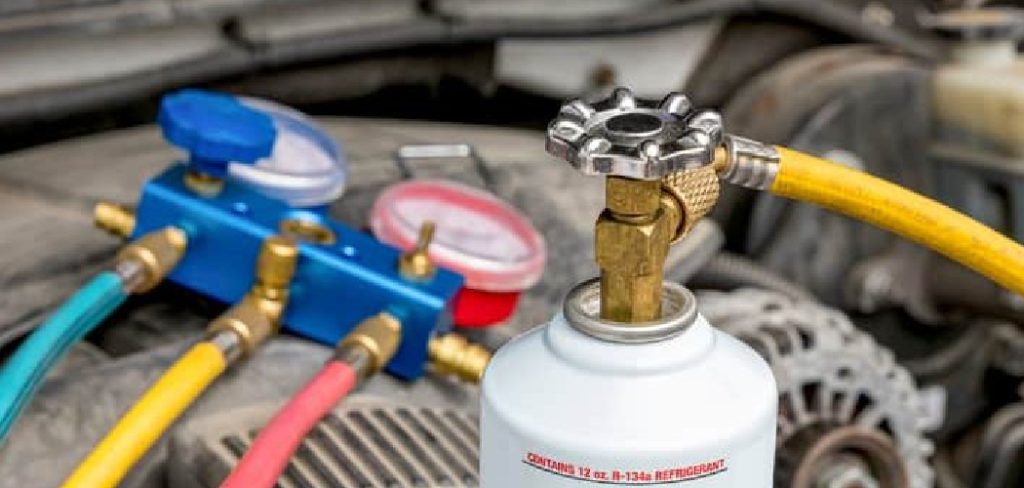
Why Replacing Freon In A Car Matters
Replacing low refrigerant can restore cooler air, improve driving comfort, and reduce strain on the air conditioning system. When refrigerant is too low, the compressor may cycle improperly or fail to cool the cabin well. However, low refrigerant often means there is a leak, so adding more without checking the system can waste money and harm the environment.
Proper handling matters because automotive refrigerants may be regulated, and some systems require special recovery equipment. A careful approach helps you avoid overcharging, using the wrong refrigerant, or ignoring a serious repair issue. It also helps protect key parts like the compressor, condenser, and evaporator.
Step-By-Step Guide To How to Replace Freon in Car
Before attempting how to replace freon in car air conditioning, understand that this is not just a “top it off and go” task. Refrigerant systems are sealed, pressurized, and sensitive to contamination. If your vehicle has a major leak, a damaged compressor, or an unknown refrigerant type, professional service is the safer and smarter choice.
Step 1: Identify The Refrigerant Type
Start by confirming the refrigerant your vehicle uses. Open the hood and look for an air conditioning label near the radiator support, underside of the hood, or engine bay. It may list R-134a, R-1234yf, or another type, along with the correct charge amount.
Do not guess based on the model year alone. Some vehicles changed refrigerant types during production, and using the wrong one can damage the system or create safety issues. If the label is missing, check the owner’s manual or ask a repair shop to confirm it before connecting any recharge equipment.

Step 2: Check For Signs Of Leaks
A low refrigerant level usually means refrigerant escaped somewhere. Before adding more, inspect the system for obvious leak signs. Look around hoses, fittings, the compressor, condenser, and service ports for oily residue, dirt buildup, or damaged parts.
You may also notice hissing sounds, poor cooling soon after a recharge, or a compressor that refuses to engage. Small leaks can be hard to see without dye, electronic leak detectors, or professional tools. If you suspect a major leak, do not keep adding refrigerant. The system should be repaired, evacuated, and recharged correctly by a qualified technician.
Step 3: Gather Proper Safety Gear
Refrigerant can cause frostbite if it contacts skin, and it can be dangerous if released in a closed space. Wear safety glasses and gloves before working near the air conditioning system. Work outside or in a well-ventilated area, and keep refrigerant containers away from heat, flames, and smoking materials.
Use only tools made for your refrigerant type. R-134a and R-1234yf fittings are different for a reason, and forcing connections can cause leaks or damage. Read the instructions on the recharge kit before starting. If anything seems unclear, stop and get help before opening the can.
Step 4: Locate The Low-Pressure Service Port
The low-pressure service port is where most basic recharge gauges connect. It is usually on the larger air conditioning line between the evaporator and compressor. The cap may be marked with an “L,” but location varies by vehicle.
Never connect a DIY recharge hose to the high-pressure port. The fittings are often different, but you should still verify the correct port before attaching anything. If you cannot identify it with confidence, check a repair manual or ask a professional. Connecting to the wrong side of the system can be dangerous because high-pressure refrigerant can escape quickly.
Step 5: Connect The Recharge Gauge Correctly
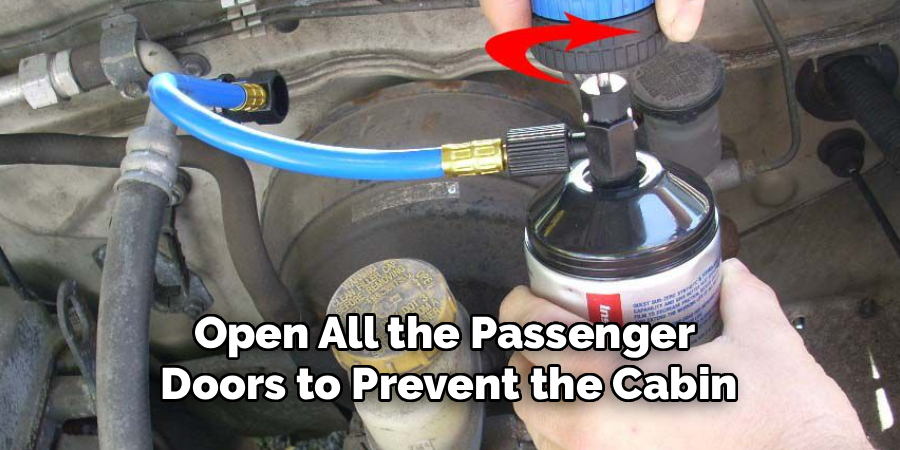
With the engine off, remove the cap from the low-pressure service port and inspect the port for dirt or damage. Attach the quick-connect fitting from the recharge hose by pulling back the collar, pressing it onto the port, and releasing it until it locks.
Do not pull the trigger or open the valve yet. Tug gently on the connector to confirm it is seated. If it leaks, hisses, or does not lock, disconnect it and inspect the fitting. A poor connection can release refrigerant and give a false pressure reading, which may lead to overcharging.
Step 6: Read The Pressure Levels
Start the engine, turn the air conditioner to the coldest setting, set the fan to high, and open the doors or windows. This helps the system run steadily while you check pressure. Read the low-side gauge and compare it with the kit instructions, outside temperature, and vehicle specifications.
Pressure readings are not a perfect diagnosis by themselves. A low reading may suggest low refrigerant, but it can also point to compressor, expansion valve, or airflow problems. A high reading may indicate overcharge, blockage, or poor condenser cooling. If the reading seems unusual, do not add refrigerant blindly.
Step 7: Add Refrigerant Slowly If Appropriate

If the system type is confirmed, no major leak is visible, and the low-side pressure suggests a small recharge is appropriate, add refrigerant slowly. Follow the product instructions exactly. Keep the can upright or positioned as directed by the kit, and add short bursts while watching the gauge.
When learning how to replace freon in car systems, patience is important. Adding too much can reduce cooling and damage the compressor. Pause often to let pressure stabilize. Check the vent temperature inside the cabin, but do not rely on cold air alone. Stop when the system reaches the proper range.
Step 8: Know When Professional Service Is Required
Some air conditioning problems should not be handled with a basic recharge kit. If the system is empty, leaking quickly, making loud compressor noises, or showing very high or very low pressure, it needs professional diagnosis. A shop can recover old refrigerant, vacuum the system, test for leaks, and recharge by exact weight.
Professional service is also recommended for R-1234yf systems, hybrid or electric vehicles, and any vehicle with unknown refrigerant history. These systems can require special oil, equipment, and safety steps. Paying for proper service can prevent expensive compressor failure and environmental harm.
Frequently Asked Questions
Can I Add Refrigerant To My Car Myself?
You can add refrigerant yourself in some cases, but only if you confirm the correct refrigerant type, use the proper tools, and follow safety instructions. DIY kits are best for small top-offs, not major leaks or empty systems. If the air conditioner stopped working suddenly or loses cooling quickly, a professional inspection is the better choice.
How Do I Know If My Car Is Low On Refrigerant?
Common signs include warm air from the vents, weak cooling at idle, frequent compressor cycling, or oily residue near air conditioning fittings. However, these symptoms can also come from electrical faults, cooling fan problems, compressor issues, or blend door trouble. Pressure readings and leak checks help narrow the cause, but a full diagnosis may require professional equipment.
What Happens If I Overcharge The AC System?

Overcharging can make the air conditioner cool poorly and can raise system pressure beyond safe levels. This may strain the compressor, damage seals, or trigger pressure switches that shut the system down. More refrigerant does not mean colder air. The best charge is the amount specified by the vehicle manufacturer, usually measured by weight.
Is Freon The Same As Refrigerant?
“Freon” is often used as a common word for automotive refrigerant, but it is technically a brand name. Your vehicle may use R-134a, R-1234yf, or another approved refrigerant. The exact type matters because each refrigerant has different fittings, pressure behavior, environmental rules, and service requirements. Always check the vehicle label before adding anything.
Should I Fix A Leak Before Recharging The System?
Yes, a leak should be repaired before a proper recharge. Adding refrigerant to a leaking system is usually temporary and may release refrigerant into the atmosphere. Small leaks may take time to find, while large leaks can empty the system fast. A repair shop can locate leaks, replace damaged parts, vacuum the system, and recharge it accurately.
Conclusion
Replacing refrigerant in a car requires more care than many drivers expect. You need to confirm the refrigerant type, inspect for leaks, use safety gear, find the correct service port, connect the gauge properly, read pressure carefully, and add refrigerant only when it is appropriate.
If the system is empty, leaking badly, or showing strange pressure readings, do not guess. A qualified technician can protect your vehicle, your safety, and the environment. If you want to learn how to replace freon in car air conditioning systems, start with diagnosis first and treat refrigerant handling with the respect it deserves.

About
Ora Hayes is a distinguished figure in the world of DIY Thecarfixes, with over a decade of expertise in automotive diagnostics and high-performance maintenance. Her professional focus lies in merging mechanical precision with modern digital tools, fostering repair solutions that are both cost-effective and highly reliable. As the author of Thecarfixes, Ora Hayes delves into the art and science of automotive restoration, inspiring car owners and hobbyist mechanics alike.
Education
RMIT University (Melbourne, Australia) Associate Degree in Automotive Engineering — Focus on vehicle dynamics, industry-driven repair protocols, and advanced diagnostics. Gained hands-on experience with traditional mechanical tools and modern ECU remapping software.
Nottingham Trent University (United Kingdom) Bachelor’s in Mechanical Design and Automotive Engineering (Honors) — Specialized in automotive systems with a focus on blending technical engineering with everyday usability. Participated in industry projects, working with leading automotive manufacturers to gain real-world insights into vehicle longevity.
Publications and Impact
In Thecarfixes, Ora Hayes shares her insights on troubleshooting complex engine issues, material durability, and strategies for efficient garage setups. Her writing bridges the gap between professional mechanic knowledge and the home enthusiast’s needs, making it a must-read for both everyday drivers and seasoned gearheads.




