Welcome, fellow home gardeners! We spend countless hours carefully pruning our prized rose bushes and protecting our delicate vegetables from harsh summer weather. Yet, we often completely overlook the heavy physical toll our daily landscaping tasks take on our trusted hauling vehicles. Loading heavy wooden trellises, dragging metal wheelbarrows past the fenders, and tossing thorny branches into the trunk frequently leave ugly white marks on your beautiful automotive paint.
If you are wondering exactly how to polish scratch out of car, you have found the perfect beginner-friendly resource. You do not need expensive pneumatic tools or a professional auto body shop to restore that original glossy shine. This friendly guide walks you safely through the entire exterior restoration process using incredibly simple hand polishing techniques. We will cover assessing the physical damage, applying the correct abrasive liquid compounds, and sealing the freshly exposed paint against harsh weather. Let us put down the heavy gardening shears and erase those frustrating driveway accidents today!
Why Fixing Your Vehicle Paint Matters
Just as an open wound on an apple tree invites harmful pests and rot, a deep gouge in your vehicle exterior invites highly destructive rust. Your automotive paint consists of several delicate layers designed specifically to protect the heavy metal frame underneath. When a rogue shovel handle scrapes past your passenger door, it usually tears directly through the clear protective topcoat. Leaving this vulnerable area completely exposed to intense summer sunlight and heavy spring rainstorms allows aggressive oxidation to take hold rapidly.
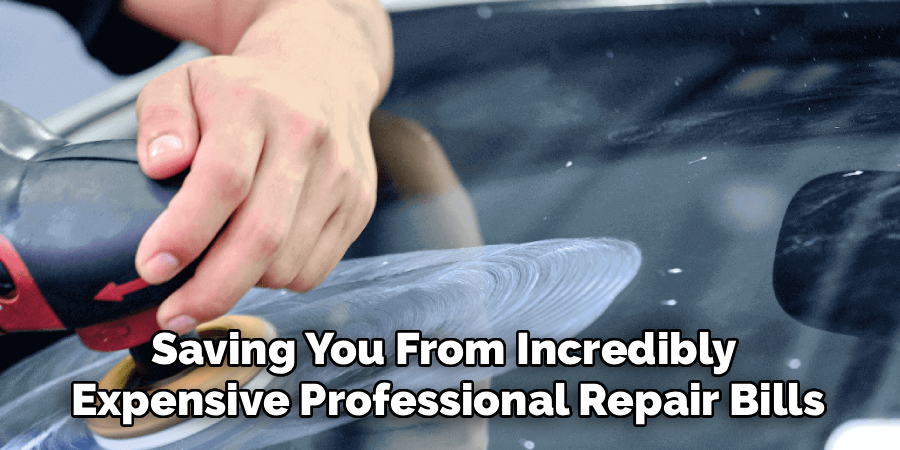
Addressing these minor cosmetic blemishes early prevents massive structural damage later, saving you from incredibly expensive professional repair bills. Maintaining your reliable gardening truck ensures it remains perfectly safe and fully capable of hauling your heavy bags of organic compost for many upcoming planting seasons. Taking immense pride in your hauling vehicle reflects the exact same unwavering dedication you apply to your thriving backyard vegetable patches.
Step-by-Step Guide: How to Polish Scratch Out of Car
Step 1: Assess the Paint Damage Carefully
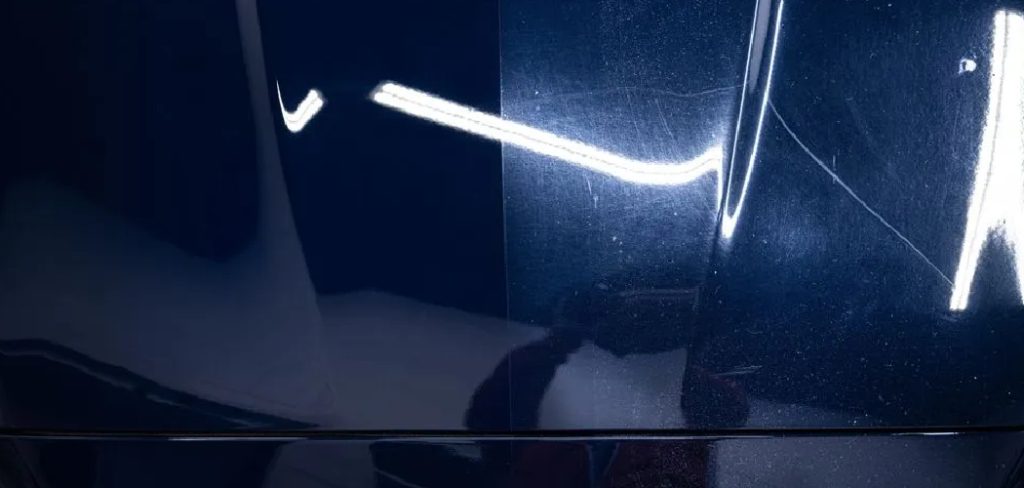
Before applying any harsh chemical compounds to your vehicle, you must accurately evaluate the exact severity of the physical damage. Treat this diagnostic phase exactly like inspecting your tomato plants for early signs of fungal blight. Gently run your bare fingernail completely perpendicular across the visible white mark on the door panel. If your nail glides smoothly over the surface without catching, the blemish resides entirely within the uppermost clear coat layer. This shallow damage remains incredibly easy to fix using simple hand techniques. However, if your nail physically catches inside a deep groove, the damage has penetrated the colored base paint, requiring professional touch-up liquids.
Step 2: Wash the Affected Area Thoroughly
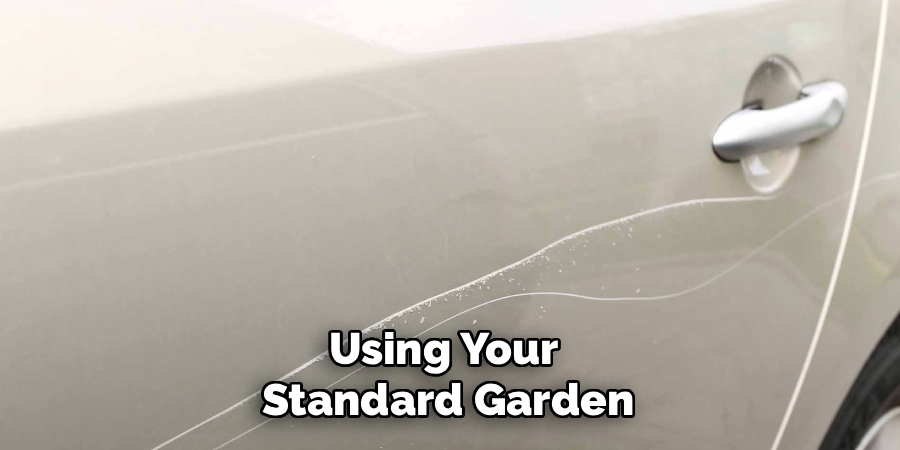
You must thoroughly clean the damaged metal panel before attempting any aggressive restorative friction work. Dip a fresh microfiber towel into a plastic bucket filled with warm water and premium automotive soap. Vigorously wash the entire fender to remove all abrasive dirt, sticky tree sap, and loose road sand. Removing this invisible surface debris prevents you from accidentally grinding sharp microscopic particles directly into the soft clear coat. Rinse the soapy residue away using your standard garden hose and dry the metal completely with a fresh towel. Starting with a perfectly clean canvas ensures your liquid abrasive compounds work at maximum efficiency.
Step 3: Tape Off the Surrounding Trim
Protecting your delicate plastic trim pieces remains absolutely critical when performing any aggressive exterior restoration work on your driveway. Take a standard roll of blue automotive painter’s tape and carefully mask off any nearby rubber weather stripping or textured black plastic panels. Applying this sticky barrier acts exactly like laying down protective cardboard weed mats before pouring fresh wood mulch in your garden beds. If your abrasive liquid compound accidentally touches the porous black plastic trim, it will leave a permanent, chalky white stain that proves incredibly difficult to remove later. Taking your time during this crucial masking phase guarantees a wonderfully clean final result.
Step 4: Apply the Liquid Restorative Compound
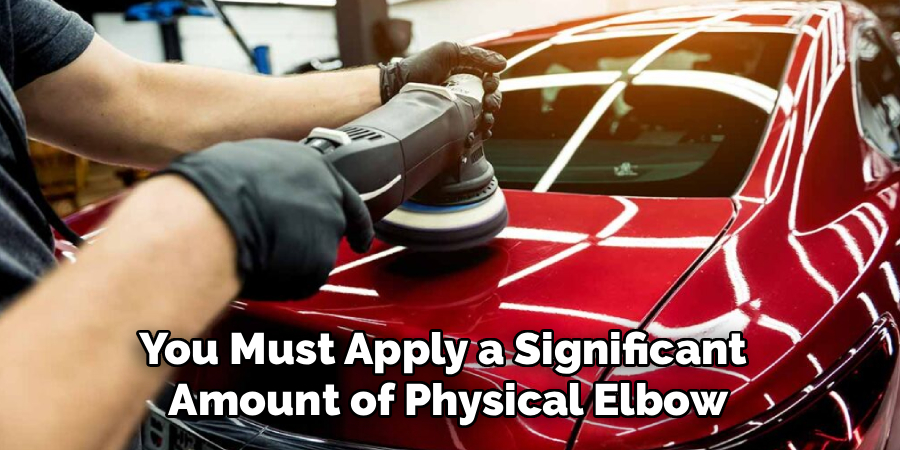
Creating the perfect restorative finish requires applying a specialized liquid abrasive compound designed to gently level the damaged clear coat. Purchase a high-quality rubbing compound from your local automotive parts store. Shake the plastic bottle vigorously to mix the chemical ingredients, then squeeze a small dime-sized drop directly onto a clean foam applicator pad. Press the foam pad firmly against the damaged paint and begin rubbing the liquid aggressively using tight, overlapping circular motions. You must apply a significant amount of physical elbow grease to cut through the thick layer of rigid automotive clear coat effectively.
Step 5: Master scratch out of car Safely
Mastering exactly how to polish scratch out of car safely requires immense patience and consistent physical pressure. Work systematically from one side of the blemish to the other, ensuring you treat every single square inch of the damaged surface equally. Spend at least two solid minutes rubbing the chemical compound into the paint before checking your visual progress. As you work the liquid into the clear coat, it will slowly begin turning slightly transparent and powdery. This visual change indicates the microscopic abrasives are actively breaking down the jagged edges of the clear coat groove. Maintain your steady circular rhythm until the harsh white line completely disappears.
Step 6: Wipe Away the Chalky Residue
After scrubbing the damaged surface extensively with your foam pad, you must wipe the chemical paste away to inspect your hard work. Grab a fresh, entirely clean microfiber towel and gently wipe the hazy white residue off the metal door panel. Inspect the freshly leveled surface carefully under the bright natural sunlight illuminating your driveway. The damaged area should look dramatically smoother, with the harsh white line entirely vanished from the colorful base paint. If you still notice a faint shadow of the original blemish, simply apply another small drop of liquid compound and repeat the aggressive scrubbing process until you achieve absolute visual perfection.
Step 7: Apply a Protective Carnauba Wax
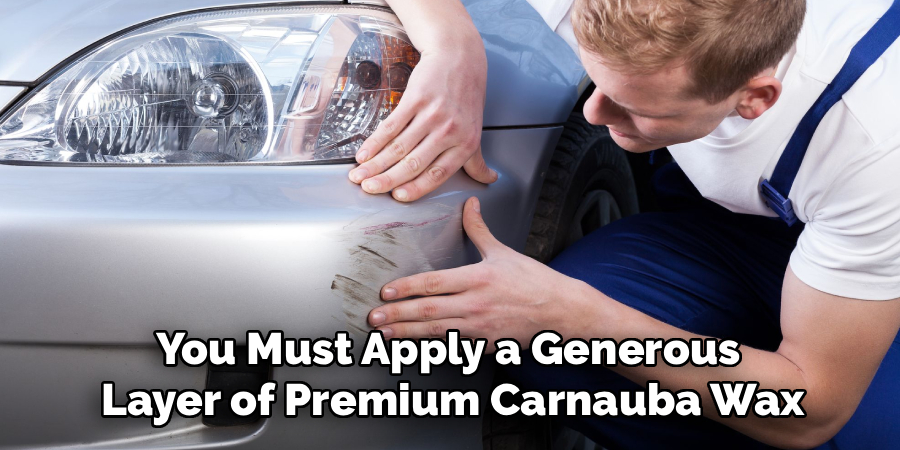
The final critical phase of this driveway maintenance project involves protecting the freshly leveled clear coat from future environmental damage. The aggressive liquid compound removed a microscopic layer of your protective topcoat, leaving that specific area slightly vulnerable to intense ultraviolet radiation. You must apply a generous layer of premium carnauba wax to seal the exposed pores of the automotive paint. Squeeze a small dollop of liquid wax onto a clean applicator pad and spread it thinly over the entire metal panel. This invisible chemical barrier acts exactly like a heavy layer of organic straw mulch, protecting the delicate material underneath from harsh natural elements.
Step 8: Buff the Surface to a Brilliant Shine
Allow the protective liquid wax to dry completely until it forms a hazy, opaque crust across your vehicle door panel. This drying phase usually takes roughly ten minutes, providing the perfect opportunity to sweep up any loose autumn leaves hiding around your driveway. Once the wax cures, grab your softest, thickest microfiber towel and begin buffing the hazy residue away using gentle, sweeping motions. As you remove the dried crust, a spectacularly deep, glossy shine will immediately reveal itself underneath. The previously damaged metal panel will perfectly match the surrounding factory paint, completely erasing any visual evidence of your unfortunate wheelbarrow accident.
Frequently Asked Question
Can I Use Toothpaste To Remove Paint Blemishes?
- Yes, standard white toothpaste serves as a highly accessible alternative to expensive commercial rubbing compounds.
- Toothpaste contains mild silica abrasives designed to remove tough plaque from your teeth without scratching delicate enamel.
- These exact same microscopic abrasives work wonderfully on shallow clear coat damage when applied with a damp cloth and heavy pressure.
- Avoid using modern gel-based toothpastes, as they completely lack the necessary gritty texture to cut through heavy automotive topcoats effectively.
- Always finish the toothpaste method by applying a dedicated automotive wax to protect your hard work.
How Do I Know If The Damage Is Too Deep?
- The fingernail test remains the absolute best diagnostic tool for evaluating automotive paint damage right in your driveway.
- Gently slide your bare fingernail completely perpendicular across the visible white line on your vehicle door.
- If your nail physically catches inside a deep, jagged groove, the object has penetrated far beyond the clear topcoat.
- Deep gouges that expose the raw gray metal or white plastic primer require professional touch-up paint rather than simple hand polishing.
- Attempting to aggressively polish a deep gouge will only destroy the surrounding healthy clear coat, making the visual blemish significantly worse.
Do I Need Expensive Professional Power Tools?
- You absolutely do not need expensive electric dual-action buffers or specialized pneumatic polishing wheels to achieve fantastic visual results.
- A standard foam applicator pad and heavy physical elbow grease will easily cut through most moderate cases of clear coat damage.
- Operating powerful rotary tools requires extensive professional training and extreme caution.
- Spinning a dry buffing pad too aggressively will generate massive thermal heat, instantly melting the automotive paint straight off the metal panel.
- For most casual DIY enthusiasts and busy home gardeners, the manual hand-polishing method remains the absolute safest and most reliable approach.
Will The Blemish Return After Several Car Washes?
- The longevity of your restoration depends entirely on the specific chemical method you utilized during the physical repair process.
- True abrasive rubbing compounds physically level the jagged edges of the clear coat, meaning the repair remains entirely permanent.
- However, many cheap commercial products simply fill the deep groove with temporary synthetic silicone glazes that hide the damage artificially.
- These temporary filler glazes will eventually wash away after several trips through a high-pressure commercial car wash tunnel.
- Always purchase true abrasive leveling compounds to guarantee your hard work lasts through countless rainy seasons.
How Often Should I Wax My Hauling Vehicle?
- Applying a protective layer of premium carnauba wax acts like a vital greenhouse shield for your expensive automotive paint.
- Industry experts strongly recommend waxing your daily driving vehicle exactly once every three to four months.
- Parking your heavy gardening truck under a shaded carport drastically reduces daily solar damage and naturally extends the lifespan of the wax.
- If rainwater no longer beads up tightly on the metal hood during a heavy storm, the protective wax barrier has completely failed.
- Consistent waxing prevents aggressive environmental oxidation and makes washing muddy soil off your vehicle incredibly easy.
Conclusion
Maintaining the reliable utility vehicle you use to transport heavy gardening supplies requires the exact same patience and dedication you apply to your thriving backyard vegetable patches. By taking the time to wash the metal panels, apply a specialized abrasive compound, and seal the exposed pores with premium wax, you guarantee a remarkably beautiful driving experience. You no longer have to stare angrily at that terrible white scrape caused by a careless mistake with a heavy metal wheelbarrow last spring.
Understanding exactly how to polish scratch out of car transforms a highly stressful automotive disaster into an incredibly satisfying, highly manageable weekend maintenance project. The noticeable improvement in your vehicle’s exterior appearance serves as a fantastic, deeply comforting reward for your careful physical efforts. Wash the thick abrasive compound off your hands, pack your sturdy gardening tools safely into the truck bed, and drive confidently toward your next beautiful botanical adventure knowing your vehicle looks absolutely flawless!
About
Ora Hayes is a distinguished figure in the world of DIY Thecarfixes, with over a decade of expertise in automotive diagnostics and high-performance maintenance. Her professional focus lies in merging mechanical precision with modern digital tools, fostering repair solutions that are both cost-effective and highly reliable. As the author of Thecarfixes, Ora Hayes delves into the art and science of automotive restoration, inspiring car owners and hobbyist mechanics alike.
Education
RMIT University (Melbourne, Australia) Associate Degree in Automotive Engineering — Focus on vehicle dynamics, industry-driven repair protocols, and advanced diagnostics. Gained hands-on experience with traditional mechanical tools and modern ECU remapping software.
Nottingham Trent University (United Kingdom) Bachelor’s in Mechanical Design and Automotive Engineering (Honors) — Specialized in automotive systems with a focus on blending technical engineering with everyday usability. Participated in industry projects, working with leading automotive manufacturers to gain real-world insights into vehicle longevity.
Publications and Impact
In Thecarfixes, Ora Hayes shares her insights on troubleshooting complex engine issues, material durability, and strategies for efficient garage setups. Her writing bridges the gap between professional mechanic knowledge and the home enthusiast’s needs, making it a must-read for both everyday drivers and seasoned gearheads.