You plug in your phone charger before a long drive, only to realize your battery is still draining. A dead car cigarette lighter—now more commonly known as a 12V accessory socket—is an incredibly frustrating issue.
We rely on these small ports to power dash cams, GPS units, tire inflators, and mobile devices. When they fail, you lose access to vital tools on the road. Fortunately, fixing a non-working 12V socket is usually a straightforward process that you can handle right in your driveway.
This guide on how to fix a car cigarette lighter will walk you through everything you need to know to get your power socket working again.
What Causes a Car Cigarette Lighter to Stop Working?
Before you start taking things apart, it helps to understand why these units fail. Most issues fall into three main categories: electrical, physical, or mechanical.
A blown fuse ranks as the number one culprit. When you plug in a device that draws too much power, or if a charger shorts out, the fuse blows to protect the rest of the car’s electrical system.
Debris inside the socket causes another common problem. Coins, paperclips, dirt, and lint frequently fall into the open socket. Metal objects create a direct short circuit, instantly blowing the fuse, while dirt blocks the electrical contacts.
Finally, you might face loose wiring or a worn-out socket. Years of pushing and pulling chargers can loosen the electrical connectors behind the dashboard or physically wear down the metal contacts inside the barrel.
What Will You Need?
You do not need a professional mechanic’s garage to fix this issue. Gather the following basic tools before you begin:
- A flashlight or headlamp
- Non-conductive tweezers or a wooden toothpick
- A digital multimeter or a 12V test light
- A fuse puller or needle-nose pliers
- Replacement fuses (check your manual for the correct type and amperage)
- Screwdrivers (Phillips and flathead) for accessing the wiring
- A replacement 12V socket assembly (if the current one is damaged beyond repair)
10 Easy Steps on How to Fix a Car Cigarette Lighter
Follow these detailed steps to diagnose and resolve your socket issue safely.
Step 1: Diagnose the Exact Problem
Start by confirming the problem actually lies with the socket and not your accessory. Try plugging your phone charger into another vehicle to see if it works. Alternatively, plug a different, known-to-be-working accessory into your car’s socket. If the new device powers on, your socket works fine, and your original charger is the issue. If multiple devices fail to turn on, you can confidently conclude that the socket itself needs attention.

Step 2: Check for Debris or Foreign Objects
Turn off your car’s engine and remove the keys from the ignition. Take your flashlight and look directly down into the barrel of the cigarette lighter. You are looking for anything that does not belong there, such as pennies, foil wrappers, or heavy dust buildup. If you spot a non-metal obstruction like lint, gently scoop it out using a wooden toothpick. If a metal object like a coin is lodged at the bottom, carefully extract it using non-conductive tools to avoid sparking, even with the car turned off.
Step 3: Locate the Fuse Box
Since blown fuses cause most failures, finding the fuse box is your next priority. Most vehicles have two fuse boxes: one under the hood and one inside the cabin. The fuse for the 12V accessory socket almost always lives in the interior fuse panel. Check your vehicle’s owner manual to find the exact location. Typically, you will find it under the dashboard on the driver’s side, behind the glove box, or hidden behind a plastic panel on the side of the center console.
Step 4: Inspect the Lighter Fuse
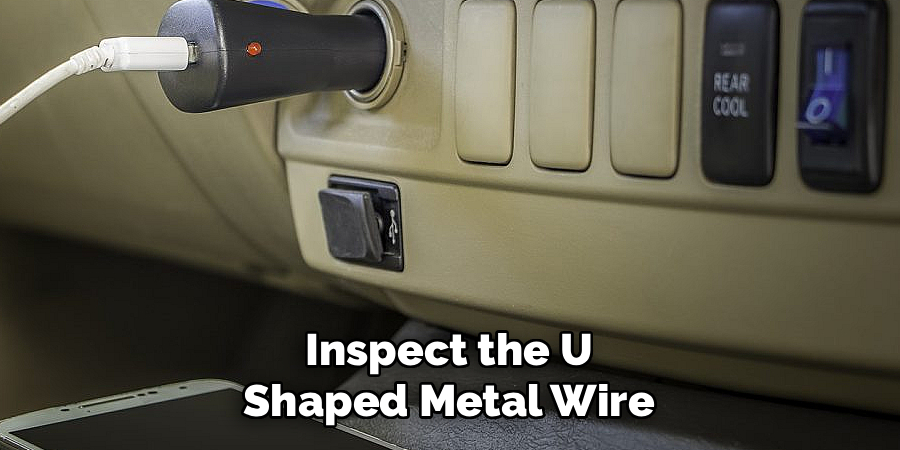
Once you locate the interior fuse panel, look at the diagram printed on the back of the cover. Search for labels like “CIG,” “PWR OUTLET,” “12V,” or “ACC.” Locate the corresponding fuse on the actual panel. Use your fuse puller or needle-nose pliers to gently pull the fuse straight out. Hold the small plastic fuse up to the light and inspect the U-shaped metal wire inside. If the metal band is broken, melted, or blackened, the fuse is blown and must be replaced.
Step 5: Replace a Blown Fuse
If the fuse is blown, you need to insert a new one of the same amperage. Most cigarette lighter fuses are 15 or 20 amps, usually indicated by blue or yellow plastic. Push the new fuse firmly into the empty slot. Turn your car’s ignition to the “Accessory” position and test the socket with your phone charger. If the charger lights up, you have successfully fixed the issue. If the new fuse blows immediately upon plugging in a device, you have a short circuit in the wiring or the socket itself.
Step 6: Test the Socket for Power
If the fuse is perfectly fine, you need to check if power is actually reaching the socket. Grab your digital multimeter and set it to measure DC voltage (the setting with a straight line above a V). Turn the car key to the accessory position. Place the black probe against the metal inside wall of the socket (ground) and touch the red probe to the metal nub at the very bottom center (power). If the multimeter reads roughly 12 volts, the socket has power, but the internal contacts might be too worn out to grip your charger properly.
Step 7: Remove the Center Console or Trim panel
If you have no power at the socket despite a good fuse, or if the physical barrel is rusted and broken, you must access the wiring behind it. Consult a repair manual or online guide specific to your vehicle’s make and model to learn how to remove the trim. Usually, this involves using a flathead screwdriver or plastic pry tool to pop off the decorative trim ring around the gear shifter or radio. Remove any retaining screws holding the center console panels in place.
Step 8: Check the Wiring Connections
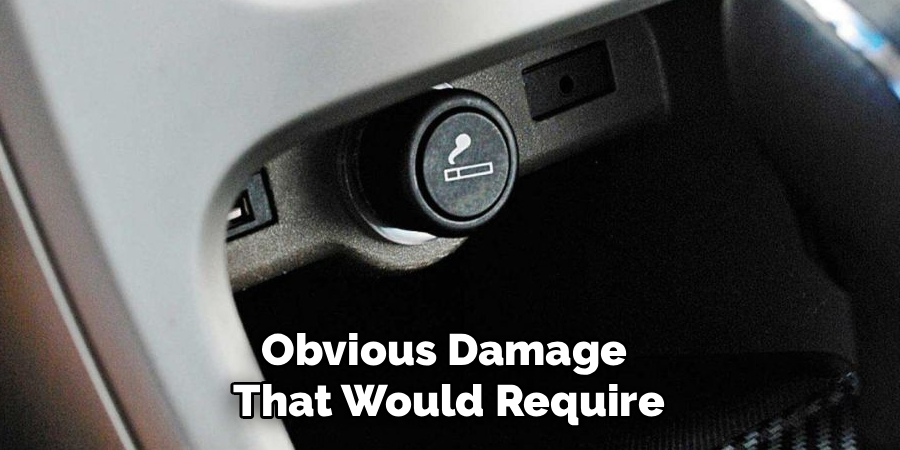
With the trim panel pulled back, look at the back of the cigarette lighter assembly. You should see two wires connected to it: a power wire and a ground wire. Sometimes, vibrations from driving cause these slip-on connectors to wiggle loose. Check to see if either wire has disconnected. If a wire is dangling, simply slide the metal spade connector back onto the terminal on the back of the socket. Also, inspect the wires for any melted insulation or obvious damage that would require splicing in new wire.
Step 9: Replace the Socket Assembly
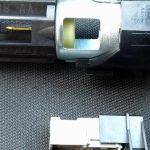
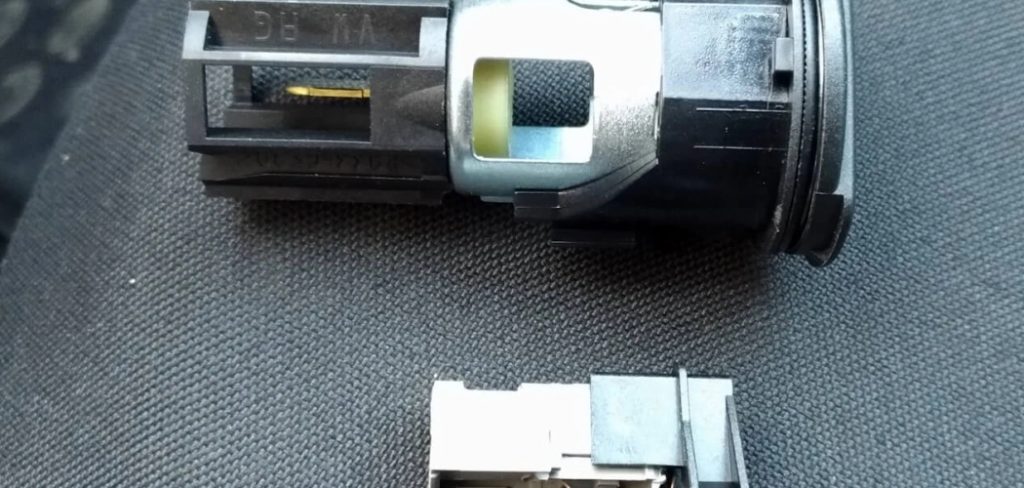
If the wiring is secure and the fuse is good, but you still lack power, the internal mechanism of the socket is broken. You will need to install a completely new 12V socket. Disconnect the two wires from the back of the old unit. Depending on the car, the socket will either twist out, pull out after releasing a retaining clip, or require a special extraction tool. Once the old barrel is out, slide the new replacement socket into the hole, lock it into place, and attach the power and ground wires to the new terminals.
Step 10: Reassemble and Perform a Final Test
Before putting all the plastic trim panels and screws back into place, test your work. Turn the ignition key to the accessory position and plug in your reliable device. Verify that it charges steadily. Once you confirm the repair is successful, carefully push the wiring harness back into the dashboard cavity. Snap the center console trim panels back into their original clips and tighten any screws you removed. Give the area a quick wipe down, and enjoy your newly restored power source.

5 Things You Should Avoid
- Never use a higher-amp fuse. If a 15-amp fuse keeps blowing, replacing it with a 20-amp or 30-amp fuse is dangerous. This allows more electricity to flow than the wires can handle, causing them to melt and potentially start an electrical fire.
- Never dig in the socket with metal tools while the battery is connected. Sticking a metal screwdriver into the socket to scrape out dirt will instantly create a short circuit and blow the fuse.
- Avoid forcing oversized plugs. Forcing cheap, poorly made, or oversized adapters into the port can bend the internal metal retaining clips, ruining the socket.
- Do not ignore burning smells. If you smell melting plastic after plugging something in, unplug it immediately and turn off the car.
- Never splice wires with tape alone. If you find damaged wiring during your inspection, use proper crimp connectors or solder and heat-shrink tubing. Electrical tape will eventually unwrap in a hot car interior.
Conclusion
How to fix a car cigarette lighter requires a trip to the dealership.
By understanding how the circuit works, you can easily troubleshoot the issue yourself. Always start with the simplest solution first—checking for loose change in the barrel and inspecting the fuse box. Keeping the socket clean and using high-quality charging adapters will extend the life of the port significantly.
If you follow these maintenance tips and respect the electrical limits of your 12V socket, you will always have reliable power for your essential devices on the road.
About
Ora Hayes is a distinguished figure in the world of DIY Thecarfixes, with over a decade of expertise in automotive diagnostics and high-performance maintenance. Her professional focus lies in merging mechanical precision with modern digital tools, fostering repair solutions that are both cost-effective and highly reliable. As the author of Thecarfixes, Ora Hayes delves into the art and science of automotive restoration, inspiring car owners and hobbyist mechanics alike.
Education
RMIT University (Melbourne, Australia) Associate Degree in Automotive Engineering — Focus on vehicle dynamics, industry-driven repair protocols, and advanced diagnostics. Gained hands-on experience with traditional mechanical tools and modern ECU remapping software.
Nottingham Trent University (United Kingdom) Bachelor’s in Mechanical Design and Automotive Engineering (Honors) — Specialized in automotive systems with a focus on blending technical engineering with everyday usability. Participated in industry projects, working with leading automotive manufacturers to gain real-world insights into vehicle longevity.
Publications and Impact
In Thecarfixes, Ora Hayes shares her insights on troubleshooting complex engine issues, material durability, and strategies for efficient garage setups. Her writing bridges the gap between professional mechanic knowledge and the home enthusiast’s needs, making it a must-read for both everyday drivers and seasoned gearheads.