

Let’s be honest, few drivers give their car battery much thought—at least, not until the engine hesitates, or worse, falls silent on a chilly morning. Yet, a little foresight (and some basic know-how) could spare you from that awkward phone call or the scramble for jumper cables. The battery isn’t so much the “heart” of your car as a silent choreographer behind the scenes, keeping everything alive, from your headlights to the last note on your radio.
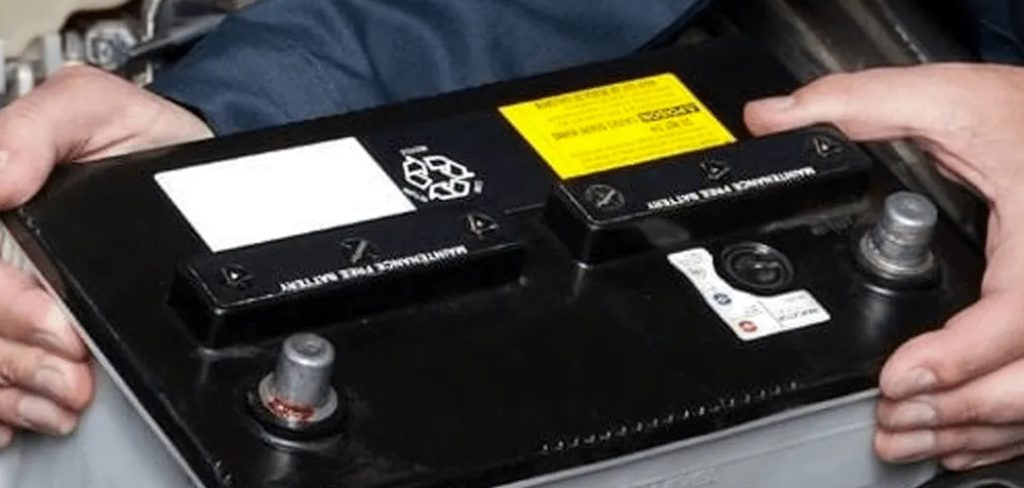
But here’s something most folks don’t realize: tracking your battery’s specs, age, and condition isn’t particularly difficult, and it’s absolutely worth the modest investment of attention. Wait for a total failure and the hassle (and cost) ramps up fast. Checking once in a while? That can help you spot problems while they’re just whispers, not emergencies.
Crack the mystery of your battery’s labeling and learn how to spot trouble early, and you’re no longer at the mercy of warning lights or roadside assistance. Instead, you become the kind of driver who manages their own vehicle’s reliability—or at least, stands to save a little on repair bills. By the end of this guide, my aim is for you to size up your battery, test its health, and know when to swap it—without feeling lost or needing a pro’s reassurance. In this guide on how to read a car battery label, we’ll explore everything from what the numbers and letters mean to how you can test your battery’s voltage.
Where to Find Information on a Car Battery?
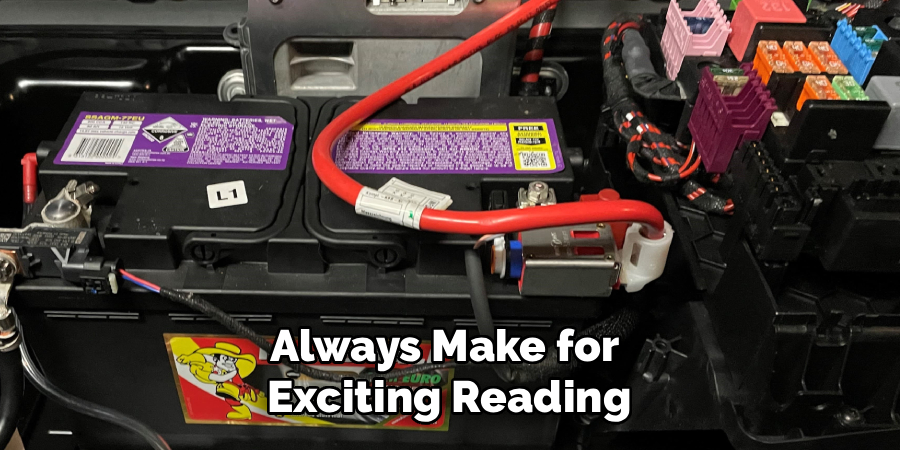
So where do the numbers and codes hide? The answer: on the battery itself—if you’re lucky. Most often, there’s a sizeable sticker plastered across the top or front face, practically begging you to pay attention. That’s where you’ll spot the manufacturer’s brand stamp, a sequence telling you the group size, cold cranking amps (or “CCA” for those in the know), and something labeled reserve capacity. Sometimes, a battery that’s seen too many hot days might have a peeling or sun-bleached label. If that’s the case, take a second look—check the casing for faint numbers or etched codes near the edge.
There are occasions, though, when all you find is a jumble of old stickers or you’re unsure about compatibility. Nothing wrong with double-checking the car’s manual. Tucked in those pages is usually a tidy list of your car’s electrical demands. Manuals don’t always make for exciting reading, but when it comes to batteries, they’re surprisingly direct. Or, just as effective, pop into an auto parts shop. Once staff know the make, model, and year, they can almost always bring up a precise battery requirement from their databases—often before you can finish explaining what you need.
Understanding Basic Battery Labels
Anyone who ever stared at a battery label and wondered if they’re reading ancient code isn’t alone. For most drivers, “CCA” or “RC” might as well be secret club abbreviations. Cold Cranking Amps, for instance, are simply the battery’s ability to turn over (start) an engine when winter’s at its worst—think subzero mornings and sluggish oil. A beefier CCA number typically hints at more reliable starts in those harsh conditions. But right underneath or nearby, you’ll probably notice “CA,” standing for Cranking Amps. That rating is measured at a milder 32°F (so, less demanding than the CCA).
What about Reserve Capacity (RC)? This one, always shown in minutes, tells you how long the battery can run your car’s vital systems solo—let’s say, if your alternator gives out partway through a drive. An Amp-Hour (Ah) spec sometimes appears on batteries, especially on European models, signaling just how much energy the battery can put out steadily, over the course of a 20-hour stretch. Finally, “Group Size” is not about cliques or clubs: it’s the battery’s physical dimensions and where the terminals sit. Get this wrong, and the best battery in the world won’t fit—somewhat anticlimactic after all that research.
Tools and Materials You’ll Need
- Socket wrench
- Battery terminal cleaner
- Baking soda and water solution
- Wire brush or battery cleaning tool
- Gloves and safety glasses
- New battery (make sure it matches the specifications of your vehicle)
7 Simple Step-by-step Guidelines on How to Read a Car Battery
Step 1: Prioritize Safety and Preparation
Don’t rush in—there’s no award for speed here. Before anything, position the car on level ground, lock down the parking brake, shut off the ignition, and pull out the keys. You may be tempted to skip this, but it’s worth emphasizing: working on a live engine brings risks. Spinning fans and exposed wiring aren’t exactly forgiving.
Goggles and gloves might look overkill at first glance; trust me, a close encounter with battery acid quickly changes minds. Raise the hood, make sure it’s properly supported, and give the engine bay a once-over. Spot any exposed wires, dampness, or, worst of all, a rotten egg smell? That’s sulfur—from a venting or ruined battery. In that case, step away and call for help rather than muscling through.
Step 2: Locate and Expose the Battery
Sounds simple, right? Yet, with newer cars, locating the battery can feel like a low-stakes scavenger hunt. Many are front and center, while others are buried under plastic covers or tucked in odd corners—sometimes under the back seat. Remove any covers carefully, and don’t force anything. While you’re poking around, check the casing: Is it warped, cracked, or oozing? If so, it’s best not to push your luck with that battery.
If everything looks normal, brush aside grime enough to see the main label. There’s little point in reading numbers through a layer of dirt.

Step 3: Read and Note the Top Label Specifications
With the label visible, jot down the critical details—primarily the Cold Cranking Amps and Group Size. Some folks prefer a smartphone photo, and there’s logic to that, but pen and paper work, too. It may feel excessive, but these specs matter far more than most realize.
If your battery is older and the CCA rating has dropped well below what your owner’s manual suggests, it could explain sluggish starts during frosty mornings. Miss this detail, and you might be replacing starters or alternators prematurely—not exactly a trivial oversight.
Step 4: Decode the Manufacturing Date Sticker
Dating your car battery isn’t about romance—it’s about timing your replacement. Most batteries sport a small sticker stamped with an alphanumeric code. Usually, a letter stands for the month (A is January, B is February, and so on), followed by a digit for the year (a “3” indicating 2023, for example).
This age check isn’t an idle exercise: a typical battery gives three to five good years, but local climate and driving routines quietly erode that window. If the date code suggests you’re pushing six years, start planning for a swap, even if things seem fine on the surface. It’s one of those times when a little skepticism is wise.
Step 5: Prepare and Calibrate the Multimeter
Now, you move from label reading to hands-on testing. Twist the multimeter’s dial to DC voltage (usually a straight line over a dashed one), set it to 20 volts. This anticipates the standard battery output, keeping you safely within limits.
Before anything touches a terminal, make sure there’s no caked-up white or blue corrosion; it can throw readings way off. Scrub gently with your brush and a dab of baking soda solution. This isn’t just a cleanup—it sidesteps misdiagnosis. Ignore this, and you may end up replacing a perfectly fine battery.
Step 6: Connect the Probes and Test the Voltage
Press the red probe against the positive post (there’s often a plus sign or a red cover) and the black against the negative (minus sign or black cover). It’s important to touch the metal—not just the terminal clamps. Watch your grip: steady hands make this much smoother.
A digital screen should settle on a number in a second or two. For best results, try this after the car’s been off for an hour or more. If you rush and check right after driving, you’ll catch a misleading “surface charge”—a spike that fakes good battery health.
Step 7: Interpret the Multimeter Results
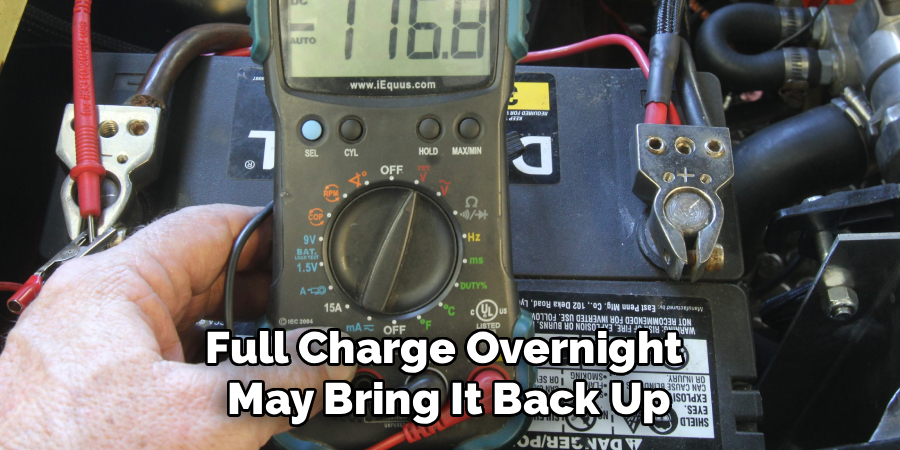
So, what do those numbers actually mean? For most cars, a solid, healthy battery at rest throws up something between 12.4 and 12.6 volts. If you’re in that range, no real concerns. If your meter hovers between 12.0 and 12.3 volts, it’s not disastrous but points to a partially drained battery—a long highway run or a slow, full charge overnight may bring it back up.
Now, spots where readings sink to 11.9 volts or below? That’s severe. Consistently low numbers after charging indicate the internal structure is breaking down. Replacement shouldn’t be far off—in fact, it ought to be soon.
Following these steps on how to read a car battery will not only help you keep an eye on your car battery’s health, but also prevent any unexpected breakdowns or issues while driving.
Common Mistakes When Reading a Battery
People are creatures of habit, for better or worse. Testing right after shutting down the engine often leads to false optimism due to that lingering surface charge. Overlooking dirty terminals is another lapse that can send you chasing the wrong problem.
Interpreting date codes is, strangely, another pitfall—shipping versus manufacturing isn’t always clear. And don’t forget the basics: physical clues like bulgy cases or oozing acid aren’t to be ignored, no matter what your voltmeter claims.
How Temperature Affects Battery Readings
Ambient temperature doesn’t just tweak comfort—it subtly (or not so subtly) shifts battery chemistry. Colder air slows the battery’s internal reactions, trimming voltage, even in a healthy cell. In contrast, a sizzling garage can overstimulate those same cells, sometimes boosting voltage readings just enough to disguise underlying wear.
The upshot? A battery that tests fine in spring might still leave you stranded on a freezing January morning. If you get an odd reading, pause for a moment and consider the weather before deciding what it means.
When to Replace a Car Battery?
Time is rarely kind to batteries. Once yours is past four or five years, it’s living on grace, even if voltage numbers still look good. A multimeter reading that keeps dipping below 12.0 volts after repeated charging spells the end is near—those cells just don’t hold juice anymore. Visible issues like cracked cases or chemical stains demand immediate action: safety trumps thriftiness here.

Finally, if you notice the headlights dim or electronics sputter as soon as you turn on the AC, that’s another unmistakable sign your battery isn’t keeping up.
Frequently Asked Questions
Q1: What Is A Good Voltage Reading For A Car Battery?
In practice, a healthy battery shows between 12.4 and 12.6 volts at rest. Switch the engine on and have a look; the numbers should climb higher, typically to the 13.7–14.7 range if the alternator’s working as it should. Anything less than 12.2 volts when the car is off ought to prompt a closer look—and usually, a charge or replacement.
Q2: Can A Multimeter Tell Me If My Battery Is Bad?
A multimeter is a handy tool for the basics; it shows you the immediate charge level and whether a battery is “dead” or just tired. But it stops short. Testing cold cranking amps—the true test of whether your battery can actually turn over a reluctant engine—needs a dedicated load tester. If your multimeter says voltage is fine and your car still struggles to start, don’t rule out a hidden CCA problem.
Q3: How Often Should I Check My Car Battery?
You don’t need to obsess, but a check twice a year—right before peak summer or winter—can be invaluable. Look at the terminals, clear any powdery buildup, and grab a quick reading. When a battery gets older than three years, testing it with every oil change becomes good insurance.
Taking Charge of Your Vehicle’s Maintenance
Getting comfortable with your car battery is about more than saving yourself from surprise breakdowns. When you know what the label is telling you, understand the signs, and can run a quick voltage test, you put control back in your hands.
No more waiting for a distressing click from the engine—just informed decisions and (hopefully) fewer emergencies. Schedule the occasional battery check-in alongside your regular maintenance. It’s a small habit that keeps your car in the kind of shape that lets you simply turn the key and drive, worry-free. Thanks for reading this guide on how to read a car battery.

About
Ora Hayes is a distinguished figure in the world of DIY Thecarfixes, with over a decade of expertise in automotive diagnostics and high-performance maintenance. Her professional focus lies in merging mechanical precision with modern digital tools, fostering repair solutions that are both cost-effective and highly reliable. As the author of Thecarfixes, Ora Hayes delves into the art and science of automotive restoration, inspiring car owners and hobbyist mechanics alike.
Education
RMIT University (Melbourne, Australia) Associate Degree in Automotive Engineering — Focus on vehicle dynamics, industry-driven repair protocols, and advanced diagnostics. Gained hands-on experience with traditional mechanical tools and modern ECU remapping software.
Nottingham Trent University (United Kingdom) Bachelor’s in Mechanical Design and Automotive Engineering (Honors) — Specialized in automotive systems with a focus on blending technical engineering with everyday usability. Participated in industry projects, working with leading automotive manufacturers to gain real-world insights into vehicle longevity.
Publications and Impact
In Thecarfixes, Ora Hayes shares her insights on troubleshooting complex engine issues, material durability, and strategies for efficient garage setups. Her writing bridges the gap between professional mechanic knowledge and the home enthusiast’s needs, making it a must-read for both everyday drivers and seasoned gearheads.




