

Are you experiencing a vibrating sensation while braking or hearing a squealing noise? These are some of the signs that your brake rotors may be bad and need to be replaced.
Your vehicle’s braking system keeps you safe on the road. When you press the brake pedal, the brake pads clamp down on the brake rotors to stop the wheels from spinning. Over time, this intense friction causes wear and tear. Knowing how to spot failing components before they compromise your safety is a crucial skill for any driver.
This guide on how to tell if brake rotors are bad will walk you through everything you need to know to diagnose worn or damaged brake rotors right in your own driveway.
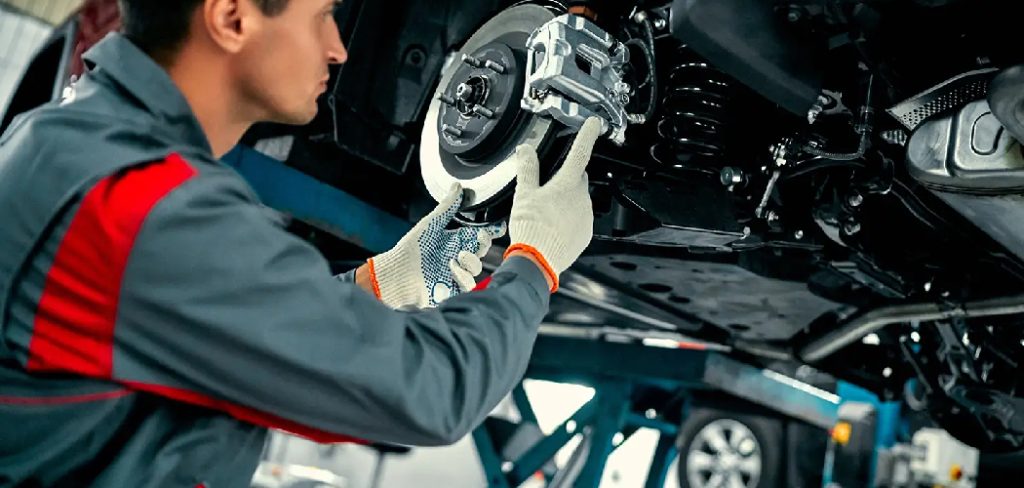
What Are the Benefits of Early Detection?
Catching brake rotor issues early offers several major advantages. First, it ensures your vehicle can stop quickly in an emergency, keeping you and your passengers safe. Second, prompt attention prevents damage to other expensive suspension and braking components, like the brake calipers. Finally, replacing rotors before they completely fail saves you money and guarantees a much smoother, quieter driving experience.
What Will You Need?
To properly inspect your brake system, gather a few basic tools:
- A sturdy car jack and jack stands
- A lug wrench or impact driver
- A reliable flashlight
- A pair of mechanic’s gloves
- A micrometer or vernier caliper (for measuring rotor thickness)
10 Easy Steps on How to Tell if Brake Rotors are Bad
Identifying worn brake rotors involves paying attention to how your car drives and performing a careful visual inspection. Follow these ten steps to accurately diagnose your braking system, using both your senses and a hands-on approach:
Step 1: Listen for Squealing or Scraping Sounds
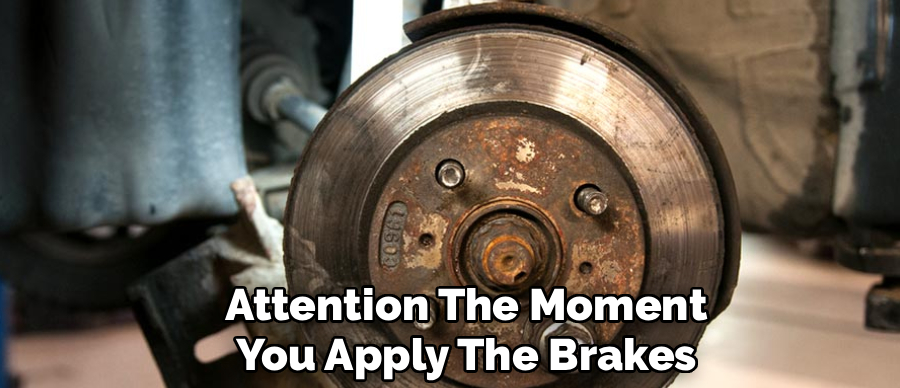
Drive in a quiet area with your windows down and pay attention the moment you apply the brakes. Squealing can indicate the presence of built-in wear indicators on your brake pads warning you they’re low, while metallic scraping or grinding sounds are much more serious, indicating your pads have worn so thin that metal is contacting metal. Continued driving in this state will further damage the rotors quickly. Try to pinpoint whether the noise comes from the front or rear, as this helps with diagnosis and eventual repairs.
Step 2: Pay Attention to Steering Wheel Vibrations
Gently apply your brakes while driving at moderate speeds, around 40-60 mph. Warped rotors, often due to excessive heat from hard or repeated braking, cause uneven contact with pads, which sends a vibration up through the steering wheel, making it shake or pulse in your hands. The more significant the warp, the more pronounced the vibration. If you notice that the phenomenon lessens or disappears at lower speeds or when the brakes are not applied, it’s almost certainly the rotors.
Step 3: Feel for Brake Pedal Pulsation
Just as you can feel vibrations in the steering wheel, the brake pedal itself can signal rotor problems. When a rotor is uneven, every rotation of the wheel creates a rapid up-and-down motion you can feel through the foot pedal, known as “brake pedal pulsation.” Press the pedal gently and observe if you notice rhythmic thumping, jerking, or a soft-spongy feeling. Such sensations not only indicate issues with the rotors but may also signal problems elsewhere in the braking system if joined by a squishy or sinking pedal.
Step 4: Check for Increased Stopping Distances
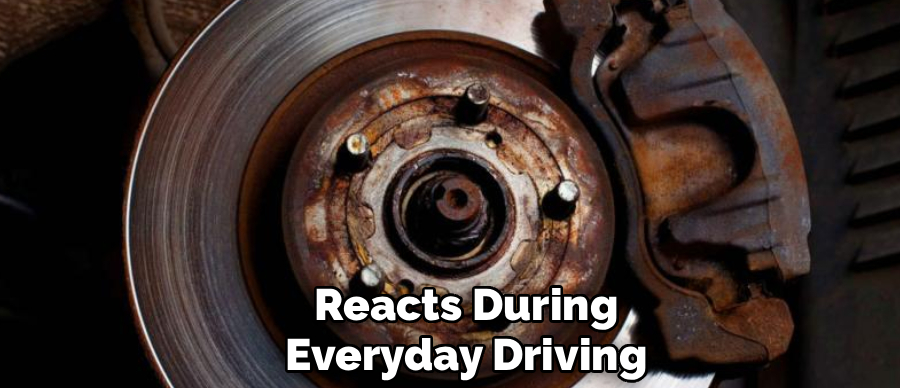
Monitor how your car reacts during everyday driving and emergency stops. If you find yourself needing significantly more time or distance to stop, even after pressing hard on the brakes, it’s a warning flag. This may be due to rotors that are glazed (overly smooth and shiny due to overheating), excessively thinned, or unevenly worn. Try a controlled stop on a safe, empty road, and compare your stopping distance to previous experiences. Any unexpected changes should raise concerns.
Step 5: Safely Park and Secure the Vehicle
Prioritize safety before attempting any inspection. Find a flat, stable surface and put the car into park (or in gear if manual), setting the parking brake. Use wheel chocks behind the wheels that remain on the ground. Loosen the lug nuts slightly before you lift the car with a jack—this keeps the wheel from spinning. Always use jack stands to support the vehicle and never rely solely on the car jack. Let the car cool down before you start, since the brakes can be extremely hot after use.
Step 6: Remove the Wheel for Visual Inspection
With the car safely elevated, finish loosening and remove the wheel nuts, pulling the wheel away from the hub completely. Set the removed wheel beneath the car as an extra precaution. Inspect the brake system: shine your flashlight into the wheel well and onto the exposed rotor, looking for visible surface wear, corrosion, or any fluid leaks that could indicate other issues (like a failing caliper). Be systematic, inspecting all accessible sides of the rotor for damage or irregularities.
Step 7: Look for Visible Grooves and Scoring
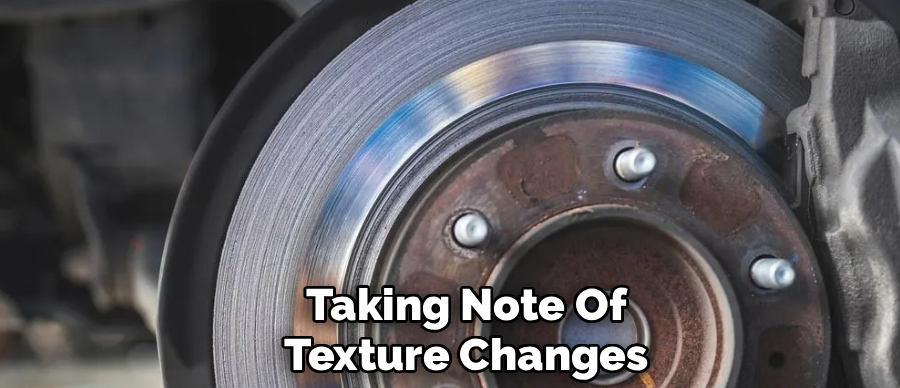
Feel across the rotor’s face with your gloved fingertips, taking note of texture changes. Deep grooves and scoring not only diminish braking performance but also indicate debris or worn-out pads have gouged the metal. While light scratches might be smoothed by machining, deeper channels mean the rotor is compromised and must be replaced. Mark any areas of concern for reference when you visit your mechanic or order new parts.
Step 8: Check for Blue Discoloration or Heat Spots
Use your flashlight to examine not only the surface but also the coloration of the rotor. Bluish, purple, or black spots typically result from overheating—often a sign of aggressive driving, dragging brakes, or stuck calipers. These colors indicate steel that has lost its structural integrity in those areas. Once heat spots develop, the rotor can no longer dissipate heat evenly, leading to dangerous performance issues, and the discoloration will not be removed by resurfacing.
Step 9: Measure Rotor Thickness
Locate the minimum thickness spec stamped or etched onto the side or face of the rotor. Clean off any dirt or rust first. Take several measurements around the rotor using your micrometer or vernier caliper to account for uneven wear. Pay special attention to the edges, where thinning often occurs fastest. If any measurement falls below the stated minimum, the rotor is no longer safe to use. Remember, thin rotors are more prone to cracking, overheating, and ultimately, failure.
Step 10: Inspect the Brake Pad Wear
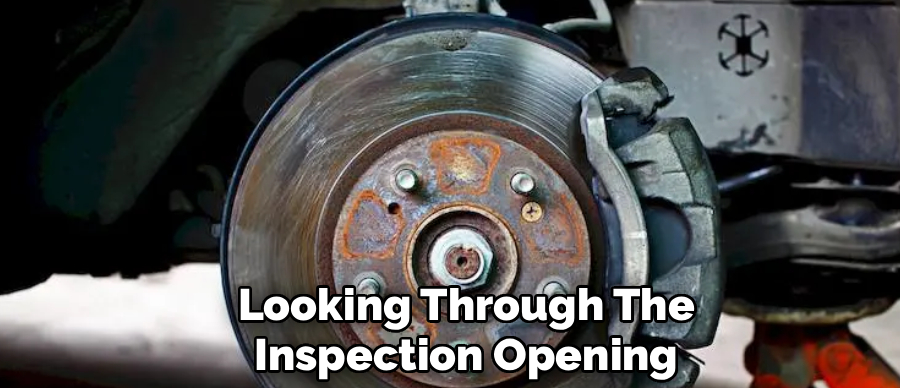
Observe brake pad thickness by looking through the inspection opening on the caliper or removing the caliper if necessary. Compare left and right sides for uneven wear, which may signal caliper, slide, or hardware issues. Pads thinner than a quarter inch should be replaced immediately. Excessively worn pads drastically speed up rotor damage and can trigger the previously mentioned warning symptoms. If abnormal wear is apparent, correct the underlying cause before fitting new rotors or pads to prevent recurrence.
By following these comprehensive steps, you’ll gain a thorough understanding of your brake rotors’ health and can confidently decide when it’s time for service or replacement.
5 Things You Should Avoid
- Ignoring Warning Sounds: Never turn up the radio to drown out brake squeals or grinds.
- Buying Ultra-Cheap Parts: Avoid bargain-bin rotors that warp quickly under normal heat.
- Riding the Brakes: Do not keep your foot resting on the brake pedal while driving downhill.
- Over-tightening Lug Nuts: Avoid using an impact wrench to aggressively tighten wheels, as this can warp the rotors.
- Washing Hot Wheels: Never spray cold water directly onto hot brake rotors after driving, as the thermal shock can crack them.
Frequently Asked Questions
- How Long Do Brake Rotors Typically Last?
Brake rotors generally last anywhere from 30,000 to 70,000 miles, depending on your driving habits. Stop-and-go city driving wears them out much faster than highway cruising. Heavy vehicles or cars used for towing will also experience faster rotor wear. You can extend their lifespan by practicing smooth, gradual braking. Always have them inspected during your routine tire rotations. - Can I Replace Brake Pads Without Replacing the Rotors?
You can replace just the brake pads if your rotors are still thick enough and perfectly smooth. However, many mechanics recommend replacing or resurfacing the rotors at the same time for optimal performance. Putting flat, new pads on grooved, old rotors will reduce your stopping power. It can also cause the new pads to wear out prematurely and unevenly. - Is It Safe to Drive With Bad Brake Rotors?
Driving with bad brake rotors is incredibly dangerous and highly discouraged. Warped or thin rotors drastically increase the distance your car needs to come to a complete stop. In an emergency braking situation, worn rotors can crack or fail, causing a complete loss of vehicle control. Always address braking issues the moment you notice a symptom.
Conclusion
Understanding how to tell if brake rotors are bad empowers you to take control of your vehicle’s maintenance and safety.
By listening for unusual noises, feeling for vibrations, and performing visual checks for scoring and minimum thickness, you can easily catch failing brakes before they become a hazard. If you notice any of these warning signs, take action immediately by replacing the worn parts or consulting a professional mechanic.
Stay proactive, and your brakes will always be ready when you need them most.

About
Ora Hayes is a distinguished figure in the world of DIY Thecarfixes, with over a decade of expertise in automotive diagnostics and high-performance maintenance. Her professional focus lies in merging mechanical precision with modern digital tools, fostering repair solutions that are both cost-effective and highly reliable. As the author of Thecarfixes, Ora Hayes delves into the art and science of automotive restoration, inspiring car owners and hobbyist mechanics alike.
Education
RMIT University (Melbourne, Australia) Associate Degree in Automotive Engineering — Focus on vehicle dynamics, industry-driven repair protocols, and advanced diagnostics. Gained hands-on experience with traditional mechanical tools and modern ECU remapping software.
Nottingham Trent University (United Kingdom) Bachelor’s in Mechanical Design and Automotive Engineering (Honors) — Specialized in automotive systems with a focus on blending technical engineering with everyday usability. Participated in industry projects, working with leading automotive manufacturers to gain real-world insights into vehicle longevity.
Publications and Impact
In Thecarfixes, Ora Hayes shares her insights on troubleshooting complex engine issues, material durability, and strategies for efficient garage setups. Her writing bridges the gap between professional mechanic knowledge and the home enthusiast’s needs, making it a must-read for both everyday drivers and seasoned gearheads.




