A bent, scratched, or rusty fender can make your car look worse than it really is. It can also lead to bigger problems if exposed metal starts to corrode or if the panel sits too close to the tire. The good news is that many light to moderate fender issues can be fixed at home with patience, basic tools, and the right repair steps.
This guide explains how to repair damaged car fender problems in a way that is simple enough for beginners but detailed enough to help you avoid common mistakes. You will learn how to inspect the damage, clean and prepare the surface, reshape dents, use body filler, sand correctly, apply primer, match paint, and check panel alignment.
The goal is not to make every repair shop-level perfect. The goal is to help you make a smart decision, improve the look of your vehicle, and protect the fender from further damage.
Why Repairing A Damaged Car Fender Matters
Repairing a damaged car fender matters because small problems can spread fast. A minor scratch can expose bare metal, which may turn into rust. A dent near the wheel arch can affect tire clearance or loosen the fender liner. Poor panel alignment can also create gaps where dirt, water, and road salt collect.
A proper repair helps restore the car’s appearance, protects the metal, and supports resale value. It can also prevent a simple cosmetic issue from becoming a more expensive body repair later.
If the damage is shallow, not structural, and not affecting the wheel, door, hood, or bumper, a careful DIY repair may be a practical option.
Step-By-Step Guide To How To Repair Damaged Car Fender
Step 1: Assess The Damage
Start by looking at the fender in bright, natural light. Check for dents, scratches, chipped paint, rust, cracks, and sharp edges. Look closely around the wheel arch because this area often collects moisture and road debris.
Run your hand gently over the panel to feel low spots and raised edges. Then check the gaps between the fender, hood, door, bumper, and headlight. Uneven gaps may mean the panel alignment has shifted.
If the fender is badly crushed, torn, or pushed into the tire, stop and consider professional help.
Step 2: Gather The Right Tools And Supplies
Before you begin, collect your materials so the job moves smoothly. You may need car wash soap, microfiber towels, masking tape, sandpaper, body filler, a spreader, primer, paint match spray, clear coat, gloves, and eye protection.
For dents, you may also need a dent puller, suction tool, rubber mallet, or access behind the panel. If the fender liner is loose, have replacement clips ready.
When learning how to repair damaged car fender issues, preparation makes a major difference. Having the right supplies nearby helps you avoid rushing, skipping steps, or damaging nearby trim.
Step 3: Clean The Fender And Surrounding Area
Wash the fender with car wash soap and clean water. Remove dirt, wax, grease, and road grime from the damaged area and the nearby panels. Paint, primer, and filler will not bond well to a dirty surface.
Dry the area fully with a clean microfiber towel. If the surface still feels slick, use a wax and grease remover made for automotive paint.
A clean work area helps you see the real damage. It also reduces the risk of sanding dirt into the finish, which can leave scratches that are harder to fix later.
Step 4: Protect Nearby Panels And Trim
Use masking tape and masking paper to cover anything you do not want to sand, scrape, or spray. Protect the tire, wheel, headlight, bumper edge, door edge, and trim around the fender.
Leave enough space around the damaged area so you can sand and blend the paint smoothly. Do not tape too close to the repair spot, or you may create hard paint lines that are difficult to hide.
If you need better access, remove small parts such as a side marker, mud flap, or loose fender liner. Store clips and screws in a safe place.
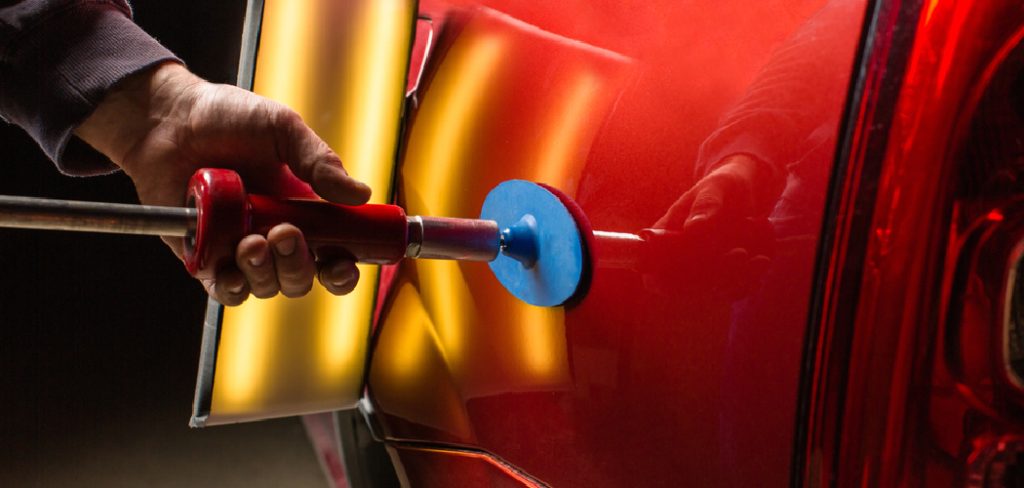
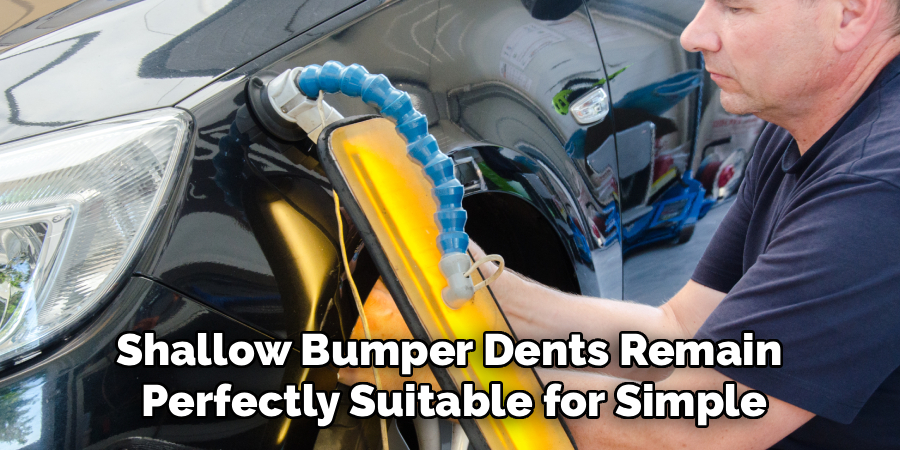
Step 5: Reshape The Dent Carefully
If the fender has a dent, try to bring the metal back close to its original shape before using filler. If you can reach behind the panel, gently push the dent outward while supporting the surrounding area.
If you cannot reach the back, use a glue puller or suction dent tool from the outside. Work slowly and check your progress often. Avoid pulling too hard because you can stretch the metal or create high spots.
The goal is not perfection at this stage. You only need the panel close enough that body filler can smooth the remaining low areas.
Step 6: Sand The Damaged Surface
Sand the damaged area to remove loose paint, rough edges, and surface rust. Start with a coarser grit for shaping, then move to finer sandpaper as the surface improves. Feather the edges, which means smoothing the transition between bare metal, old paint, and the repair area.
If rust is present, remove as much as possible. For light rust, sanding may be enough. For deeper rust, use a rust treatment before moving forward.
A key part of how to repair damaged car fender damage is patient sanding. The smoother the base, the better the final paint will look.
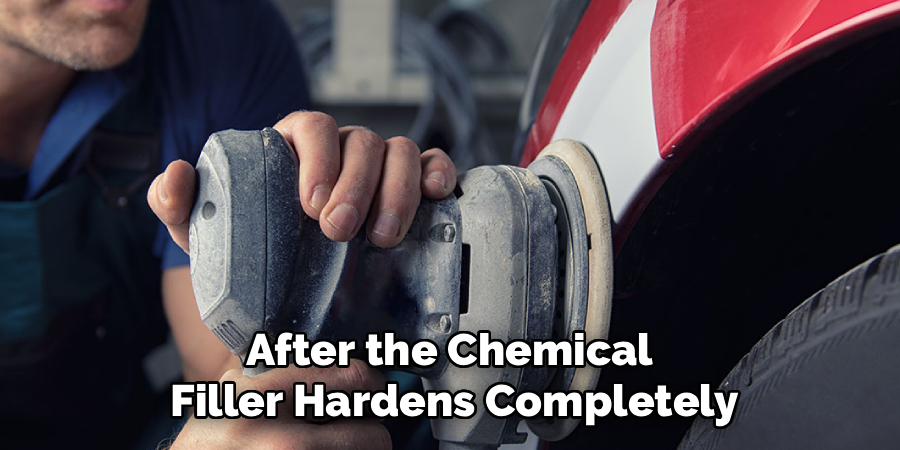
Step 7: Apply Body Filler And Primer
Mix the body filler according to the product directions. Apply a thin, even layer over low spots with a spreader. Do not pile it on thick. Several thin passes are better than one heavy layer.
After the filler cures, sand it until it follows the fender’s shape. Use your hand to feel for waves or edges. Your fingers can often find uneven spots your eyes miss.
Once the surface is smooth, wipe away dust and apply primer in light coats. Primer helps seal the repair and gives the paint a better surface to grip.
Step 8: Paint, Reassemble, And Inspect The Finish
After the primer dries, lightly sand it with fine sandpaper. Wipe the area clean, then apply paint match spray in thin coats. Give each coat time to flash, or dry slightly, before adding the next one.
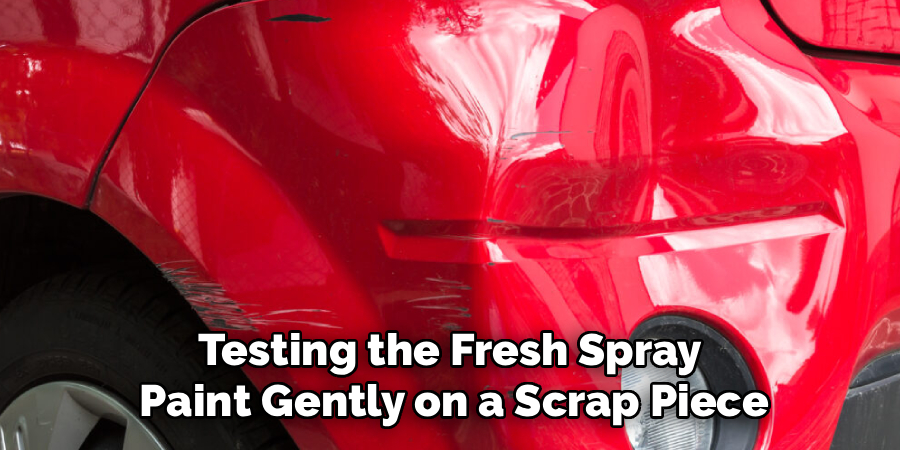
Apply clear coat if your paint system requires it. Remove masking tape carefully after the paint has set, but before it becomes too hard at the tape edge.
Reinstall the fender liner, trim, lights, clips, and any parts you removed. Check panel alignment around the door, hood, bumper, and wheel arch. Make sure nothing rubs the tire when the wheel turns.
Frequently Asked Questions
Can I Repair A Damaged Fender At Home?
Yes, you can repair a damaged fender at home if the issue is minor to moderate. Small dents, scratches, paint chips, and light surface rust are often manageable with basic tools and careful prep work. However, deep creases, torn metal, major rust holes, or damage near mounting points should be inspected by a professional body shop.
When Should I Replace A Fender Instead Of Repairing It?
Replacement may be better if the fender is severely bent, cracked, rusted through, or no longer lines up with the door, hood, bumper, or headlight. If repair time and materials cost more than a replacement panel, replacing it may also make sense. Safety matters most, especially if the fender affects tire clearance.
Do I Need To Paint The Whole Fender?
Not always. Small chips and scratches may only need touch-up paint, while larger repairs often need blending into the surrounding paint. Full fender painting may be needed if the damage covers a wide area or the color is hard to match. Metallic, pearl, and faded paint can be more difficult to blend cleanly.
How Long Does Fender Repair Usually Take?
A simple repair may take a few hours of hands-on work, but drying and curing times can stretch the project over one or two days. Body filler, primer, paint, and clear coat all need time to set. Rushing these steps can cause sanding marks, poor paint adhesion, uneven texture, or early peeling.
Is Surface Rust On A Fender Serious?
Surface rust is serious if you ignore it, but it is often repairable when caught early. Rust usually starts where paint is chipped or scratched, especially around the wheel arch. If you remove the rust, treat the area, seal it with primer, and repaint it, you can slow or stop the damage from spreading.
Conclusion
A damaged fender can look intimidating, but many small dents, scratches, rust spots, and paint flaws can be repaired with the right process. Start with a careful inspection, clean the surface, protect nearby panels, reshape dents, sand well, apply body filler properly, prime, paint, and check alignment before calling the job done.
The best repair comes from patience, not speed. If the fender is crushed, rusted through, or interfering with the tire or nearby panels, choose a professional repair for safety.
Now that you understand how to repair damaged car fender problems, take a close look at your vehicle and decide whether a careful DIY repair or expert help is the right next step.
About
Ora Hayes is a distinguished figure in the world of DIY Thecarfixes, with over a decade of expertise in automotive diagnostics and high-performance maintenance. Her professional focus lies in merging mechanical precision with modern digital tools, fostering repair solutions that are both cost-effective and highly reliable. As the author of Thecarfixes, Ora Hayes delves into the art and science of automotive restoration, inspiring car owners and hobbyist mechanics alike.
Education
RMIT University (Melbourne, Australia) Associate Degree in Automotive Engineering — Focus on vehicle dynamics, industry-driven repair protocols, and advanced diagnostics. Gained hands-on experience with traditional mechanical tools and modern ECU remapping software.
Nottingham Trent University (United Kingdom) Bachelor’s in Mechanical Design and Automotive Engineering (Honors) — Specialized in automotive systems with a focus on blending technical engineering with everyday usability. Participated in industry projects, working with leading automotive manufacturers to gain real-world insights into vehicle longevity.
Publications and Impact
In Thecarfixes, Ora Hayes shares her insights on troubleshooting complex engine issues, material durability, and strategies for efficient garage setups. Her writing bridges the gap between professional mechanic knowledge and the home enthusiast’s needs, making it a must-read for both everyday drivers and seasoned gearheads.