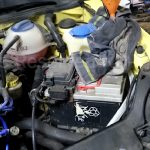
Welcome, fellow home gardeners! We dedicate massive amounts of physical energy to cultivating our backyard vegetable patches, pruning beautiful fruit trees, and building sturdy wooden trellises. However, our demanding landscaping projects often require hauling heavy bags of organic compost and dense cedar mulch using our reliable utility trucks. When that annoying yellow tire pressure light suddenly illuminates on your dashboard, your weekend transportation plans can quickly come to a frustrating halt. Maintaining your hauling vehicle remains just as vital as maintaining your sharp pruning shears.

Understanding exactly how to remove tpms sensor units empowers you to handle minor automotive maintenance right in your own driveway. You do not need to be a professional mechanic to understand the basic components regulating your vehicle’s safety systems. This beginner-friendly guide walks you safely through the entire mechanical process without requiring highly complicated pneumatic tools. We will cover securing your vehicle, deflating the heavy rubber, and detaching the delicate electronic hardware safely. Let us put down the heavy gardening gloves, grab a sturdy wrench, and prepare your reliable hauling vehicle for another beautiful planting season!
Step-by-Step Guide: How to Remove Tpms Sensor
Step 1: Park on a Flat Concrete Surface
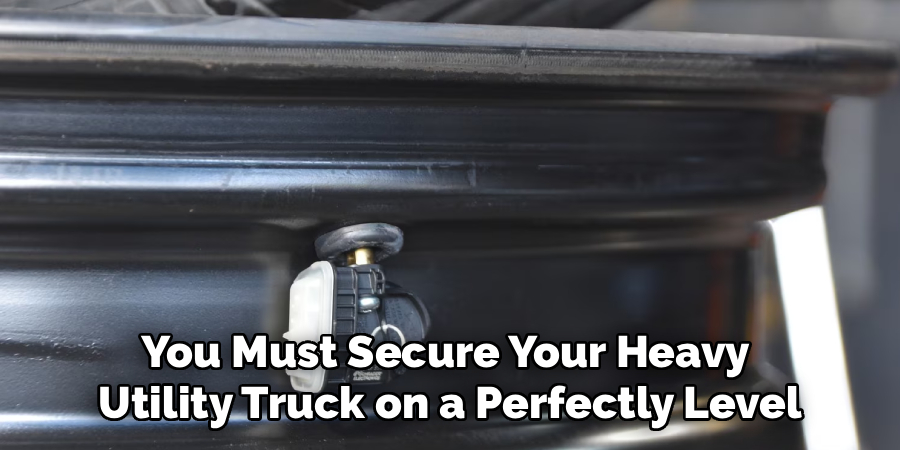
Before attempting any automotive maintenance, you must secure your heavy utility truck on a perfectly level concrete driveway or solid garage floor. Working on soft garden dirt or uneven gravel presents a massive physical danger, as the heavy jack can easily sink and cause the vehicle to collapse unexpectedly. Engage your emergency parking brake firmly to prevent the truck from rolling backward while you work. Place heavy wooden blocks or thick landscaping bricks behind the rear wheels to provide an extra layer of mechanical security. Taking these simple safety precautions ensures your driveway environment remains perfectly secure before you begin lifting heavy metal components.
Step 2: Loosen the Metal Lug Nuts
While the heavy vehicle still rests firmly on the solid ground, you must break the initial tension on your metal wheel fasteners. Grab your sturdy lug wrench and turn each individual nut counterclockwise just enough to loosen their tight mechanical grip. Do not remove the metal nuts completely during this early stage; simply rotate them about half a turn to break the stubborn factory torque. Attempting to loosen these heavy fasteners after the wheel is suspended in the air proves incredibly difficult, as the entire rubber tire will simply spin freely. Treating this step like loosening a stubborn jar of organic fertilizer makes the entire process highly efficient.
Step 3: Lift and Secure the Garden Truck
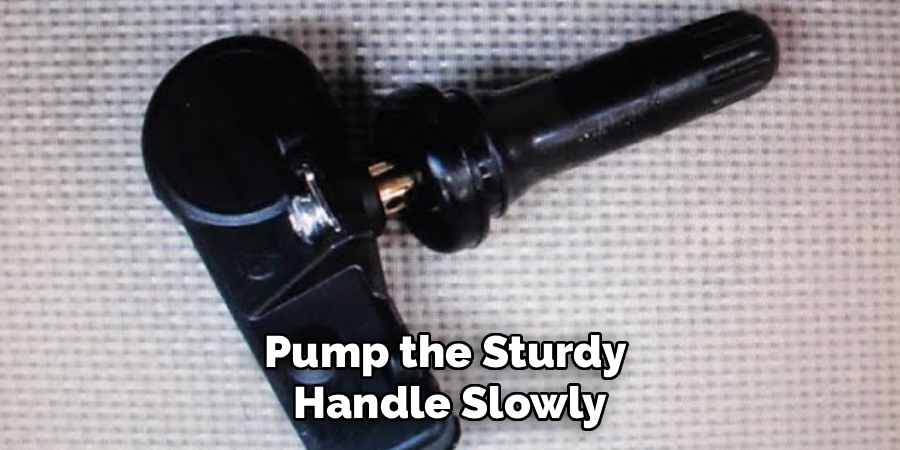
Position your heavy-duty hydraulic floor jack directly under the reinforced metal lifting points designated by your vehicle manufacturer. Pump the sturdy handle slowly and steadily until the flat tire hovers roughly two inches above the concrete pavement. Immediately slide a heavy metal jack stand underneath the solid vehicle frame to provide permanent structural support. You should never rely entirely on a hydraulic cylinder to hold thousands of pounds of heavy metal while your hands are nearby. Slowly lower the truck onto the solid stand, ensuring the vehicle rests perfectly stable before you proceed to remove the loosened lug nuts entirely.
Step 4: Detach the Heavy Rubber Wheel
With the vehicle resting completely secure on your metal jack stands, carefully spin the loosened lug nuts off the threaded metal studs. Place these vital fasteners inside a small plastic bucket so they do not roll away into your nearby garden beds. Grasp the heavy rubber tire firmly with both hands and pull it straight off the metal hub assembly. Roll the dirty wheel away from the truck and lay it completely flat on the concrete driveway with the silver metal face pointing upward. Handling heavy automotive wheels requires decent physical strength, much like moving massive ceramic planters across your outdoor patio.
Step 5: Deflate the Rubber Tire Completely
Before you can access the delicate electronics hidden inside the metal rim, you must remove all the compressed air trapped inside the rubber casing. Locate the small metal valve stem protruding from the front of the silver rim and unscrew the tiny plastic dust cap. Use a specialized valve core removal tool to unscrew the tiny brass mechanism hidden deep inside the metal stem. The trapped air will rush out incredibly fast, creating a loud hissing noise that might startle you initially. Wait patiently until the heavy rubber casing feels completely soft and flexible, indicating the high-pressure chamber is entirely empty and safe to manipulate.

Step 6: Break the Tough Outer Bead
Accessing the interior cavity of the wheel requires pushing the thick rubber sidewall away from the outer metal rim edge. Mechanics use massive pneumatic machines for this task, but you can achieve similar results using a heavy wooden plank and your body weight. Place the wooden board carefully along the rubber edge, completely avoiding the delicate valve stem area to prevent accidental crushing. Apply heavy downward pressure to the wooden plank until the stubborn rubber bead pops away from the metal seating channel. Breaking this tight physical seal provides the necessary clearance to reach your hand inside the dark tire cavity.
Step 7: Master remove tpms sensor Components
With the thick rubber sidewall pushed firmly downward, you can finally see the small plastic electronic box attached directly to the interior valve stem. Take a small socket wrench and carefully unscrew the external metal collar nut securing the stem to the silver wheel rim. Once you remove this outer metal retaining nut, gently push the threaded stem backward through the circular rim hole. Reach your hand into the dark rubber cavity and carefully extract the small plastic electronic housing. You must handle this fragile computerized component with extreme care, exactly as you would handle a delicate orchid seedling during a spring transplant.
Step 8: Clean the Exposed Metal Rim
After extracting the faulty electronic device, you must prepare the circular metal opening for the brand new replacement hardware. Over several years of driving down muddy agricultural roads, microscopic dirt particles and thick metallic corrosion naturally accumulate around this tiny opening. Take a small piece of fine-grit sandpaper and gently scrub the circular hole until the exposed aluminum shines brightly in the sun.

Wipe the entire area clean using a damp microfiber cloth to remove any abrasive metallic dust. Creating a perfectly smooth, completely clean seating surface guarantees your new rubber sealing gaskets will not leak compressed air during your future trips to the nursery.
Frequently Asked Question
Can I Drive Without A Working Sensor?
- Operating a hauling vehicle with a broken pressure monitor will not physically stop your engine from running normally.
- However, driving without this vital safety system leaves you completely blind to slow, dangerous pneumatic leaks.
- The bright yellow dashboard warning light will remain permanently illuminated, which might cause your vehicle to fail mandatory state safety inspections.
- Gardeners hauling heavy loads of compost should always maintain working pressure monitors to prevent unexpected, dangerous highway blowouts.
- Replacing faulty electronic units immediately ensures maximum safety for you and your expensive landscaping cargo.
Do I Need Special Mechanical Tools?
- You do not need to invest in a massive, expensive pneumatic machine to complete this basic driveway maintenance project.
- A standard hydraulic floor jack, heavy metal supporting stands, and a basic socket wrench set handle most of the required labor.
- Purchasing an inexpensive brass valve core removal tool remains the only highly specialized instrument you will need to buy.
- Heavy wooden planks provide excellent leverage for pushing the stubborn rubber sidewalls downward safely.
- Taking a patient, methodical approach replaces the need for expensive professional garage equipment.
How Long Do These Electronic Batteries Last?
- The tiny lithium batteries sealed tightly inside these computerized components typically last between five and ten years.
- Extreme winter freezing and intense summer heat can occasionally reduce this expected operational lifespan.
- Because the plastic housing is completely permanently sealed at the factory, you cannot replace just the dead internal battery.
- When the internal power source eventually fails, you must completely replace the entire electronic plastic unit.
- Installing brand new hardware guarantees another full decade of highly reliable pneumatic pressure monitoring.
Will This Project Affect My Wheel Alignment?
- Detaching a single electronic pressure monitor will not negatively impact your vehicle’s mechanical suspension alignment.
- However, dismounting the heavy rubber casing and installing new hardware slightly alters the physical rotational balance of the spinning rim.
- You might feel a highly noticeable, rapid vibration passing through the steering wheel when driving at elevated highway speeds.
- Taking the completed wheel to a local tire shop for professional digital balancing remains a highly recommended safety practice.
- Properly balanced wheels ensure your heavy utility truck drives perfectly straight down long rural roads.
Can I Reuse The Old Rubber Grommets?
- You should absolutely never reuse old, compressed rubber sealing gaskets when installing sensitive pneumatic electronics.
- The original rubber components become incredibly brittle, crushed, and permanently deformed after years of intense mechanical pressure.
- Reusing degraded seals almost always results in frustrating, microscopic air leaks that constantly trigger your dashboard warning lights.
- Brand new hardware kits always include fresh, highly pliable rubber grommets designed to create a perfect airtight mechanical seal.
- Spending a few extra dollars on fresh rubber components saves you from repeating this entire labor-intensive process next week.
Conclusion
Maintaining the reliable utility truck you use to haul heavy gardening supplies requires the exact same patience and dedication you apply to your thriving backyard vegetable patches. By taking the time to secure the vehicle safely, deflate the heavy rubber casing completely, and carefully extract the fragile electronics, you guarantee a remarkably smooth repair experience. You no longer have to stare nervously at that glowing yellow dashboard light while transporting delicate spring flowers home from the local wholesale plant nursery.
Understanding how to remove tpms sensor units transforms a potentially expensive mechanic visit into a highly manageable, incredibly satisfying weekend chore. The noticeable improvement in your vehicle’s diagnostic safety serves as a fantastic, deeply comforting reward for your careful physical efforts. Wash the dark black grease off your hands, pack your sturdy gardening tools into the clean truck bed, and drive confidently toward your next beautiful botanical adventure knowing your tires remain perfectly monitored!
About
Ora Hayes is a distinguished figure in the world of DIY Thecarfixes, with over a decade of expertise in automotive diagnostics and high-performance maintenance. Her professional focus lies in merging mechanical precision with modern digital tools, fostering repair solutions that are both cost-effective and highly reliable. As the author of Thecarfixes, Ora Hayes delves into the art and science of automotive restoration, inspiring car owners and hobbyist mechanics alike.
Education
RMIT University (Melbourne, Australia) Associate Degree in Automotive Engineering — Focus on vehicle dynamics, industry-driven repair protocols, and advanced diagnostics. Gained hands-on experience with traditional mechanical tools and modern ECU remapping software.
Nottingham Trent University (United Kingdom) Bachelor’s in Mechanical Design and Automotive Engineering (Honors) — Specialized in automotive systems with a focus on blending technical engineering with everyday usability. Participated in industry projects, working with leading automotive manufacturers to gain real-world insights into vehicle longevity.
Publications and Impact
In Thecarfixes, Ora Hayes shares her insights on troubleshooting complex engine issues, material durability, and strategies for efficient garage setups. Her writing bridges the gap between professional mechanic knowledge and the home enthusiast’s needs, making it a must-read for both everyday drivers and seasoned gearheads.