A failing catalytic converter can drain your wallet at the gas pump and cause your vehicle to fail state emissions tests. This vital exhaust system component transforms harmful engine gases into safer emissions before they exit the tailpipe. When it stops working, your car loses power and runs roughly.
While professional replacement often costs thousands of dollars, tackling this repair in your own garage can save you a substantial amount of money. With the right tools and a solid plan, you can restore your vehicle’s performance and environmental compliance.

Let’s dive into how to fix a catalytic converter.
What Are the Causes?
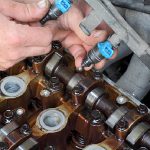
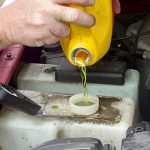
Catalytic converters rarely fail on their own; they usually break down due to upstream engine problems. Unburned fuel reaching the exhaust system is a primary culprit, often caused by bad spark plugs or a failing oxygen sensor. This excess fuel ignites inside the converter, melting the internal honeycomb structure. Oil or antifreeze leaking into the exhaust can also coat the catalyst materials, preventing them from doing their job. Finally, physical damage from road debris or speed bumps can smash the exterior shell and break the delicate internals.
What Will You Need?
Before you begin, gather the following tools and supplies to ensure a smooth repair process:
- A high-quality replacement catalytic converter
- Jack and heavy-duty jack stands
- Penetrating fluid (like WD-40 or PB Blaster)
- Metric and standard socket set with extensions
- Wrench set and a dedicated oxygen sensor socket
- Safety glasses and mechanics gloves
- New exhaust gaskets and hardware
10 Easy Steps on How to Fix a Catalytic Converter
Step 1: Diagnose the Exact Problem
Before turning a single wrench, you must confirm the catalytic converter is actually the root of your trouble. Plug an OBD-II scanner into your dashboard port to check for specific error codes, like P0420, which indicates low catalyst system efficiency. You can also perform a temperature test using an infrared thermometer; a healthy converter should be significantly hotter at the rear than at the front. If you hear a loud rattling noise from under the car when you accelerate, the internal honeycomb has likely shattered. Confirming the diagnosis ensures you do not waste time and money replacing a perfectly good exhaust component.

Step 2: Allow the Exhaust to Cool Completely
Exhaust systems reach extreme temperatures during normal operation, routinely exceeding 1000 degrees Fahrenheit. Attempting to work on a vehicle that has recently been driven is a recipe for severe burns. Park your car on a flat, level surface and let it sit for at least two to three hours before touching any metal parts. Tap the exhaust pipes lightly with your gloved hand to verify the temperature has dropped to a safe level. This cooling period also allows the metal to contract slightly, which can sometimes make removing stubborn bolts a bit easier.
Step 3: Elevate and Secure the Vehicle
You need plenty of room to maneuver under the vehicle safely. Use a high-quality hydraulic floor jack to lift the front of the car, utilizing the factory-designated lift points. Once the vehicle is elevated, slide heavy-duty jack stands under the frame rails or designated support areas. Never rely solely on a hydraulic jack to support the weight of a car while you are underneath it. Give the vehicle a firm shake to ensure it rests solidly on the stands before you crawl under with your tools.
Step 4: Locate the Converter and Inspect the Area
Slide underneath the vehicle and trace the exhaust pipe backward from the engine block. The catalytic converter looks like a swollen metal canister, usually located between the exhaust manifold and the muffler. Take a close look at the surrounding area to identify the bolts, flanges, and oxygen sensors you will need to remove. Note how the factory heat shields are positioned, as you will need to reinstall them correctly to prevent heat damage to your floorboards. Take a quick photo with your phone for reference later.
Step 5: Apply Penetrating Fluid to All Hardware
Exhaust bolts endure constant cycles of extreme heat and splashing water, causing them to rust and seize tightly. Liberally spray all the mounting bolts, nuts, and the threads of the oxygen sensors with a high-quality penetrating fluid. Let the fluid soak into the threads for 15 to 30 minutes. For heavily rusted hardware, you may want to spray it the night before you plan to do the work. This simple step prevents snapped bolts and saves hours of frustration during the removal process.
Step 6: Carefully Remove the Oxygen Sensors
Most modern vehicles have at least two oxygen sensors: one before the catalytic converter and one after. Unplug the electrical connectors for each sensor first to prevent the wires from twisting and breaking. Use a specialized oxygen sensor socket or a standard wrench to gently break the sensors loose. If they refuse to budge, apply more penetrating fluid and wait a few more minutes rather than forcing them. Set the removed sensors aside in a safe, clean place so their delicate tips do not get contaminated by dirt or oil.
Step 7: Unbolt and Remove the Old Converter
With the sensors out of the way, use your socket set and wrenches to remove the bolts connecting the catalytic converter to the exhaust pipes. You may need to use a breaker bar for extra leverage if the bolts remain stubborn. Support the weight of the converter with one hand as you remove the final bolt so it does not drop on you. Carefully lower the old unit away from the exhaust system and pull it out from under the car. Keep the old hardware if it is still in good condition, though replacing it is always recommended.
Step 8: Clean the Exhaust Flanges Thoroughly
The mounting surfaces on the existing exhaust pipes must be perfectly clean to ensure a tight seal with the new converter. Use a wire brush or coarse sandpaper to scrub away any rust, carbon buildup, or remnants of the old gasket material. A clean, flat surface prevents dangerous exhaust leaks from forming around the new joints. Wipe the area down with a clean rag to remove any loose metal dust. Inspect the mating pipes for any severe corrosion that might require further repair before you proceed with the installation.
Step 9: Install the New Catalytic Converter
Position the new catalytic converter into place, ensuring it faces the correct direction according to the airflow arrows stamped on the shell. Sandwich the new gaskets between the converter flanges and the exhaust pipes. Insert your new bolts and hand-tighten the nuts to hold the assembly together. Once everything aligns perfectly, use your wrenches to tighten all the hardware securely, working in an alternating pattern to ensure even pressure on the gaskets. Finally, reinstall the oxygen sensors and carefully plug their electrical connectors back into the wiring harness.
Step 10: Lower the Vehicle and Test for Leaks
Clear all tools from under the car, raise it slightly to remove the jack stands, and carefully lower the vehicle back to the ground. Start the engine and let it idle while you listen closely for any sputtering sounds that indicate an exhaust leak near the new connections. You can also run your hand a few inches away from the flanges to feel for escaping puffs of air, being careful not to touch the rapidly heating metal. If you detect a leak, tighten the bolts slightly more until it stops. Clear any lingering engine codes with your scanner, and take the car for a test drive.
5 Things You Should Avoid
- Avoid buying non-compliant replacement parts; always ensure your new converter meets your state’s specific emissions regulations.
- Avoid working on the exhaust system while it is still hot to prevent serious burns.
- Avoid reusing old, damaged exhaust gaskets, as this almost always guarantees a noisy exhaust leak.
- Avoid using aggressive force on stuck oxygen sensors, which can strip the threads and destroy the sensor.
- Avoid replacing the converter without fixing the underlying engine issue that caused the original one to fail.
Frequently Asked Questions
Can I Just Clean My Catalytic Converter Instead of Replacing It?
Cleaning a catalytic converter is sometimes possible if the internal clogging is strictly carbon-based and minimal.
You can use specialized fuel additives designed to run through the system and break down light exhaust deposits.
However, if the internal ceramic honeycomb is melted, cracked, or missing, no amount of chemical cleaning will help.
Additives serve as a temporary band-aid rather than a permanent mechanical fix for a severely damaged unit.
Ultimately, replacement is the only reliable way to guarantee your vehicle passes emissions and runs correctly.
How Much Does It Cost to Fix a Catalytic Converter Yourself?
Fixing it yourself drastically reduces the overall expense since you eliminate costly professional labor charges entirely.
A standard replacement catalytic converter typically costs between two hundred and eight hundred dollars, depending on your vehicle.
You may also need to spend twenty to fifty dollars on new hardware, gaskets, and penetrating fluids.
If you need to purchase specialty tools like an oxygen sensor socket or heavy-duty jack stands, add another hundred dollars.
Overall, a DIY replacement generally costs a fraction of the thousands a dealership might charge for the same job.
Is It Legal to Drive Without a Catalytic Converter?
Driving a vehicle on public roads without a functioning catalytic converter is a direct violation of federal emissions laws.
Removing or bypassing this component allows highly toxic gases and unburned hydrocarbons to pollute the local atmosphere directly.
If caught driving a modified vehicle without one, you can face massive fines and immediate vehicle impoundment.
Furthermore, modern cars are computer-tuned to run with backpressure, so removing it will make the engine run poorly.
Always keep a compliant converter installed to ensure legal driving, optimal engine performance, and environmental protection.
Conclusion
Replacing a catalytic converter is a straightforward mechanical task that most determined DIYers can accomplish over a weekend.
By following these steps on how to fix a catalytic converter, respecting the intense heat of the exhaust system, and taking the time to loosen rusted bolts properly, you can successfully restore your car’s emissions system. Remember to address any underlying engine issues first so your brand-new part does not suffer the same fate as the old one.
With a bit of patience and elbow grease, your vehicle will run smoothly, efficiently, and cleanly once again.
About
Ora Hayes is a distinguished figure in the world of DIY Thecarfixes, with over a decade of expertise in automotive diagnostics and high-performance maintenance. Her professional focus lies in merging mechanical precision with modern digital tools, fostering repair solutions that are both cost-effective and highly reliable. As the author of Thecarfixes, Ora Hayes delves into the art and science of automotive restoration, inspiring car owners and hobbyist mechanics alike.
Education
RMIT University (Melbourne, Australia) Associate Degree in Automotive Engineering — Focus on vehicle dynamics, industry-driven repair protocols, and advanced diagnostics. Gained hands-on experience with traditional mechanical tools and modern ECU remapping software.
Nottingham Trent University (United Kingdom) Bachelor’s in Mechanical Design and Automotive Engineering (Honors) — Specialized in automotive systems with a focus on blending technical engineering with everyday usability. Participated in industry projects, working with leading automotive manufacturers to gain real-world insights into vehicle longevity.
Publications and Impact
In Thecarfixes, Ora Hayes shares her insights on troubleshooting complex engine issues, material durability, and strategies for efficient garage setups. Her writing bridges the gap between professional mechanic knowledge and the home enthusiast’s needs, making it a must-read for both everyday drivers and seasoned gearheads.