Welcome, fellow home gardeners! We rely constantly on our dependable pickup trucks and utility vehicles to transport massive loads of rich compost, heavy landscaping stones, and delicate nursery plants. When your trusty vehicle suddenly begins vibrating violently at neighborhood stoplights, your relaxing weekend gardening plans can quickly turn into a frustrating ordeal. Those harsh, aggressive vibrations usually indicate that the thick rubber cushions holding your heavy engine block have completely deteriorated.
If you are wondering exactly how to replace motor mounts, you have arrived at the perfect mechanical resource. You do not need to be a professional automotive technician to understand these basic structural components. This beginner-friendly guide walks you safely through the entire diagnostic and repair process using standard household hand tools. We will cover securing your vehicle properly, supporting the heavy engine block, and swapping out the damaged rubber insulators. Let us grab a pair of heavy work gloves, pop the metal hood, and restore your reliable garden transport back to its original smooth condition!
Step-by-Step Guide: How to Replace Motor Mounts
Step 1: Park and Secure Your Hauling Vehicle
Before beginning any serious mechanical repair beneath your heavy garden truck, you must create an incredibly safe working environment. Park your vehicle on a perfectly flat, solid concrete surface rather than sinking gravel or soft backyard soil. Engage your emergency parking brake firmly to prevent the heavy truck from rolling backward while you work underneath the chassis. Place sturdy wooden wheel chocks tightly behind the rear tires to provide an additional layer of critical physical security. Creating a perfectly stable workspace guarantees your personal safety and ensures your mechanical lifting tools operate at maximum efficiency without slipping dangerously.
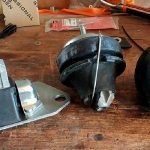
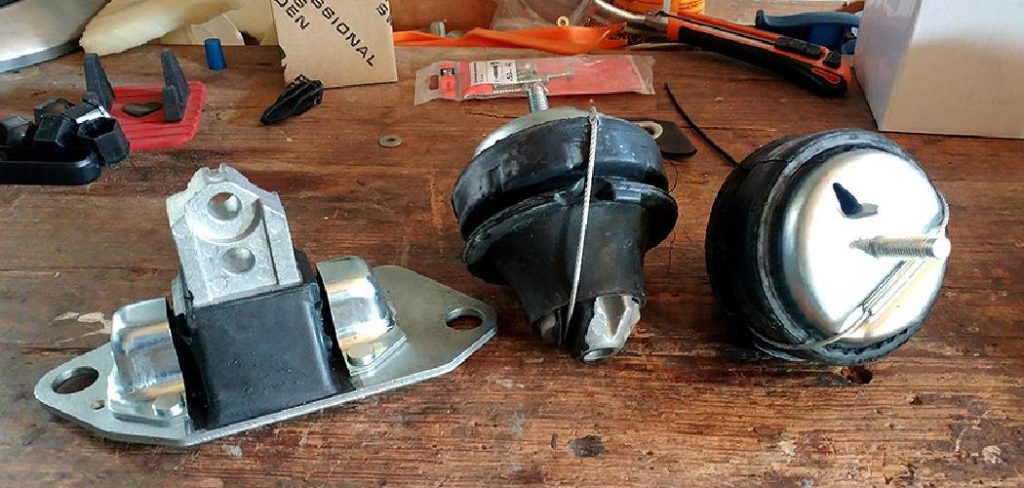
Step 2: Locate the Damaged Rubber Cushions
Identifying the exact location of your deteriorated structural components saves you immense amounts of time and frustration. Open your metal hood and inspect the lower sides of the heavy engine block where it physically connects to the truck frame. You are looking for thick metal brackets encasing large blocks of dense black rubber. Use a bright flashlight to search for obvious physical damage, such as deep cracks, missing rubber chunks, or dark hydraulic fluid leaking down the metal frame. Finding the specific broken insulator dictates exactly which side of the vehicle you must raise and support first.
Step 3: Master how to replace motor mounts Safely
Preparing your tools and understanding the structural geometry represents the most critical phase of this entire weekend repair project. You must gather a heavy-duty hydraulic floor jack, several thick blocks of scrap wood, and a comprehensive metric socket wrench set. Organizing your tools neatly on the concrete driveway prevents you from frantically searching for missing wrenches while supporting a massive automotive engine. Treat this preparation phase exactly like organizing your favorite heirloom seeds before the busy spring planting season begins. Having everything readily accessible ensures you can complete the heavy structural repair quickly, safely, and highly efficiently.

Step 4: Support the Engine Block From Below
You must physically lift the massive weight of the engine block off the broken rubber insulators before unbolting any metal brackets. Slide your heavy hydraulic floor jack underneath the thick metal oil pan located at the very bottom of the engine. Place a wide block of scrap wood directly between the steel jack and the aluminum oil pan to distribute the intense lifting pressure evenly. Slowly pump the hydraulic handle until the wooden block makes firm contact, then lift the engine upward about one single inch. This gentle lift entirely removes the crushing gravitational tension from the broken rubber components.
Step 5: Unbolt the Broken Metal Brackets
With the heavy engine block fully supported by your hydraulic jack, you can safely remove the damaged structural hardware. Grab your longest socket wrench and locate the main primary bolt running directly through the center of the rubber cushion. Turn the wrench counterclockwise using steady, even pressure to break the rusted threads loose.
Once the central bolt is completely removed, unbolt the surrounding metal bracket from the primary engine block and the vehicle frame. Pull the heavy, broken assembly completely out of the engine bay, taking careful mental notes regarding exactly how the original metal hardware was oriented.
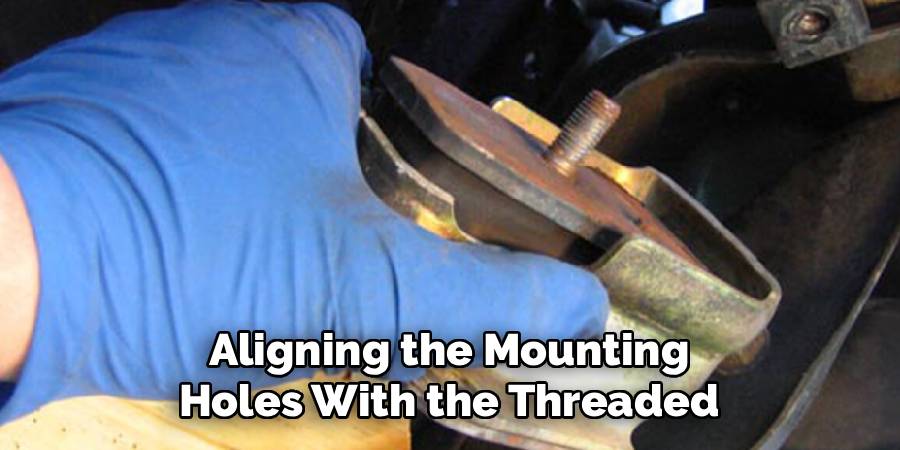
Step 6: Install the Fresh Rubber Components
Installing the brand new structural support requires careful alignment to ensure the engine sits perfectly level inside the engine bay. Slide the fresh rubber and metal assembly directly into the empty space, aligning the mounting holes with the threaded inserts on the vehicle frame. Insert the new mounting bolts by hand first, spinning them gently to ensure you do not accidentally cross-thread the delicate metal holes. Tighten all the surrounding bracket bolts firmly with your socket wrench before sliding the massive central connecting bolt completely through the fresh rubber core. Hand-tightening prevents incredibly frustrating structural alignment issues during the final steps.
Step 7: Lower the Engine and Test Drive
The final phase of this heavy structural repair involves returning the engine weight to the brand new rubber cushions. Slowly turn the release valve on your hydraulic floor jack to lower the massive engine block back into its proper resting position. Remove the wooden blocks and tighten the central mounting bolt to the exact torque specifications outlined in your repair manual. Start the vehicle engine and let it idle quietly in your driveway, feeling the steering wheel for any lingering harsh vibrations. Your hauling truck should feel remarkably smooth, perfectly ready to transport your heavy landscaping supplies securely.
Frequently Asked Question
What Happens If I Ignore Broken Engine Mounts?
- Ignoring these critical structural failures leads to severe mechanical damage throughout your entire drivetrain system over time.
- The unsecured engine will physically violently slam against the metal frame every time you press the accelerator pedal.
- This aggressive movement stretches delicate electrical wiring harnesses and can literally snap your primary radiator cooling hoses.
- Eventually, the excessive movement will destroy your expensive transmission housing and snap your rotating metal driveshaft.
- Replacing the cheap rubber components immediately saves you from catastrophic, incredibly expensive mechanical breakdowns later this season.
How Long Do Rubber Engine Cushions Usually Last?
- Premium factory insulators typically provide excellent structural support for roughly eighty thousand to one hundred thousand miles.
- However, hauling incredibly heavy landscaping trailers or driving constantly down rough, unpaved agricultural roads drastically reduces their lifespan.
- Extreme summer heat and leaking motor oil can chemically dissolve the dense rubber material much faster than normal.
- You should actively inspect these components during your annual spring vehicle maintenance routine.
- Treating your truck gently and avoiding aggressive, sudden acceleration extends the functional lifespan of these vital rubber cushions.
Do I Need Specialized Mechanical Lifting Tools?
- You absolutely do not need expensive professional mechanic hoists to complete this structural repair in your home driveway.
- A standard heavy-duty hydraulic floor jack and thick pieces of scrap wood provide plenty of safe lifting capacity.
- Never use the flimsy emergency scissor jack included with your spare tire to lift a massive engine block.
- You will also need a high-quality socket wrench set featuring long extension bars to reach buried hardware.
- Taking your time and working methodically ensures standard household tools are completely sufficient for this heavy repair.
Should I Replace All Rubber Brackets At Once?
- Automotive experts highly recommend replacing the primary left and right structural supports simultaneously for perfectly balanced engine geometry.
- When one rubber cushion fails completely, the remaining mounts suffer incredible physical stress trying to stabilize the heavy engine alone.
- Installing just one single new mount often causes the older, weakened mounts to fail rapidly within a few weeks.
- Purchasing a complete hardware kit usually saves you money and prevents you from repeating this heavy physical labor.
- Doing the job comprehensively guarantees your reliable hauling truck remains perfectly smooth for many upcoming planting seasons.
Can Damaged Mounts Cause Transmission Shifting Issues?
- Yes, severe engine movement directly impacts the complex mechanical geometry connecting your manual or automatic transmission system.
- When the engine block tilts violently during heavy acceleration, the physical shift linkages become severely stretched and misaligned.
- You might experience grinding gears, delayed shifting, or the vehicle suddenly popping out of gear entirely while driving.
- Restoring the proper structural alignment instantly cures many mysterious, highly frustrating transmission shifting problems.
- Securing the engine block ensures all mechanical linkages operate smoothly while you haul heavy bags of organic topsoil.
Conclusion
Maintaining the reliable utility vehicle you use to haul heavy gardening supplies requires the exact same patience and dedication you apply to your thriving backyard vegetable patches. By taking the time to secure your truck, lift the massive block safely, and install fresh rubber components, you guarantee a remarkably smooth driving experience. You no longer have to grip the vibrating steering wheel nervously, worrying that your truck might suddenly break down at the neighborhood hardware store while loaded with expensive organic mulch.
Understanding exactly how to replace motor mounts transforms a highly stressful automotive problem into an incredibly satisfying, money-saving weekend maintenance project. The noticeable improvement in your engine smoothness serves as a fantastic, deeply comforting reward for your careful physical efforts. Wash the heavy black grease off your hands, pack your sturdy gardening gloves into the clean truck bed, and drive confidently toward your next botanical adventure knowing your vehicle remains perfectly reliable!
About
Ora Hayes is a distinguished figure in the world of DIY Thecarfixes, with over a decade of expertise in automotive diagnostics and high-performance maintenance. Her professional focus lies in merging mechanical precision with modern digital tools, fostering repair solutions that are both cost-effective and highly reliable. As the author of Thecarfixes, Ora Hayes delves into the art and science of automotive restoration, inspiring car owners and hobbyist mechanics alike.
Education
RMIT University (Melbourne, Australia) Associate Degree in Automotive Engineering — Focus on vehicle dynamics, industry-driven repair protocols, and advanced diagnostics. Gained hands-on experience with traditional mechanical tools and modern ECU remapping software.
Nottingham Trent University (United Kingdom) Bachelor’s in Mechanical Design and Automotive Engineering (Honors) — Specialized in automotive systems with a focus on blending technical engineering with everyday usability. Participated in industry projects, working with leading automotive manufacturers to gain real-world insights into vehicle longevity.
Publications and Impact
In Thecarfixes, Ora Hayes shares her insights on troubleshooting complex engine issues, material durability, and strategies for efficient garage setups. Her writing bridges the gap between professional mechanic knowledge and the home enthusiast’s needs, making it a must-read for both everyday drivers and seasoned gearheads.