It’s an unfortunate but common situation: your car sputters, refuses to start, or flashes that pesky check engine light. Mechanics can charge a hefty sum to diagnose and swap out a failed sensor—but, with patience (and a bit of know-how), you don’t necessarily have to fork over the money. Left unchecked, a bad crankshaft position sensor leaves your engine guessing when to spark or inject fuel, and the result isn’t pretty—misfires, stalling, and sometimes, nothing but silence when you turn the key.

This isn’t a quick five-minute fix, but it’s far from impossible. The steps below outline not only what you’ll need, but also some ways to navigate the more frustrating bits. You learn a little more about how things fit together under the hood; perhaps, admittedly, you’ll end up cursing a bolt or two along the way. Let’s get to the details. In this guide on how to remove crank position sensor, we will cover everything from the necessary tools and parts to how to properly install the new sensor.
Signs of a Faulty Crankshaft Position Sensor
If your vehicle is experiencing any of these symptoms, it could be due to a faulty crankshaft position sensor:
- Engine misfires
- Stalling or difficulty starting the engine
- Loss of power while driving
- Check
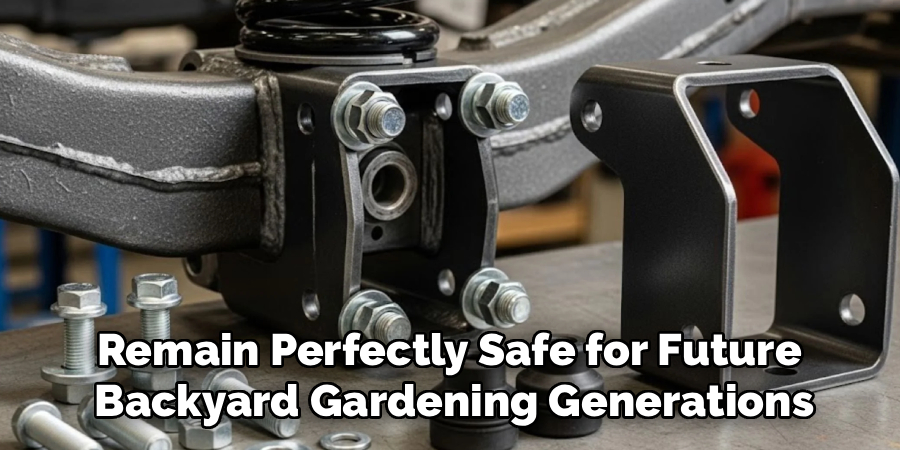
What Is a Crankshaft Position Sensor?
If you’re not entirely clear on the function of this sensor, that’s understandable. Nestled somewhere on your engine, the crankshaft position sensor tracks the rotation and position of—no prizes for guessing—the crankshaft itself. By feeding this information straight to the vehicle’s computer (the ECU), the system can coordinate spark timing and fuel injection with remarkable precision. In theory, that means every piston receives just the right zap at the right instant.
Now, when this sensor goes bad, your engine management system flies blind. Your timing’s off. Spark plugs might misfire or not fire at all, and fuel delivery becomes guesswork. Typical symptoms? A temperamental idle, erratic acceleration, complete no-start, or that persistent check engine light. You may even pull a diagnostic code if you have the scanner for it. Long story short, leaving this problem to fester spells trouble for your car’s overall health.
Safety Precautions Before Starting
Working on your car is satisfying, but the risks are real. Double-check: is the ground flat? Are the brakes set firmly? If you’re tempted to skimp on jack stands and just slide under a jacked-up car, don’t—jacks sometimes fail without warning, and nothing ruins a weekend like a pinned arm. Only work with the engine stone-cold, since the sensor lurks next to parts that retain heat long after you’ve killed the ignition.
Dirt, rust, hot metal edges: none are your friends. Toss on a pair of protective gloves; your hands will thank you if you happen to stumble across a sharp bracket or a pool of lingering coolant. Safety glasses aren’t just for show, either; even seasoned mechanics have had debris fall straight into their eyes while contorting under the hood. Caution beats regret every time.
Tools and Materials You’ll Need
Let’s not overcomplicate things. No need for a NASA toolkit. Rummage up:
- A socket set (bet on 10mm or 12mm for most cars)
- Ratchet wrench, ideally with a few extension bars
- Both flathead and Phillips screwdrivers
- Penetrating oil (helpful for corroded bolts)
- Clean rags or old towels
- Safety glasses and gloves (really, don’t skip these)
- Flashlight or a bright work light—nothing’s worse than guessing by feel
- An OBD2 scanner (optional, but handy if you want to check—or erase—codes afterward)
7 Simple Step-By-Step Guidelines on How to Remove a Crankshaft Position Sensor
Step 1: Locate the Sensor
Here’s where things get tricky. The sensor’s hiding spot isn’t universal—it might be front and center, near the crankshaft pulley, tucked beside the transmission bell housing, or wedged deep into the engine block near the oil pan. There’s a fair chance you’ll need to squint at a diagram online or in the manual for your car, unless you have the model-specific placement memorized.
Shine your light in deep recesses, follow the wiring harness, and mentally note how the sensor sits relative to its neighbors. Is there a hose just above it? A stubborn bracket off to the left? A little preparation here saves endless hassle later.
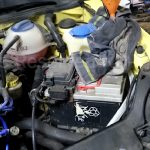
Step 2: Disconnect the Battery
Tempting as it may be to dive right in, pause and disconnect the battery. Even a dormant car may send enough current to fry an expensive ECU if wires touch in the wrong way. Find the negative terminal (the minus sign, usually the black cable), loosen the nut, and pull the clamp free. Don’t just let it dangle—tuck it safely where it can’t spring back.
Step 3: Remove Obstructions
Some engine bays are wide open. Most, regrettably, are not. Odds are, you’ll spot a tangle of hoses, shrouds, or heat shields standing between you and the sensor. Approach these obstacles with care—unsnap, unbolt, and label each part as you remove it. Corners and nooks swallow bolts alarmingly fast, so it’s wise to keep a tray or even a cup handy. If hoses or plugs come off, a bit of masking tape and a marker may spare you from playing the “what does this connect to?” game later.
Step 4: Disconnect the Electrical Connector
Here’s a test of patience: after years of heat and grime, the sensor’s plug can become stubbornly stuck. Locate the locking tab or lever—some require pressing, others a gentle pull. Plastic fatigues and cracks quickly, so resist the urge to wrench it loose with brute force. If needed, slip a small screwdriver under the tab to nudge it loose, but don’t twist hard enough to snap anything. Tearing out a sensor wire means you’ve just given yourself a much nastier job.
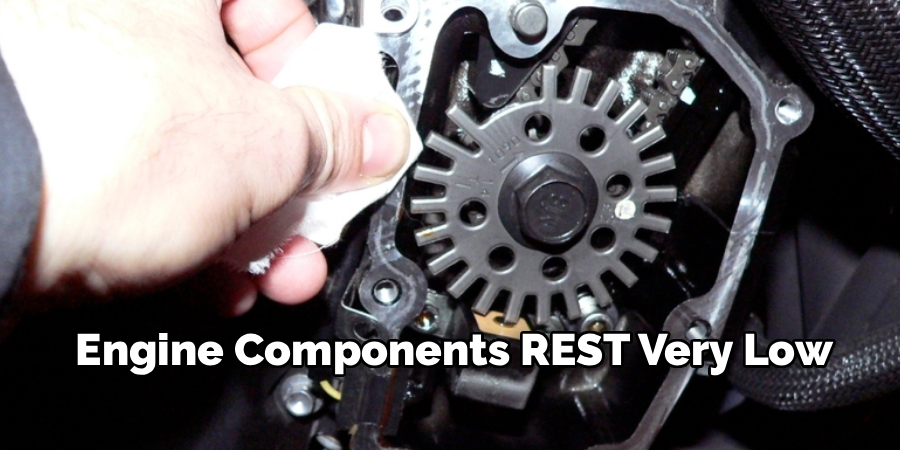
Step 5: Clean the Area Around the Sensor
You’d be amazed at how much greasy sludge clings around the base of even a well-cared-for engine. Before you extract the sensor, scrub the area vigorously. Any stray debris that drops into the open port works its way into the internals, potentially contaminating your oil or blocking passages. Use a shop rag or brush, maybe some degreaser, and wipe everything down. Focus on the seal between the sensor and the block—dirt loves to hide there.
Step 6: Loosen the Mounting Bolt
It’s usually one, sometimes two bolts holding things down, and they’re often 10mm. Seat your socket squarely so you don’t round off the bolt. Years of heat cycling and splashed water may have seized it. Don’t force it—let penetrating oil work its magic for a few minutes if there’s any resistance. With patience, even stubborn bolts usually surrender. Once loosened, spin them out by hand and set aside somewhere memorable.
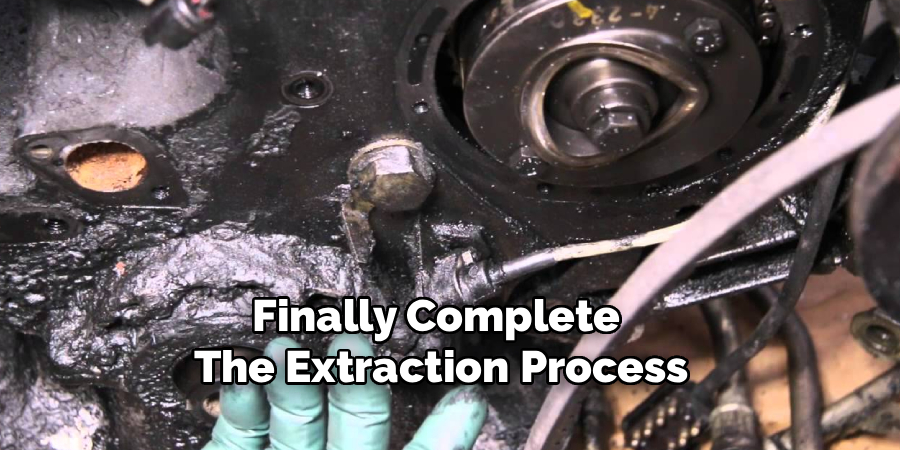
Step 7: Pull the Sensor Out
With the fastener gone, the sensor is held only by its own stubbornness—mainly that rubber O-ring, swollen and baked in place by years of engine heat. A bit of twisting as you pull can break the seal. Don’t resort to major prying against the plastic; a cracked housing will turn a straightforward job into a drawn-out ordeal. Gentle persistence is far more effective than brute force. If it’s still clinging fast, sometimes a small screwdriver slipped carefully under the flange gets it moving.
Following these steps on how to remove a crankshaft position sensor, you should be able to successfully remove the sensor without causing any damage. However, if you encounter difficulties or are unsure about completing this task, it is always best to seek help from a professional mechanic.
Common Problems During Removal
Some bolts rust to the point where the head can’t hold a socket—they round or even snap. If that happens, extraction becomes a delicate, sometimes maddening affair requiring drills and care not to leave shards in the engine block.
Another headache: old sensors may crumble as you pull, the brittle plastic breaking off inside the block. Fishing these chunks out isn’t fun—you may need a pick tool, or occasionally, a screw threaded into the ruined plastic for extra grip.
Common Mistakes to Avoid
Resist using excessive force. A shattered sensor or stripped bolt complicates everything, possibly beyond a simple driveway repair.
Cutting corners on the cleaning phase? That’s another pitfall: it’s deceptively easy to drop muck into the block, only to pay for it with engine wear later. Yanking on wires in frustration won’t help either; those repairs can get fussy, fast.

After Removal / Replacement Steps
With the old sensor out, take a moment to wipe out the mounting hole—it’s often dirtier than expected. A dab of clean oil on the new sensor’s O-ring will help it slip into place. Press it in until flush, and only then thread the bolt by hand, so it seats squarely.
Tighten the bolt, reconnect the electrical plug (listen for the click), and replace any parts removed earlier. Hook up the battery again, fire up the engine, and watch: if it idles smoothly, and no new warning lights appear, you’re likely in the clear.
When to Seek Professional Help?
Honestly, things don’t always go smoothly. If a bolt snaps off level with the engine block or the sensor breaks and drops a piece inside, that’s a tough situation to remedy at home. Professional mechanics have the tools (specialty extractors, drills, sometimes even boroscopes) and the experience for these messier scenarios.
Likewise, if a fresh sensor doesn’t solve your problem—if starting is still a battle or codes persist—a wiring fault may lurk deeper in the harness than you can easily sort out.
Frequently Asked Questions
Q1: How Long Does It Take To Remove A Crankshaft Position Sensor?
Time can fluctuate based on access. On some cars, this is a breezy half-hour job. Others, with tightly packed engine bays or tangled add-ons, can stretch well past an hour—especially if bolts are seized or the sensor’s wedged tight.
Q2: Can I Drive With A Bad Crankshaft Position Sensor?
It’s not advisable, and not just because the car runs poorly. You risk stalling at speed, which can mean the loss of steering or braking assist—dangerous, plain and simple. Even if it drives, you’ll burn more fuel, struggle with misfires, and risk damaging other engine parts in the process.
Q3: Does A New Sensor Require Engine Reprogramming?
In almost all late-model vehicles, no special computer work is necessary: install the new sensor, clear old codes if you wish, and the system recognizes it automatically. That said, a few high-end European cars may prompt you for a quick calibration—a scan tool handles that. For most drivers, though, it’s plug-and-go.
Get Your Engine Running Smoothly Again
There’s something satisfying about tackling your own car repairs, even when they test your patience. Removing and replacing a crankshaft position sensor isn’t glamorous, but it’s a doable project if you keep a cool head and follow each step. The moments you spend wrestling with stubborn bolts or greasy connectors don’t just save money—they sharpen your understanding of how your car works.
Take it slow. Don’t cut corners, stay safe, and double-check every connection before turning the key. Thanks for reading this guide on how to remove a crankshaft position sensor.
About
Ora Hayes is a distinguished figure in the world of DIY Thecarfixes, with over a decade of expertise in automotive diagnostics and high-performance maintenance. Her professional focus lies in merging mechanical precision with modern digital tools, fostering repair solutions that are both cost-effective and highly reliable. As the author of Thecarfixes, Ora Hayes delves into the art and science of automotive restoration, inspiring car owners and hobbyist mechanics alike.
Education
RMIT University (Melbourne, Australia) Associate Degree in Automotive Engineering — Focus on vehicle dynamics, industry-driven repair protocols, and advanced diagnostics. Gained hands-on experience with traditional mechanical tools and modern ECU remapping software.
Nottingham Trent University (United Kingdom) Bachelor’s in Mechanical Design and Automotive Engineering (Honors) — Specialized in automotive systems with a focus on blending technical engineering with everyday usability. Participated in industry projects, working with leading automotive manufacturers to gain real-world insights into vehicle longevity.
Publications and Impact
In Thecarfixes, Ora Hayes shares her insights on troubleshooting complex engine issues, material durability, and strategies for efficient garage setups. Her writing bridges the gap between professional mechanic knowledge and the home enthusiast’s needs, making it a must-read for both everyday drivers and seasoned gearheads.