Maintaining your vehicle’s braking system is one of the most important responsibilities you have as a vehicle owner. While brake pads and shoes often get all the attention, brake drums play a massive role in ensuring you can stop safely and effectively.
Over time, friction wears down the inside of the brake drum, increasing its inner diameter. If a drum becomes too thin, it cannot absorb heat properly, leading to brake fade, vibration, and even catastrophic failure. Learning how to measure brake drums yourself empowers you to take control of your vehicle’s maintenance and ensures your braking system remains in peak condition.
This comprehensive guide will walk you through the entire process, explaining exactly what you need to know to measure your brake drums accurately and confidently right in your own garage.
What Will You Need?
Before you begin, gather the right tools. Having the correct equipment makes the job much easier and guarantees accurate results. You will need:
- Brake Drum Micrometer: This is a specialized tool designed specifically for measuring the inside diameter of brake drums. A standard ruler or tape measure will not provide the precision required for this job.
- Jack and Jack Stands: To safely lift and secure your vehicle.
- Lug Wrench or Impact Gun: To remove the wheels.
- Wire Brush and Brake Cleaner: To remove rust, brake dust, and debris from the drum before measuring.
- Safety Glasses and Gloves: To protect your eyes and hands from harmful brake dust and sharp metal edges.
- Shop Rags or Paper Towels: For wiping down the measuring surfaces.
- Your Vehicle’s Service Manual: To find the maximum discard diameter specification for your specific make and model.
10 Easy Steps on How to Measure Brake Drums
Step 1: Secure and Lift the Vehicle Safely
Safety must always be your primary concern when working on any vehicle. Park your car on a hard, completely flat surface to prevent it from rolling or shifting while you work. Engage the parking brake firmly and place heavy-duty wheel chocks behind the wheels on the opposite end of the vehicle.
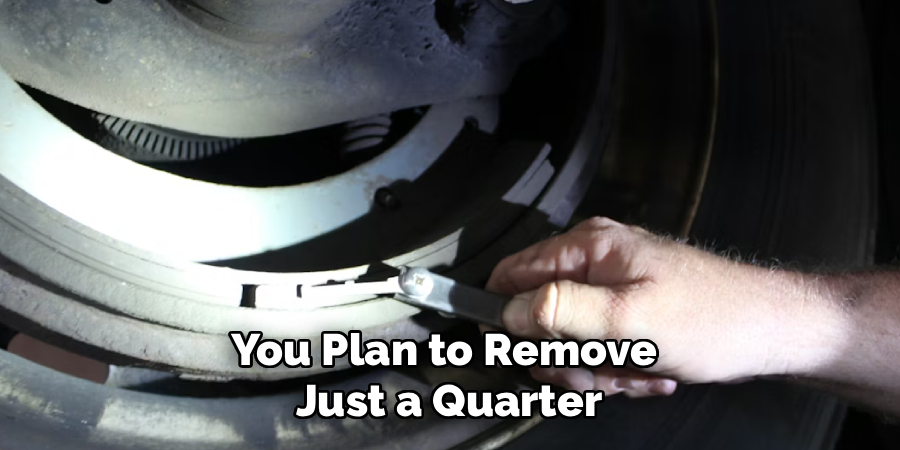
Loosen the lug nuts on the wheels you plan to remove just a quarter turn while the tires are still on the ground. Position your hydraulic floor jack under the factory-recommended lifting points and raise the vehicle slowly. Once it is high enough, place high-quality jack stands beneath the solid frame rails or pinch welds. Carefully lower the vehicle onto the stands and give it a firm shake to ensure it is completely stable before you ever put any part of your body underneath it.
Step 2: Remove the Wheels and Expose the Drum
With the vehicle safely supported in the air, you can now remove the lug nuts completely. Take the wheel off the hub and roll it out of your working area so you do not trip over it. You will now see the brake drum housing. If the drum has not been removed in a long time, it might be stuck to the hub due to rust and heat cycling.
If the drum refuses to slide off, do not panic. Locate the threaded holes on the face of the drum, insert the appropriate bolts, and slowly tighten them evenly to push the drum away from the hub. Alternatively, a few gentle taps with a rubber mallet around the outer edge can help break the rust bond. Pull the drum straight off and place it on a clean workbench.
Step 3: Thoroughly Clean the Braking Surface
A dirty brake drum will ruin your measurements. The inside surface of the drum where the brake shoes make contact must be absolutely spotless. Take your wire brush and aggressively scrub away any rust scale, hardened dirt, or heavy brake dust buildup on the friction surface.
Next, take a can of high-quality brake parts cleaner and spray the entire inside of the drum thoroughly. Place a drip pan underneath to catch the runoff. Use clean shop rags to wipe away the remaining solvent and grime. You want the metal to be bare, smooth, and dry so your measuring tools can make perfect contact with the actual surface of the drum, not a layer of accumulated road grime.
Step 4: Locate the Maximum Discard Specification
Every brake drum manufactured for modern vehicles has a specific discard limit. This number dictates the maximum allowable inside diameter of the drum. If the drum measures larger than this number, it is too thin to use and must be thrown away. Manufacturers stamp this crucial number directly onto the outside casting of the brake drum itself.
Look carefully around the outer edge or the front face of the drum for words like “Max Dia” followed by a measurement in millimeters or inches. If rust has eaten away the stamping, consult your vehicle’s factory service manual or look up the specifications for your specific vehicle online. You absolutely must know this number before you measure.
Step 5: Calibrate Your Brake Drum Micrometer
A brake drum micrometer is a highly sensitive, precision instrument. Before you rely on it to make a safety-critical decision, you must ensure it is reading accurately. Most professional brake drum micrometers come with a calibration bar or a standard block. Set the micrometer to the exact length of the calibration bar.
If the gauge reads zero, your tool is calibrated correctly. If it reads slightly above or below zero, you must adjust the dial face or the digital readout to zero it out. Taking a few moments to verify the accuracy of your measuring tool ensures that the numbers you record in the following steps represent the true physical state of your brake drums.

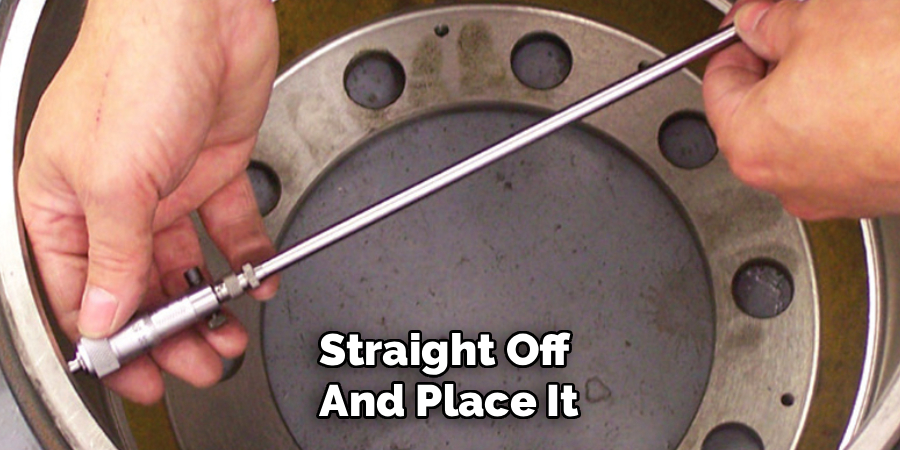
Step 6: Position the Micrometer Inside the Drum
Pick up your calibrated brake drum micrometer and carefully insert it into the open cavity of the brake drum. You need to measure the exact friction surface where the brake shoes press against the metal. Expand the micrometer arms until the contact points on both ends touch the inside walls of the drum.
Ensure the tool is perfectly level and passes straight through the exact center point of the drum. If the micrometer is tilted even slightly up, down, or sideways, you will record a measurement that is larger than the actual diameter. Take your time to align the tool horizontally across the widest point of the circle to guarantee precision.
Step 7: Take the First Diameter Measurement
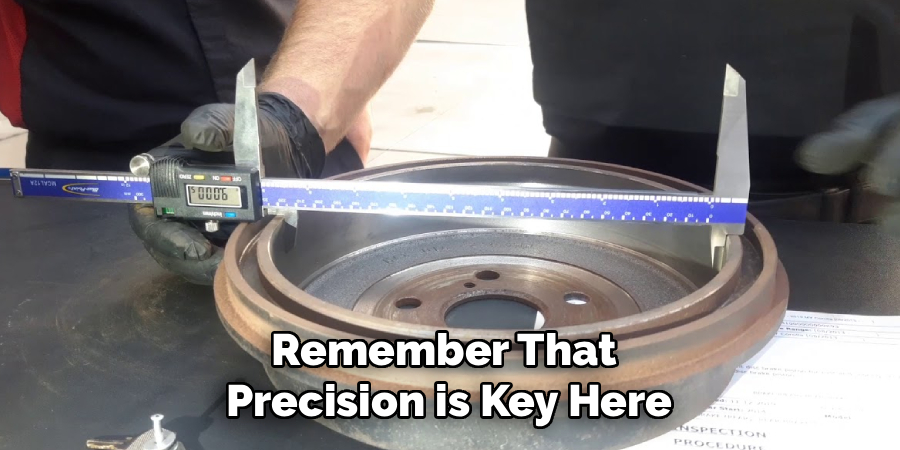
With the micrometer seated squarely across the center of the friction surface, gently adjust the thumbscrew or locking mechanism until you feel a slight drag when you move the tool. You do not want to force the arms outward too hard, as this can flex the tool and distort the reading.
Once you have established the correct tension, look at the dial or digital display and read the number. Write this measurement down on a piece of paper. This is your baseline inside diameter. Remember that precision is key here, so record the measurement down to the thousandths of an inch or the exact millimeter displayed on your instrument.
Step 8: Measure at Multiple Points to Check for Out-of-Roundness
A brake drum rarely wears perfectly evenly. Often, heat warping causes the drum to become slightly oval-shaped, a condition known as being “out-of-round.” To check for this, you must take several measurements. Leave the micrometer in the drum, but rotate it approximately 45 degrees from your initial measuring point.
Expand the tool, find the center, and take another reading. Write this second number down. Rotate the tool another 45 degrees and take a third reading, then one more to complete the circle. Compare these four numbers. If they vary by more than the manufacturer’s allowable out-of-round specification (usually around 0.006 inches), the drum is warped and will cause significant brake pulsation.
Step 9: Measure the Depth of Scoring and Grooves
In addition to checking the overall diameter and roundness, you must evaluate the physical condition of the friction surface. Run your fingernail across the inside of the drum. If your nail catches on deep grooves or heavy scoring, the drum has suffered aggressive wear, often from brake shoes that were worn down to the metal rivets.
You can use a depth gauge or the pointed end of a caliper to measure the depth of these specific grooves. Add the depth of the deepest groove to your overall diameter measurement. If this combined number exceeds the maximum discard specification, the drum cannot be machined smoothly and must be replaced immediately.
Step 10: Compare Findings and Make a Decision
Now that you have gathered all your data, it is time to evaluate the health of your brake drum. Take the largest diameter measurement you recorded during your multi-point check in Step 8. Compare this largest number directly to the maximum discard specification you found in Step 4.
If your measurement is well below the discard limit, your drum is safe to reuse or have resurfaced at a machine shop. If your measurement is exactly at or larger than the discard limit, the drum is unsafe, and you must purchase a new one. Do not attempt to reuse a drum that has exceeded its maximum diameter, as it poses a severe safety risk to you and other drivers on the road.
Conclusion
Understanding how to measure brake drums is a highly valuable skill that elevates your DIY mechanic capabilities.
By gathering the right tools, following proper safety procedures, and taking precise measurements with a calibrated micrometer, you remove the guesswork from brake maintenance. Remember that the maximum discard specification is not a suggestion—it is a strict safety boundary designed to keep you alive. Taking the time to properly clean, measure, and evaluate your brake drums ensures that your vehicle will stop exactly when you need it to.
Hopefully, this guide has given you a comprehensive understanding of how to properly measure your brake drums and determine their condition.
About
Ora Hayes is a distinguished figure in the world of DIY Thecarfixes, with over a decade of expertise in automotive diagnostics and high-performance maintenance. Her professional focus lies in merging mechanical precision with modern digital tools, fostering repair solutions that are both cost-effective and highly reliable. As the author of Thecarfixes, Ora Hayes delves into the art and science of automotive restoration, inspiring car owners and hobbyist mechanics alike.
Education
RMIT University (Melbourne, Australia) Associate Degree in Automotive Engineering — Focus on vehicle dynamics, industry-driven repair protocols, and advanced diagnostics. Gained hands-on experience with traditional mechanical tools and modern ECU remapping software.
Nottingham Trent University (United Kingdom) Bachelor’s in Mechanical Design and Automotive Engineering (Honors) — Specialized in automotive systems with a focus on blending technical engineering with everyday usability. Participated in industry projects, working with leading automotive manufacturers to gain real-world insights into vehicle longevity.
Publications and Impact
In Thecarfixes, Ora Hayes shares her insights on troubleshooting complex engine issues, material durability, and strategies for efficient garage setups. Her writing bridges the gap between professional mechanic knowledge and the home enthusiast’s needs, making it a must-read for both everyday drivers and seasoned gearheads.