A low voltage knock sensor code can make your car feel confusing, especially if the engine still seems to run normally. The knock sensor listens for abnormal combustion, often called engine knock or pinging, and sends that information to the engine control module. When the signal voltage is too low, the computer may not trust the sensor’s reading, which can affect timing, performance, fuel economy, and long-term engine health.

This guide explains how to fix knock sensor low voltage in a practical, beginner-friendly way. You will learn what the problem means, why it matters, and how to inspect the sensor, wiring, connectors, and related systems before replacing parts. The goal is not to guess. The goal is to test, confirm, and repair the real cause.
Why Addressing Knock Sensor Issues Matters
Your knock sensor helps protect the engine from damaging combustion. When air and fuel ignite too early or burn unevenly, the engine can produce a sharp metallic ping. That ping may seem small, but repeated knock can stress pistons, bearings, valves, and cylinder walls.
The engine control module uses knock sensor data to adjust ignition timing. If the sensor detects knock, the computer can reduce timing advance to protect the engine. If the sensor signal is too low, missing, or unreliable, the computer may set a diagnostic trouble code and use a backup strategy.
That backup strategy can reduce power. You may notice sluggish acceleration, lower fuel mileage, rough running, or a check engine light. In some cases, the vehicle may feel fine at first, but the risk is still there because the computer may not be getting accurate information.
Step-by-Step Guide to Fixing Your Knock Sensor
Step 1: Confirm the Exact Trouble Code
Start by scanning the vehicle with an OBD-II scanner. Common knock sensor-related codes include P0325, P0327, P0330, and P0332, depending on the vehicle and sensor bank. Write down the code, freeze frame data, engine temperature, rpm, and driving conditions when the code was stored.
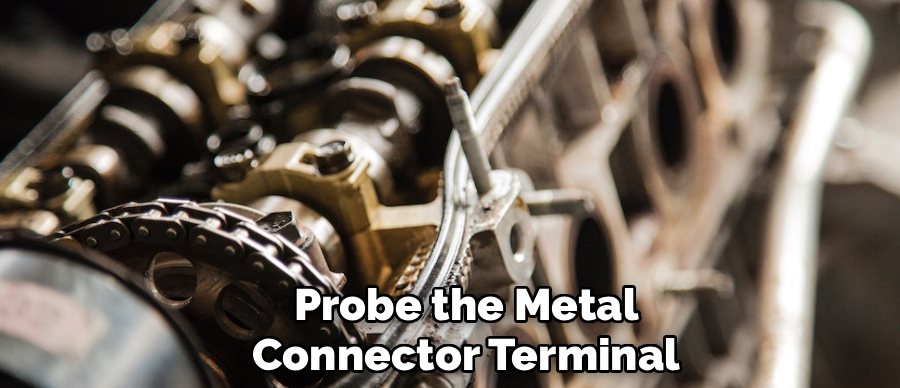
This first step matters because not all knock sensor codes mean the same thing. A low input code often points to a voltage signal problem, but the cause can still be electrical, mechanical, or sensor-related. If you want to understand how to fix knock sensor low voltage correctly, begin with the exact code instead of replacing parts blindly.
Step 2: Check for Engine Performance Symptoms
Before touching the sensor, pay attention to how the engine behaves. Look for hesitation, pinging under acceleration, rough idle, poor fuel economy, or reduced power. Also note whether the check engine light came on after heavy acceleration, towing, rain, washing the engine bay, or recent repair work.
These clues help narrow the cause. For example, if the code appeared after an intake manifold repair, a connector may be loose. If the engine pings under load, there may be a real combustion issue. If the car runs normally but the code returns quickly, the problem may be in the sensor circuit rather than the engine itself.
Step 3: Inspect the Wiring and Connector
Turn the engine off and let it cool before inspecting the wiring. Locate the knock sensor using a repair manual or reliable vehicle-specific diagram. On many engines, it may sit on the engine block, cylinder head, or under the intake manifold.
Check the connector for broken locks, bent terminals, corrosion, oil intrusion, coolant residue, or loose fit. Then inspect the wiring harness for rubbing, melted insulation, rodent damage, stretched wires, or previous poor repairs. A knock sensor produces a small signal, so even minor wiring damage can affect voltage readings. Repair damaged wires with proper automotive-grade connectors and heat-shrink protection.
Step 4: Test the Reference, Signal, and Ground Circuits
Use a digital multimeter to test the circuit according to your vehicle’s service information. Some knock sensors use one wire and ground through the engine block, while others use two wires. Do not assume the circuit design without checking the diagram.
With the connector unplugged, inspect for proper continuity, resistance, and short-to-ground or short-to-voltage conditions. If the sensor circuit has high resistance, an open wire, or a poor ground path, the computer may see a low voltage signal. This is one of the most common reasons people search for how to fix knock sensor low voltage after a new sensor does not solve the problem.
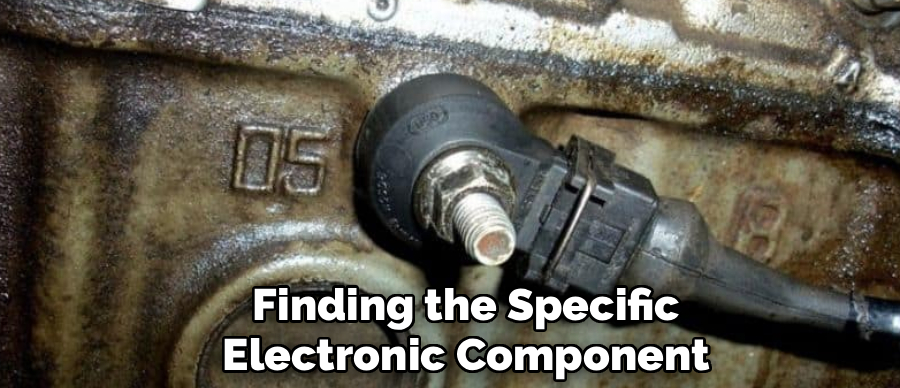
Step 5: Remove the Faulty Component
Once you confirm the vehicle wiring delivers adequate electrical power, you must completely remove the defective component from the engine block. Use a deep socket and a sturdy metal ratchet to loosen the central mounting bolt. Treat the surrounding brittle engine parts with the exact same gentle care you use when dividing delicate perennial plant roots. Apply steady pressure to the ratchet handle to avoid accidentally snapping the rusted bolt inside the expensive engine block. Once loosened properly, unscrew the device entirely by hand and lift it safely away. Clean away any accumulated engine grease near the empty threaded opening.
Step 6: Install the Correct Replacement Part
If testing confirms the sensor is faulty, replace it with a part that matches the vehicle’s specifications. Cheap sensors may fit physically but send an inaccurate signal. This can cause the same code to return or create new drivability problems.
Torque is critical. A knock sensor that is too loose may not detect vibration well, while one that is too tight can be damaged or become overly sensitive. Use a torque wrench and follow the manufacturer’s specification. Do not add thread sealant unless the service manual says to use it. After installation, reconnect the harness securely and route it away from heat, sharp edges, and moving parts.
Step 7: Clear the Code and Complete a Road Test
After the repair, clear the code with a scan tool. Start the engine and let it reach normal operating temperature. Watch for warning lights, rough running, or abnormal engine noise. If your scan tool shows live data, monitor knock sensor activity and timing behavior during light and moderate acceleration.
Then perform a careful road test. Drive under conditions similar to when the code first appeared, such as acceleration uphill or steady cruising. If the code does not return and the engine runs smoothly, the repair was likely successful. The final proof of how to fix knock sensor low voltage is not just clearing the code, but confirming it stays gone after real driving.
Frequently Asked Questions
What Does a Knock Sensor Low Voltage Code Mean?
A knock sensor low voltage code means the engine control module is receiving a signal that is lower than expected from the knock sensor circuit. This can happen because of a failed sensor, damaged wiring, corroded connector, poor ground, or an internal computer issue. It does not always mean the engine is knocking. The code usually points to a signal problem that needs proper testing before parts are replaced.
Can I Drive With a Bad Knock Sensor?
You may be able to drive for a short time, but it is not a good long-term plan. A faulty knock sensor can prevent the computer from adjusting ignition timing correctly. This may reduce power, hurt fuel economy, or leave the engine less protected from harmful knock. If the check engine light is flashing, the engine is running poorly, or you hear pinging under acceleration, avoid driving until the issue is diagnosed.
Is a Knock Sensor Hard to Replace?
The difficulty depends on the vehicle. On some engines, the knock sensor is easy to access from the top or side of the engine. On others, it may sit under the intake manifold, which makes the job more time-consuming. The replacement itself is usually simple, but access, correct torque, and wiring inspection are important. If the sensor is buried, many beginners choose professional help.
What Causes Knock Sensor Wiring to Fail?
Heat, vibration, oil leaks, coolant leaks, age, and rodent damage can all harm knock sensor wiring. The harness may also get pinched during other repairs, especially when intake parts or engine covers are removed. Since the knock sensor signal is sensitive, a small wiring issue can trigger a low voltage code. That is why visual inspection and circuit testing should happen before replacing the sensor.
Will Higher-octane Fuel Fix a Knock Sensor Code?
Higher-octane fuel can help if the engine is truly knocking because of fuel quality or heavy load, but it will not fix a damaged sensor circuit. If the code is caused by low voltage, the issue is usually electrical or sensor-related. Use the octane recommended by the vehicle manufacturer. If pinging continues or the code returns, test the sensor, wiring, connector, and engine control circuit.

Conclusion
A knock sensor low voltage code should not be ignored, but it also should not lead to guesswork. Start with the trouble code, inspect the wiring, test the circuit, examine the sensor, and replace parts only when the evidence supports it. This approach protects your engine and helps you avoid wasting money.
If you want to know how to fix knock sensor low voltage, the key is to diagnose the full circuit, not just the sensor itself. Use a scan tool and multimeter, follow the correct torque specs, and confirm the repair with a real road test. If access is difficult or the code returns after testing, contact a qualified mechanic for a complete diagnosis.

About
Ora Hayes is a distinguished figure in the world of DIY Thecarfixes, with over a decade of expertise in automotive diagnostics and high-performance maintenance. Her professional focus lies in merging mechanical precision with modern digital tools, fostering repair solutions that are both cost-effective and highly reliable. As the author of Thecarfixes, Ora Hayes delves into the art and science of automotive restoration, inspiring car owners and hobbyist mechanics alike.
Education
RMIT University (Melbourne, Australia) Associate Degree in Automotive Engineering — Focus on vehicle dynamics, industry-driven repair protocols, and advanced diagnostics. Gained hands-on experience with traditional mechanical tools and modern ECU remapping software.
Nottingham Trent University (United Kingdom) Bachelor’s in Mechanical Design and Automotive Engineering (Honors) — Specialized in automotive systems with a focus on blending technical engineering with everyday usability. Participated in industry projects, working with leading automotive manufacturers to gain real-world insights into vehicle longevity.
Publications and Impact
In Thecarfixes, Ora Hayes shares her insights on troubleshooting complex engine issues, material durability, and strategies for efficient garage setups. Her writing bridges the gap between professional mechanic knowledge and the home enthusiast’s needs, making it a must-read for both everyday drivers and seasoned gearheads.