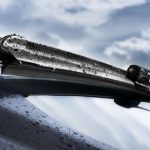
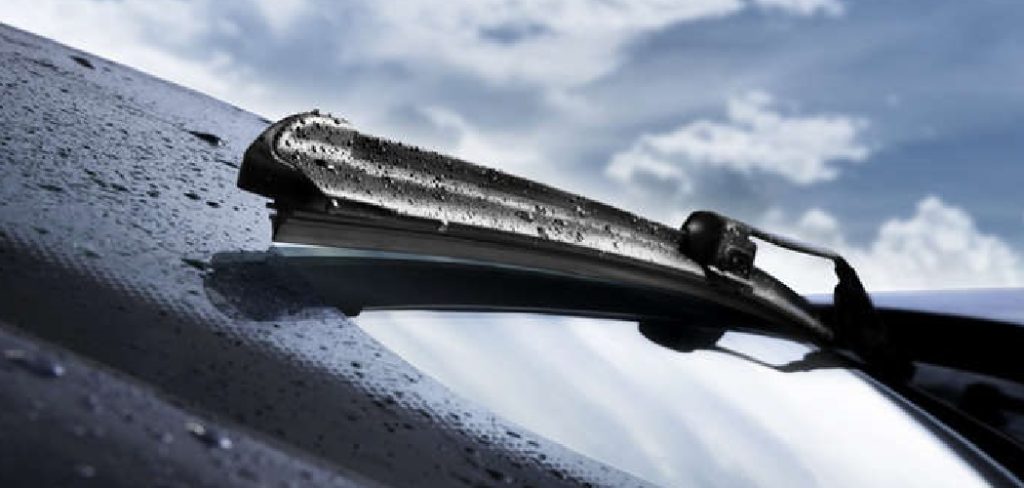
Clear visibility dictates fundamental automotive safety. Driving through heavy rain or sleet with degraded rubber components introduces unnecessary hazards to your daily commute. Replacing those old, streaky parts restores optical clarity almost immediately.
Many vehicle owners feel slightly intimidated by the installation process. They might assume modern automotive components require specialized tools or professional intervention. Fortunately, learning exactly how to change michelin wiper blades requires nothing more than basic observation and a few minutes of your time.
This guide will walk you through the entire replacement procedure. We will decipher the unique connector systems and provide a precise installation walkthrough. By adopting a methodical approach, you can eliminate annoying streaks and secure a clear windshield.
Understanding Michelin Wiper Blade Connector Types
Modern vehicles utilize a surprisingly wide variety of wiper arm styles. Automakers seemingly refuse to agree on a universal standard for this basic exterior component. Michelin adapts to this fractured landscape by utilizing specialized, modular plastic connectors.
These interchangeable mounts allow a single blade to fit dozens of different car models. This engineering choice might suggest a broader industry shift toward universal aftermarket components. Understanding which mounting system your specific vehicle uses dictates your next physical steps.
The Michelin EZ Lok Connector System
The proprietary EZ Lok system comes pre-installed on many premium blades. This streamlined housing specifically accommodates the highly common J-hook wiper arms. You will not need any additional plastic adapters if your car features this traditional hook design.
The physical mechanism relies on a simple hinged cap that swings open. This creates a wide gateway for the metal hook to slide inside. Snapping that cap shut secures the blade instantly and prevents it from flying off at highway speeds.
Adapters For Pin Arm And Hook Wiper Arms
Some manufacturers prefer side pin, pinch tab, or push-button wiper arms. Michelin provides a secondary packet of small plastic adapters within the packaging to handle these alternative layouts. You must identify your vehicle’s arm type before attempting to mount the new rubber.
Removing the default EZ Lok connector might be necessary to fit the correct alternative adapter. You simply snap the corresponding plastic piece onto the center bridge of the blade. This modular approach appears to indicate a highly flexible design philosophy.
Preparation And Safety Measures
Transitioning from abstract theory to physical labor requires a brief pause for safety preparation. You might easily cause expensive cosmetic damage if you rush this process. The metal wiper arms hold an astonishing amount of spring tension.
A minor slip of the hand could send raw metal crashing down onto fragile glass. Preventing this specific disaster takes only ten seconds. Careful preparation usually yields a completely stress-free installation experience.
Protecting Your Windshield Glass
You must respect the extreme tension hidden within the wiper arm springs. Place a thick, folded towel directly on the windshield glass just beneath the metal arm. This creates a soft landing pad in case you accidentally bump the assembly.
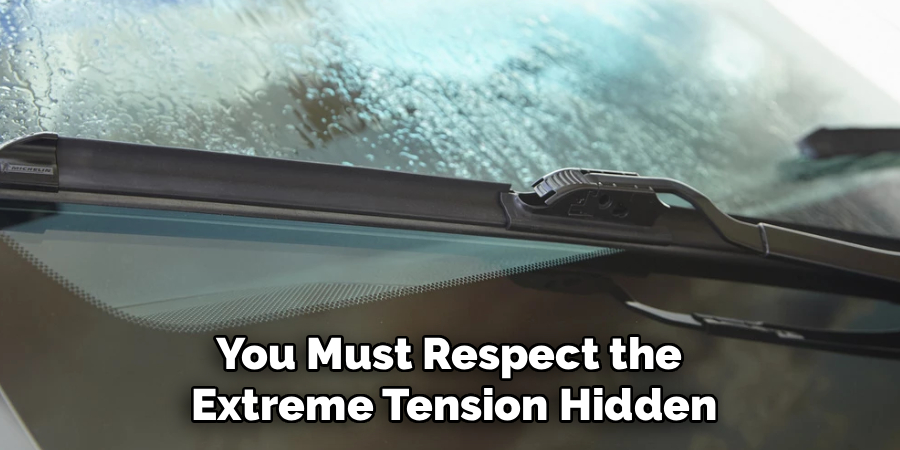
If the bare metal arm snaps back down unexpectedly, this towel absorbs the kinetic energy. It prevents the spring-loaded metal from shattering or heavily chipping your expensive windshield. Professional mechanics utilize this exact trick to mitigate accidental damage.
Removing The Old Wiper Blades Safely
Detaching the existing blades requires a specific physical motion. Look closely at the underside of the old connector to locate a small plastic release tab. You must press this tab firmly to unlock the internal catch.
While holding the tab, push the entire blade downward toward the base of the metal arm. The unit should slide out of the hook with moderate pressure. Advise patience here to avoid bending the metal arm permanently.
Step-by-Step Guide: How To Change Michelin Wiper Blades
We have reached the core instructional phase of this automotive task. Reassure yourself that following these precise steps prevents installation errors. You will lock the new components perfectly into place by moving sequentially.
Handling the new rubber carefully prevents you from transferring finger oils onto the wiping edge. Precision matters significantly more than raw physical strength. Let us begin the actual mounting procedure.
Step 1: Position The Wiper Arm
Lift the metal wiper arm entirely away from the windshield. You want to pull it outward until it locks into an upright, perpendicular posture. The internal spring should hold it firmly in this vertical stance.
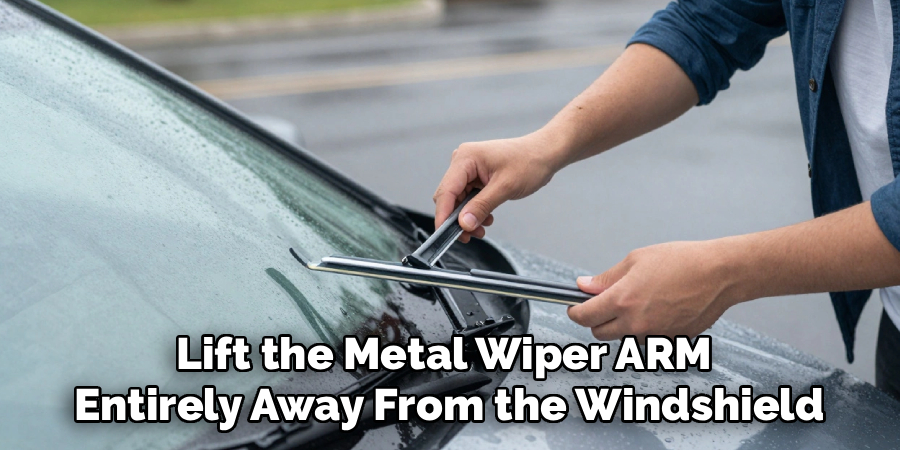
Keep one hand lightly resting on the metal arm at all times. You must prevent it from snapping backward while you prepare the new part with your other hand. This simple precaution drastically reduces the risk of cracked glass.
Step 2: Open The Michelin Connector Cap
Inspect the center bridge of your newly purchased Michelin wiper. You need to unsnap the top plastic hinge or EZ Lok cap located on the main connector. Squeeze the sides gently and lift the cover upward.
Opening this gateway provides the necessary clearance for the vehicle’s metal arm. You cannot force the hook inside without lifting this tiny plastic door first. This mechanism could suggest a focus on foolproof mechanical security.
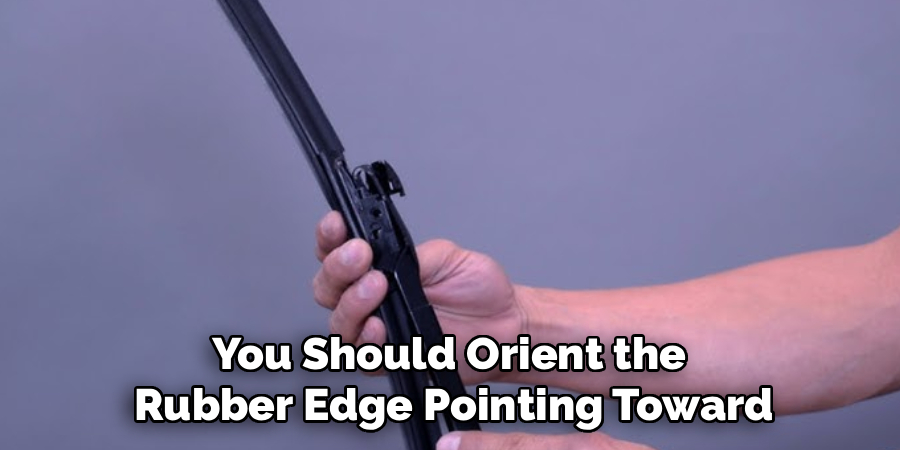
Step 3: Slide The Blade Onto The Hook
Position the new blade parallel to the metal arm. You should orient the rubber edge pointing toward the windshield glass. Guide the open plastic connector directly beneath the curve of the metal hook.
Push the blade upward firmly into the J-hook. You will eventually feel a distinct mechanical click. That sound indicates the metal is seated deeply within the plastic channel.
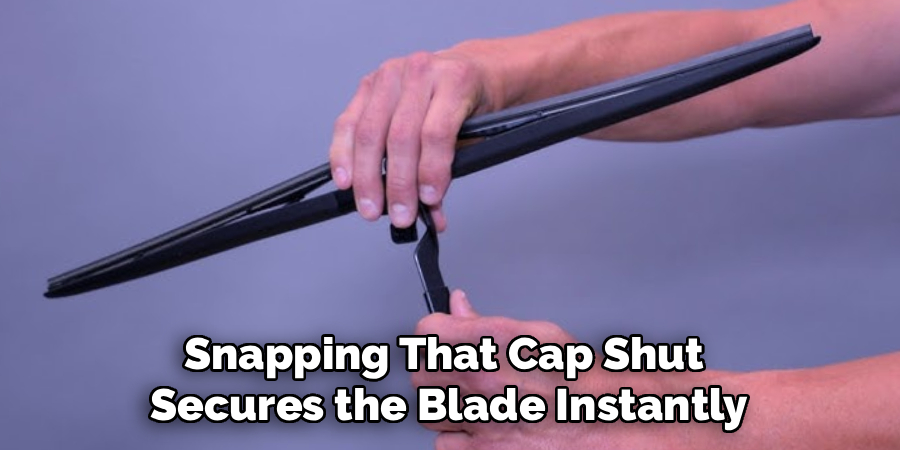
Step 4: Lock The Cap And Test The Fit
You must secure the installation before driving the vehicle. Press the hinged plastic cap down firmly until it snaps flush against the connector body. This action traps the hook inside the housing permanently.
Give the blade a gentle tug to verify it is completely locked in place. The assembly should feel solid and refuse to slide downward. Carefully lower the arm back down to rest against the windshield glass.
Troubleshooting Common Wiper Blade Issues
Drivers occasionally face minor frustrations immediately after installing fresh parts. You might notice annoying visual imperfections even with brand-new rubber. We can apply practical, analytical solutions to restore perfect visibility.
Identifying the root cause of these performance drops requires a bit of observation. The environment often plays a larger role than the physical blade itself. A dirty operating surface ruins the effectiveness of any sweeping mechanism.
Fixing Annoying Streaks And Smudges
Brand-new blades sometimes leave streaks right out of the box. This visual annoyance typically happens because the windshield glass retains an invisible layer of road grime. Old car wax and exhaust fallout create a stubborn chemical film on the exterior surface.
You must thoroughly clean the exterior glass to resolve this issue. Use a dedicated automotive glass cleaner and a fresh microfiber towel to strip away the oily residue. Removing this barrier allows the new rubber to make perfect, uninterrupted contact with the glass.
Resolving Squeaking Or Chattering Noises
A blade that skips aggressively across the glass creates a terrible, jarring noise. This physical chatter often means the metal wiper arm itself is slightly bent. A warped arm forces the rubber to attack the glass at an incorrect, harsh angle.
You can usually correct this geometry by gently twisting the metal arm with pliers. Place a rag over the metal to protect the black paint, and apply slight rotational pressure. Realigning the rubber blade so it sits perfectly vertical usually resolves this maddening noise.
Maintenance Advice For Long-Lasting Wiper Blades
Premium synthetic rubber compounds degrade over time due to environmental exposure. You can extend the effective lifespan of your purchase by providing minor preventative care. A little bit of attention keeps the material soft and highly functional.
Neglecting these exterior components accelerates their physical breakdown. Ultraviolet radiation and atmospheric pollutants constantly attack the flexible wiping edge. We recommend incorporating a few simple steps into your normal vehicle care routine.
Cleaning The Rubber Edge Regularly
You should actively clean the wipers every time you wash the rest of the car. Take a damp paper towel or a rag soaked in rubbing alcohol and wipe the sharp rubber edge gently. You will likely pull a thick streak of black dirt off the blade.
This simple wiping action removes abrasive grit and tree sap that degrade the synthetic rubber. Keeping the edge perfectly clean prevents it from scratching your windshield over time. It appears to indicate a proactive approach to automotive longevity.
Seasonal Care And Winter Precautions
Freezing weather introduces extreme physical stress to exterior plastics. You should never use your windshield wipers to clear heavy, frozen ice from the glass. The jagged ice crystals will instantly shred the delicate rubber edge into useless ribbons.
We strongly advise lifting the blades away from the glass before winter storms arrive. Parking your car with the arms pointed at the sky prevents the rubber from freezing solidly to the windshield. This foresight saves you from tearing the blade apart when you attempt to leave for work the next morning.
Conclusion
Upgrading your visibility does not require an expensive trip to the dealership or a local mechanic. You can execute this essential safety maintenance right in your own driveway. Identifying the correct adapter and protecting your windshield with a towel guarantees a flawless, professional-grade installation.
Listening for that final locking click ensures the new parts stay securely attached at highway speeds. Knowing exactly how to change michelin wiper blades empowers you to take absolute charge of your own safety. We encourage you to test your newly installed wipers with the vehicle’s washer fluid to confirm a smooth, silent, and crystal-clear sweep across the glass.
About
Ora Hayes is a distinguished figure in the world of DIY Thecarfixes, with over a decade of expertise in automotive diagnostics and high-performance maintenance. Her professional focus lies in merging mechanical precision with modern digital tools, fostering repair solutions that are both cost-effective and highly reliable. As the author of Thecarfixes, Ora Hayes delves into the art and science of automotive restoration, inspiring car owners and hobbyist mechanics alike.
Education
RMIT University (Melbourne, Australia) Associate Degree in Automotive Engineering — Focus on vehicle dynamics, industry-driven repair protocols, and advanced diagnostics. Gained hands-on experience with traditional mechanical tools and modern ECU remapping software.
Nottingham Trent University (United Kingdom) Bachelor’s in Mechanical Design and Automotive Engineering (Honors) — Specialized in automotive systems with a focus on blending technical engineering with everyday usability. Participated in industry projects, working with leading automotive manufacturers to gain real-world insights into vehicle longevity.
Publications and Impact
In Thecarfixes, Ora Hayes shares her insights on troubleshooting complex engine issues, material durability, and strategies for efficient garage setups. Her writing bridges the gap between professional mechanic knowledge and the home enthusiast’s needs, making it a must-read for both everyday drivers and seasoned gearheads.