Discovering a pool of cloudy water inside your vehicle’s headlight assembly often provokes immediate frustration. That stagnant moisture actively scatters the precise beam pattern of your expensive halogen or LED bulbs. This scattering creates a legitimately dangerous driving environment during nighttime commutes.
Many drivers simply assume a foggy lens requires an overpriced trip to the local dealership. They surrender to purchasing a completely new plastic assembly. However, knowing exactly how to reseal a headlight might save you hundreds of dollars in unnecessary parts.
The actual repair process relies heavily on patience and thermal manipulation. It requires very little advanced mechanical expertise. You simply need to understand the basic chemistry of automotive adhesives.
This guide explores the underlying environmental causes of water intrusion. We will provide a highly structured methodology for extracting the trapped fluid. By adopting an analytical approach to the repair, you could easily restore optical clarity to your car.
Understanding Moisture Dynamics Inside Headlights
Automotive lighting enclosures do not operate as perfect, hermetically sealed vacuums. They function as dynamic breathing systems that constantly adjust to atmospheric pressure shifts. Understanding this specific behavior could clarify why water enters the assembly in the first place.
Internal bulbs generate massive amounts of thermal energy the moment you turn them on. This intense heat rapidly expands the air trapped inside the plastic housing. Engineers typically install tiny rubber ventilation tubes to let this expanding air escape safely into the engine bay.
Turning the vehicle off reverses this thermal process entirely. The plastic housing cools down rapidly in the evening air. The internal atmosphere contracts and pulls fresh oxygen back through those same ventilation tubes.
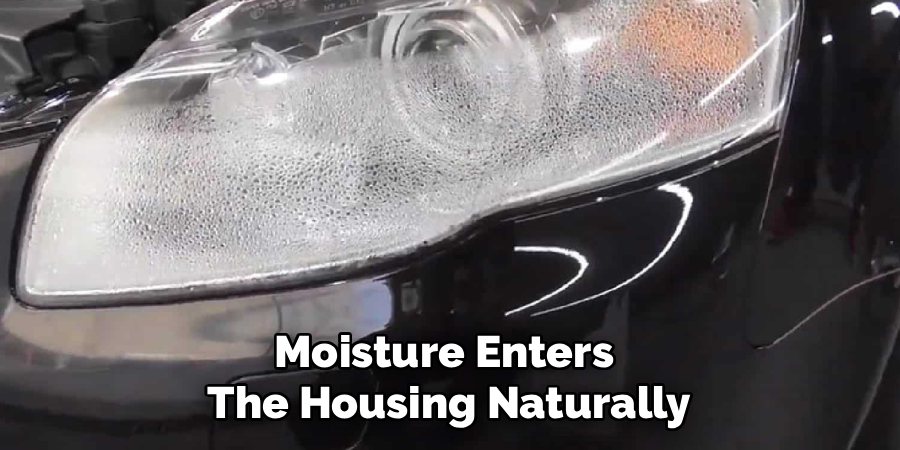
If the ambient air happens to be saturated with high humidity, moisture enters the housing naturally. The temperature differential causes condensation to form on the inside of the cold plastic lens. This physical reality dictates how we must approach the eventual repair.
How Factory Seals Fail
The actual perimeter of the lens relies on a thick bead of butyl rubber to block standing water. This soft adhesive sealant generally performs well for the first few years of a vehicle’s life. Over time, ultraviolet radiation and engine vibration appear to degrade the chemical elasticity of this material.
The sealant hardens. It slowly pulls away from the plastic retaining channels. A microscopic gap eventually forms between the clear polycarbonate lens and the black plastic backing.
Capillary action then pulls rainwater directly through this failed boundary during the next heavy storm. The factory essentially sets a ticking clock on the lifespan of these seals. It seems to indicate a manufacturing philosophy that prioritizes initial assembly speed over long-term durability.
The Dangers Of Standing Water
Minor condensation that evaporates after a few hours of driving is somewhat normal. Permanent water droplets clinging to the inside of the lens suggest a severe breach in the factory perimeter. This standing water poses a significant threat to the electrical architecture of your entire vehicle.
Moisture eventually drips down onto the exposed wiring harnesses. It pools inside the delicate bulb sockets. This stagnant water causes rapid oxidation on the metal contact points.
A short circuit could easily fry your expensive lighting control modules. What starts as a minor cosmetic annoyance transforms into a major electrical nightmare. Addressing the leak early prevents this cascading sequence of mechanical failures.
Essential Supplies For The Repair
Attempting this repair with improper materials usually guarantees a secondary failure down the road. You must gather highly specific automotive adhesives before removing the unit from your car. Standard household silicones simply cannot withstand the extreme temperature fluctuations of an engine compartment.
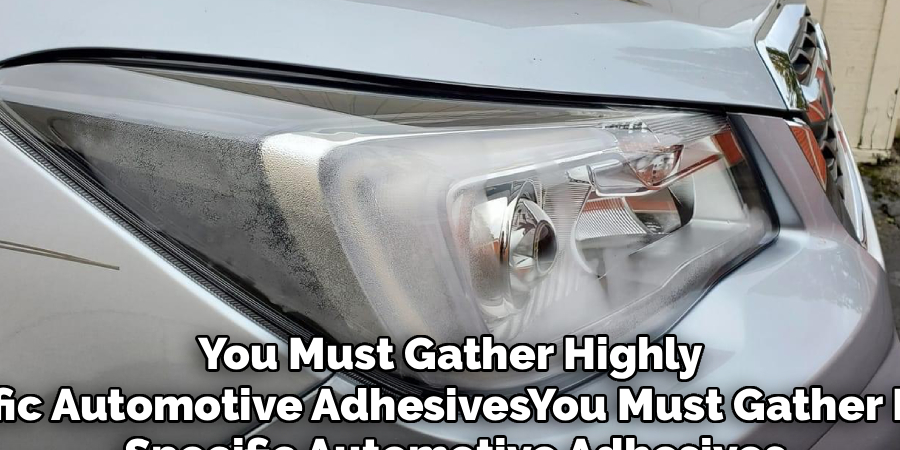
Sourcing the correct butyl rubber tape represents the most critical step in this entire procedure. This specialized, tar-like substance remains permanently tacky and flexible regardless of the weather. You can typically find rolls of automotive butyl tape at specialized auto body supply stores.
Avoid buying basic weatherstripping from a hardware store. That material lacks the thermal resistance required to survive near a hot halogen bulb. Purchasing the right adhesive ensures your repair actually lasts through the winter.
Gathering The Right Tools
You need a basic metric socket set to physically remove the headlight assembly from the front bumper. A flathead screwdriver and a dedicated plastic trim removal tool will assist in prying the lens apart later. Wearing heavy leather work gloves is absolutely mandatory to protect your hands.
Hot plastic and sharp edges present distinct physical hazards. You must also secure a reliable heat source to soften the existing factory glue. A standard kitchen oven provides the most even, controlled thermal environment for this specific task.
If an oven is entirely unavailable, an industrial heat gun might suffice. Heat guns require vastly more user caution to operate safely. Concentrated thermal energy could easily melt the thin plastic housing if you hold the nozzle in one place for too long.
Cleaning And Preparation Materials
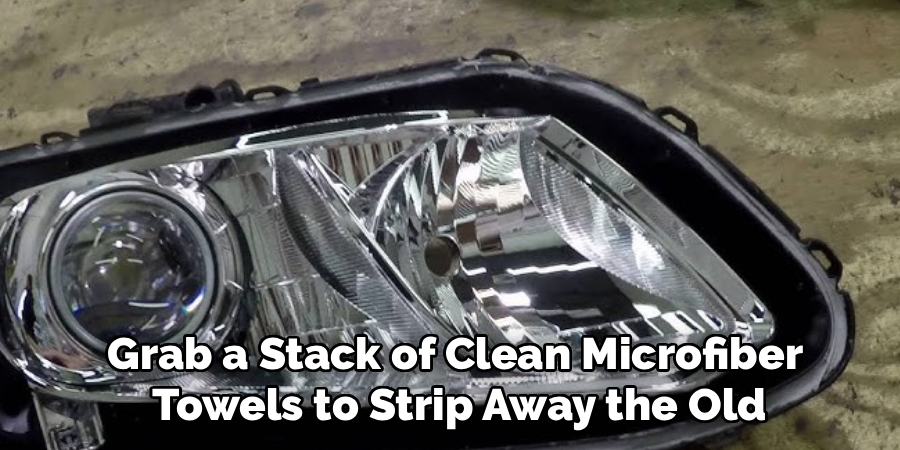
The new butyl sealant requires a perfectly clean surface to adhere properly. You should purchase a bottle of high-percentage isopropyl alcohol. Grab a stack of clean microfiber towels to strip away the old, degraded glue residue.
A pair of needle-nose pliers often proves highly useful for pulling thick strands of cold butyl out of the plastic retaining channels. Having a few spring clamps on hand will also help you compress the housing together. Small vise grips offer excellent mechanical advantage during the final curing phase.
Proper preparation appears to indicate a much higher success rate for this project. Skimping on the cleaning supplies will likely compromise the chemical bond of the new tape. You must strip the plastic down to its barest state.
The Step-By-Step Process: How To Reseal A Headlight
Executing this repair demands a highly analytical, unhurried mindset. Rushing the separation of the plastic components frequently results in a cracked lens. You must allow thermal energy to do the heavy lifting for you.
This structured procedure minimizes physical stress on the expensive plastic components. Follow the sequence carefully to isolate the leak and rebuild the perimeter boundary. Knowing exactly how to reseal a headlight relies entirely on manipulating adhesive chemistry at specific temperatures.
Step 1: Remove The Headlight Assembly
Begin by consulting your specific vehicle’s service manual to locate the retaining bolts for the housing. You might need to remove the front plastic bumper cover entirely to access the lower mounting brackets. Extract the steel bolts carefully and place them in a magnetic tray so they do not vanish into the grass.
Disconnect the main wiring harness plug from the back of the assembly. Pull the entire plastic housing away from the vehicle frame. Carry the unit to a clean, well-lit workbench to begin the disassembly phase safely.
Step 2: Strip The Hardware And Bulbs
You cannot subject delicate electrical components to extreme heat safely. Twist and remove every single halogen or LED bulb from the rear of the housing. Extract the rubber dust boots and any attached wiring pigtails to prevent them from melting.
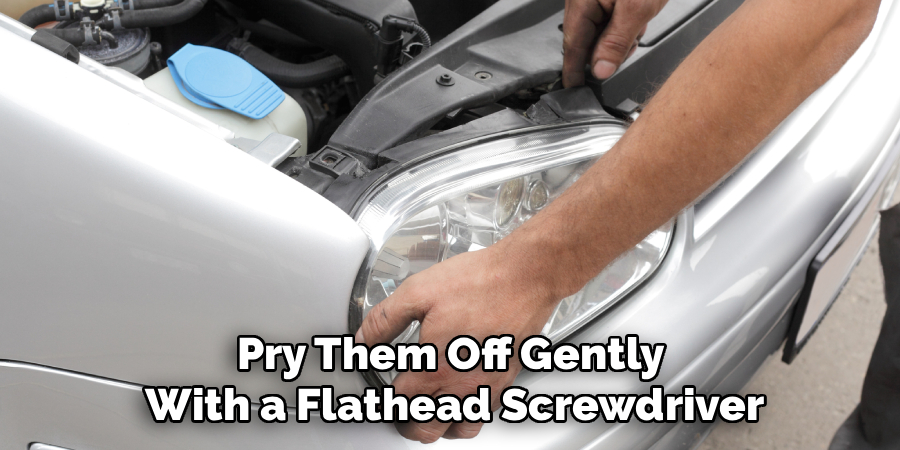
Certain assemblies feature metal retaining clips around the outer edge of the lens. Pry them off gently with a flathead screwdriver and set them aside. The housing should now consist entirely of bare plastic and old rubber sealant.
This stripped unit is now prepared for thermal expansion. Leaving a stray bulb inside the casing might cause the glass to shatter under the intense oven heat. You must verify the shell is empty.
Step 3: Soften The Factory Sealant
Preheat your kitchen oven to a highly specific, low temperature, usually around 220 degrees Fahrenheit. Place a large piece of damp cardboard or a wooden plank directly on the center metal rack. This wooden barrier prevents the plastic housing from melting against the hot metal bars.
Place the stripped headlight assembly onto the wood and close the oven door. Allow it to bake undisturbed for exactly ten minutes. This controlled thermal exposure softens the rigid factory butyl rubber into a stringy, yielding consistency.
Do not walk away from the kitchen during this phase. Overheating the plastic will warp the mounting tabs permanently. You must monitor the timer with strict discipline.
Step 4: Separate The Lens From The Housing
Remove the hot assembly from the oven while wearing your heavy leather work gloves. Insert your plastic trim tool into the seam where the clear lens meets the black backing. Twist the tool gently to widen the gap.
Work your way slowly around the entire perimeter of the light. The lens should begin to pull away, leaving long, sticky strings of hot glue between the two halves. Slice these glue strings carefully with a utility knife.
The clear lens will eventually separate from the black base. Place the clear lens face up on a soft towel to avoid scratching the optical surface. You have successfully breached the factory seal.
Step 5: Clean The Channels And Apply New Butyl
While the black plastic remains warm, use your needle-nose pliers to pull the old glue out of the perimeter channel. Try to remove as much of the factory adhesive as mechanically possible. Wipe the empty channel down with isopropyl alcohol to dissolve any residual oils.
A perfectly clean channel ensures the new adhesive binds permanently to the plastic. Unroll your new automotive butyl tape. Stretch it slightly with your fingers to thin it out into a uniform rope.
Press this tacky rope directly into the clean perimeter channel of the black housing. Ensure the butyl string overlaps itself slightly at the ends. This overlap prevents a microscopic gap from forming where the two ends meet.
Step 6: Reheat And Compress The Assembly
Press the clear polycarbonate lens firmly back into the black housing. Make sure to align the plastic locking tabs correctly. The new butyl tape will feel quite stiff at room temperature, preventing the lens from seating completely flush.
You must subject the assembly to a second round of thermal treatment. Place the loosely assembled headlight back into the 220-degree oven for another ten minutes. The heat will soften the new butyl, allowing it to compress.
Remove the unit, wearing your gloves, and immediately squeeze the two halves together with immense physical force. Attach your spring clamps around the perimeter to hold the tension. Allow the unit to cool completely to room temperature before reinstalling it on the vehicle.
Removing Condensation Before Sealing
Sealing a headlight while it still contains moisture defeats the entire purpose of the repair. You must eradicate every microscopic droplet of water before pressing the new butyl tape into place. Trapped humidity will simply vaporize and fog the lens the moment you turn the bulbs on again.
This extraction phase requires a strictly dry environment. You cannot simply wipe the inside of the clear lens with a paper towel. Touching the inner reflective chrome surfaces will instantly leave permanent, unsightly scratches.
The metallic coating inside a headlight is astonishingly fragile. It flakes off under the slightest physical abrasion. We must rely on passive absorption and airflow instead.
Utilizing Desiccant Packets
Silica gel desiccant packets offer a brilliant, passive method for pulling moisture out of the air. You likely have several of these small white packets sitting inside old shoeboxes in your closet. They absorb ambient humidity remarkably well without leaving any chemical residue behind.
Toss three or four dry desiccant packets into the black housing while the lens is separated. Let them sit inside the plastic shell for an hour. They will actively absorb any lingering water vapor trapped in the deep corners.
You must remember to remove the packets entirely before you apply the new butyl tape. Leaving them inside the sealed unit might cause them to catch fire near the hot bulbs. Count them as they go in, and count them as they come out.
Using Compressed Air Safely
If you observe heavy water pooling inside the disconnected housing, you might need mechanical intervention. A standard air compressor can physically blow the standing water out of the tight plastic crevices. You must regulate the air pressure carefully to avoid damaging the delicate chrome reflectors.
Attach an inline moisture filter to your air compressor line before spraying the housing. Blowing oily, unfiltered air from a dirty compressor tank will coat the inside of your lens with a permanent haze. This haze ruins the optical clarity just as badly as the water did.
Direct the clean, dry air stream into the bulb sockets. Keep the air flowing until the interior appears completely dry. Patience during this phase guarantees a fog-free result later.
Long-Term Maintenance For Clear Vision
Completing this complex repair restores the optical boundary of your lighting system. However, proactive observation prevents the rubber sealant from failing a second time prematurely. You should treat the headlight assembly as a wear item that requires occasional physical inspection.
The heavy butyl rubber you installed should theoretically outlast the rest of the vehicle. Environmental variables occasionally conspire to weaken even the best aftermarket adhesives. Altering your car washing habits might extend the lifespan of your handiwork significantly.
A little bit of preventative care goes a remarkably long way. It shields the chemical bond from unnecessary mechanical stress. You can protect your investment with just a few minor behavioral adjustments.
Avoiding High-Pressure Water
Commercial car washes utilize extreme water pressure to blast stubborn dirt away from the paint. Pointing a high-pressure wand directly at the seam of your newly sealed headlight invites absolute disaster. The intense kinetic energy can literally slice straight through the soft butyl rubber tape.
You should wash the front fascia of your vehicle gently using a standard garden hose. Keep the water pressure relatively low when rinsing the narrow gap between the hood and the lighting assemblies. This simple precaution reduces mechanical stress on the sticky perimeter boundary.
Hand washing allows you to monitor the condition of the clear plastic. You will notice a failing seal long before it becomes a major electrical problem. Catching a tiny leak early saves you from repeating the entire baking process.
Inspecting The Ventilation Tubes
Remember that the housing must breathe freely to survive thermal expansion. Look closely at the rear of the black plastic housing to find the small rubber ventilation tubes. These tubes frequently clog with road dust, dried mud, or spider webs over the years.
Pull the small rubber elbows off the housing gently. Clean them out with warm, soapy water in your kitchen sink. Verify that the tiny moisture-wicking patches remain intact and completely free of dirt.
A clear ventilation path prevents internal air pressure from blowing out your new butyl seal. The hot air needs an escape route. If the tubes are blocked, the expanding air will physically push the lens away from the housing.
Conclusion
Operating a motor vehicle with compromised forward lighting introduces an unacceptable degree of risk to your evening commute. Trapped moisture acts as a physical barrier. It actively scatters the photons you desperately need to see the asphalt ahead.
Addressing this structural breach requires a measured, highly specific approach to automotive adhesives. We have explored the thermal dynamics that cause water to enter the plastic housing in the first place. You now understand the absolute necessity of using specialized butyl tape rather than generic household silicone.
The methodical baking and clamping process ensures the two plastic halves fuse permanently. Taking the time to repair the assembly yourself usually saves a massive amount of money compared to buying dealership parts. Knowing exactly how to reseal a headlight empowers you to maintain your vehicle’s safety systems directly.
You do not have to rely on overpriced replacement units to fix a simple adhesive failure. With a clear, dry lens and a fresh beam of light, you can navigate the darkest roads with renewed, analytical confidence.
About
Ora Hayes is a distinguished figure in the world of DIY Thecarfixes, with over a decade of expertise in automotive diagnostics and high-performance maintenance. Her professional focus lies in merging mechanical precision with modern digital tools, fostering repair solutions that are both cost-effective and highly reliable. As the author of Thecarfixes, Ora Hayes delves into the art and science of automotive restoration, inspiring car owners and hobbyist mechanics alike.
Education
RMIT University (Melbourne, Australia) Associate Degree in Automotive Engineering — Focus on vehicle dynamics, industry-driven repair protocols, and advanced diagnostics. Gained hands-on experience with traditional mechanical tools and modern ECU remapping software.
Nottingham Trent University (United Kingdom) Bachelor’s in Mechanical Design and Automotive Engineering (Honors) — Specialized in automotive systems with a focus on blending technical engineering with everyday usability. Participated in industry projects, working with leading automotive manufacturers to gain real-world insights into vehicle longevity.
Publications and Impact
In Thecarfixes, Ora Hayes shares her insights on troubleshooting complex engine issues, material durability, and strategies for efficient garage setups. Her writing bridges the gap between professional mechanic knowledge and the home enthusiast’s needs, making it a must-read for both everyday drivers and seasoned gearheads.